Server Edition setup
Run the coaching platform on Windows or Linux within a Docker container then use any browser to access from any device on your local network. The Server Edition has been optimised for mobile devices, plus it includes Zoom webhook support for automatic recording staging when meetings end.
Prerequisites
- Docker installed. See Install Docker if you don't have it yet
- Requires Windows 10 (build 19045 or later), Windows 11 or Linux
- An Intel or AMD processor (64-bit). ARM-based machines are not supported
- Your licence key from the purchase confirmation email
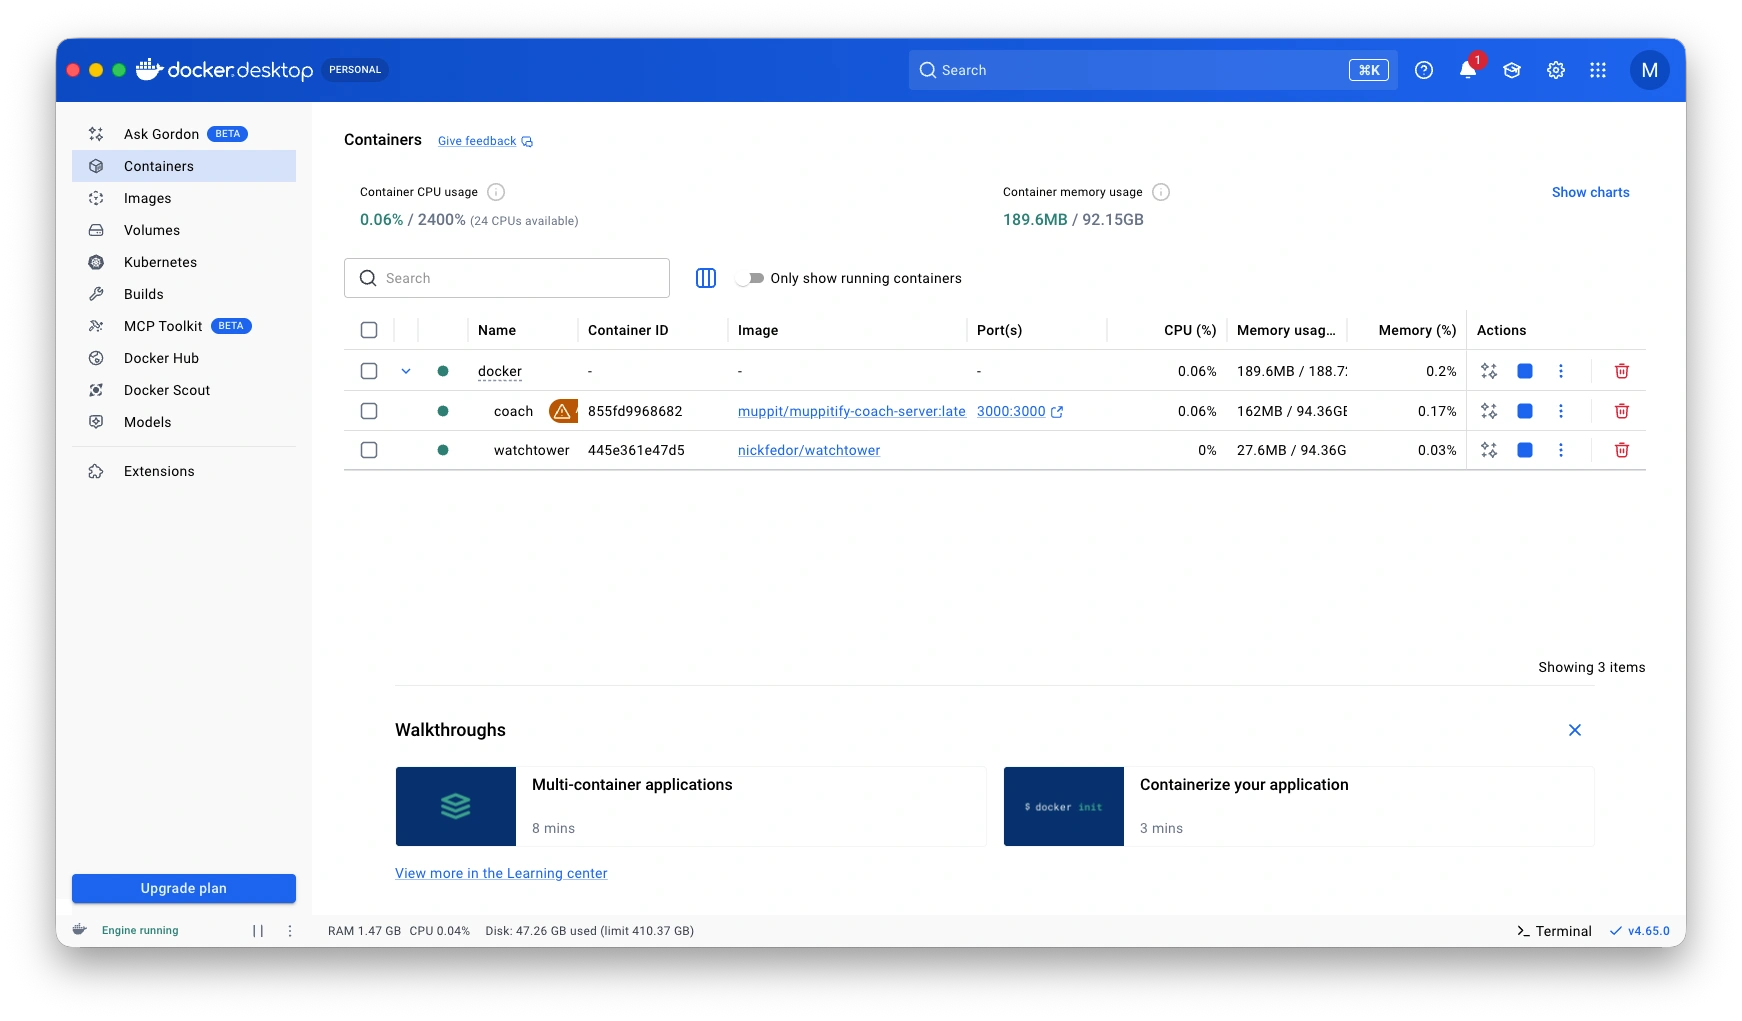
Docker ready for Server Edition to be installed:
The Server Edition may run on macOS via Docker Desktop. This is tested but not officially supported.
1. Start the server
Recommended: docker-compose with auto-updates
Create a docker-compose.yml file:
services:
  coach:
    image: muppit/muppitify-coach-server:latest
    container_name: coach
    restart: unless-stopped
    ports:
      - "3000:3000"
    volumes:
      - coach-data:/data
    labels:
      - "com.centurylinklabs.watchtower.enable=true"

  watchtower:
    image: nickfedor/watchtower
    container_name: watchtower
    restart: unless-stopped
    volumes:
      - /var/run/docker.sock:/var/run/docker.sock
    command: --label-enable --interval 86400 --cleanup

volumes:
  coach-data:
Then start the platform:
docker compose up -d
Example, Mac M-Series:
[+] up 25/27
[+] up 27/27. Pulled                                                                                                                        12.0s
 ✔ Image m... Pulled                                                                                                                        12.0s
 ✔ Network... Created                                                                                                                       0.0s
 ✔ Contain... Started                                                                                                                       0.3s
 ✔ Contain... Started                                                                                                                       0.3sa ! coach
 The requested image's platform (linux/amd64) does not match the detected host platform (linux/arm64/v8) and no specific platform was requested 0.0s
Watchtower checks for new coaching platform images once per day and updates the container automatically. It only touches containers with the watchtower label, so it's safe alongside other Docker containers on the same machine.
Docker with Server Edition installed:
Alternative: quick start with docker run
If you prefer a single command without automatic updates:
docker run -d --restart unless-stopped -p 3000:3000 -v coach-data:/data --name coach muppit/muppitify-coach-server:latest
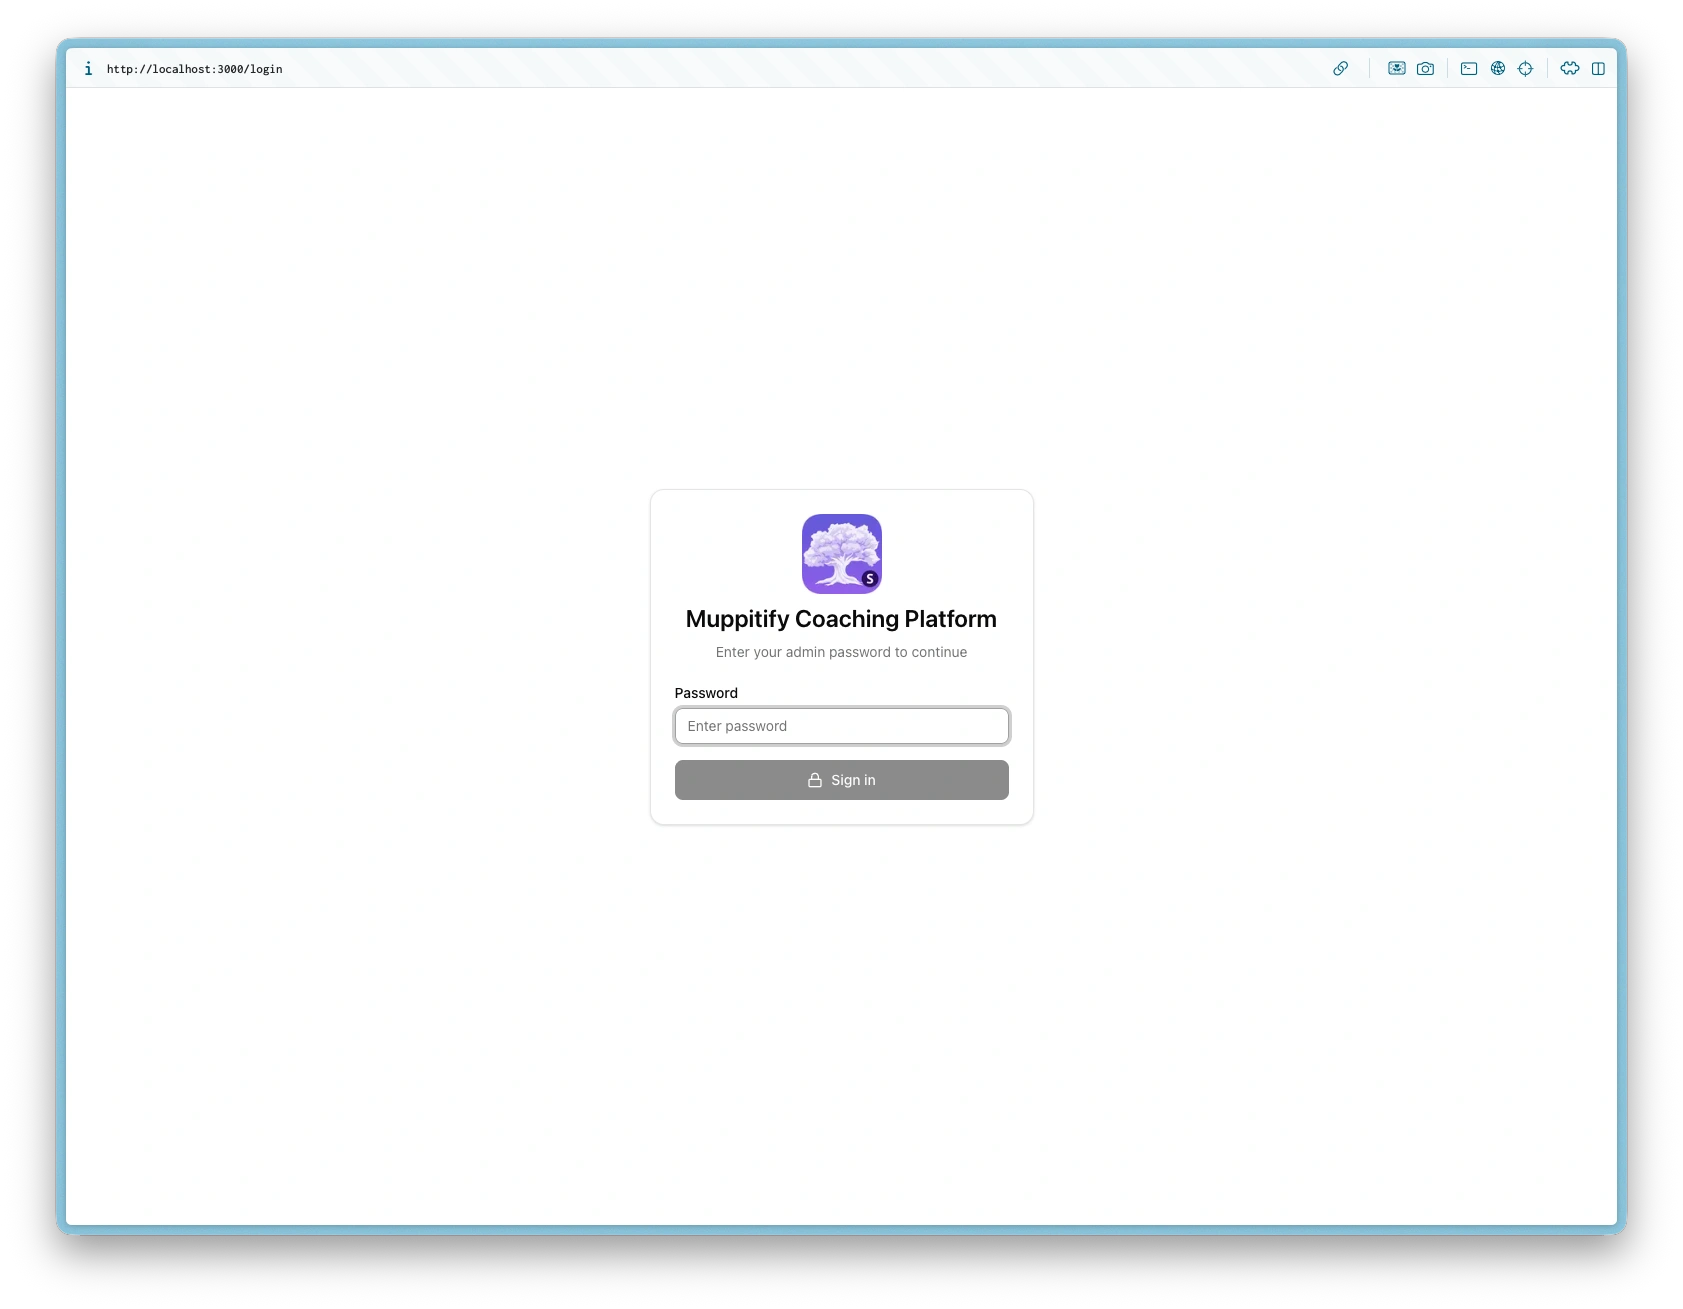
The first start takes a minute or two to pull the image. Once running, open https://localhost:3000 in your browser.
Your browser will show a certificate warning on first visit. This is expected because the server generates a self-signed certificate for encrypted local access. See Certificate trust below to permanently remove this warning.
If port 3000 is already in use on your machine, change the host port. In docker-compose, change "3000:3000" to "3001:3000". With docker run, use -p 3001:3000. The app will be available at https://localhost:3001. The second number (3000) is the internal container port and must stay the same.
2. Setup wizard
On first launch, the setup wizard guides you through:
- Certificate trust. Download and import the server's TLS certificate into your OS trust store (see details below). You can skip this step, but the browser will show recurring "Not Secure" warnings
- Admin password. Choose a password to protect your server (you'll use this to sign in from any device)
- Licence activation. Enter your licence key from the purchase email
- Your profile. Enter your name and email (links you as the coach for your sessions)
- Cloudflare Tunnel (optional). Paste your tunnel token if you want a public domain. WAF rules must be configured in Cloudflare first (see step 3)
- Domain configuration (optional). Enter your public domain (e.g.
coach.yourdomain.com) - Zoom credentials (optional). Enter your Zoom OAuth app credentials for webhook-based recording staging
- Complete. You're ready to use the coaching platform
All settings can be changed later from the Settings page.
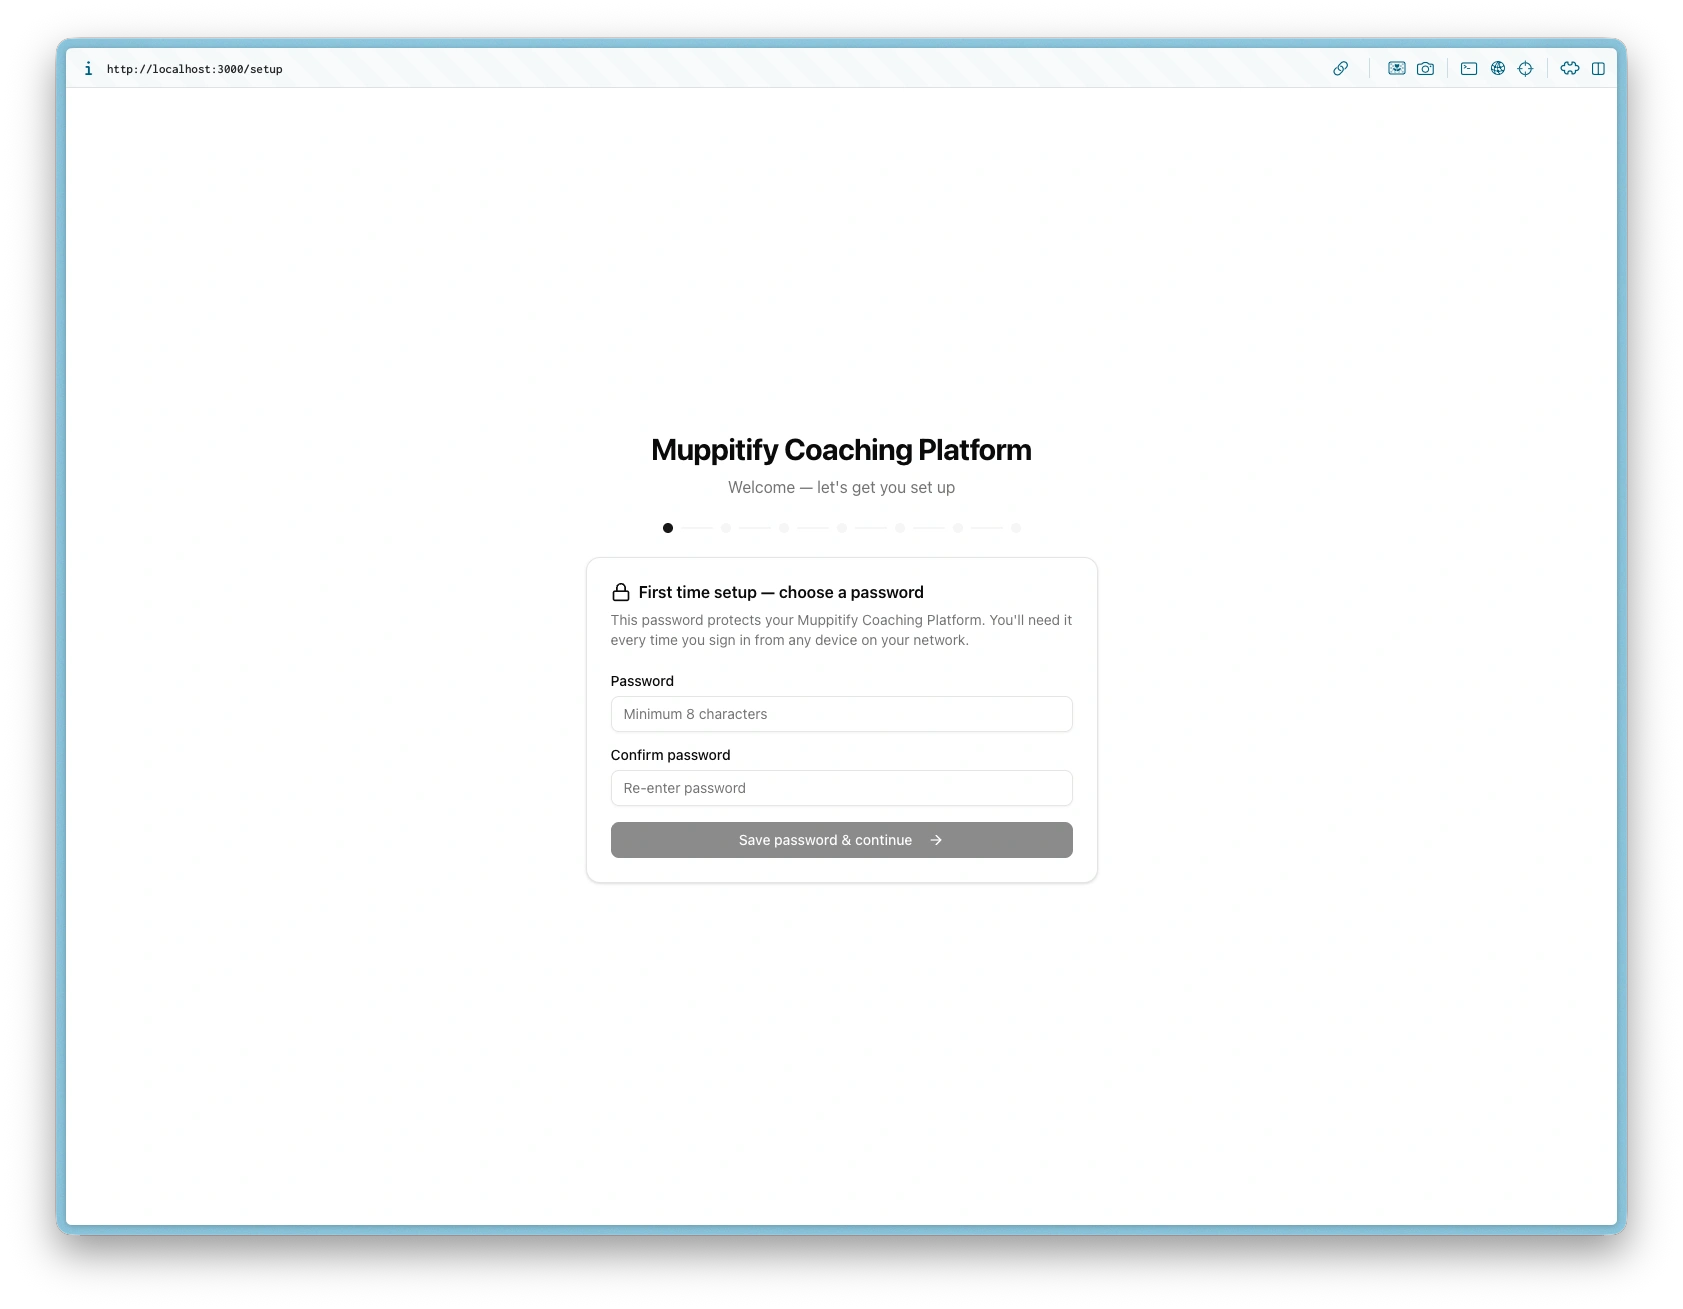
Welcome screen on first launch
Step 1 — Set your admin password
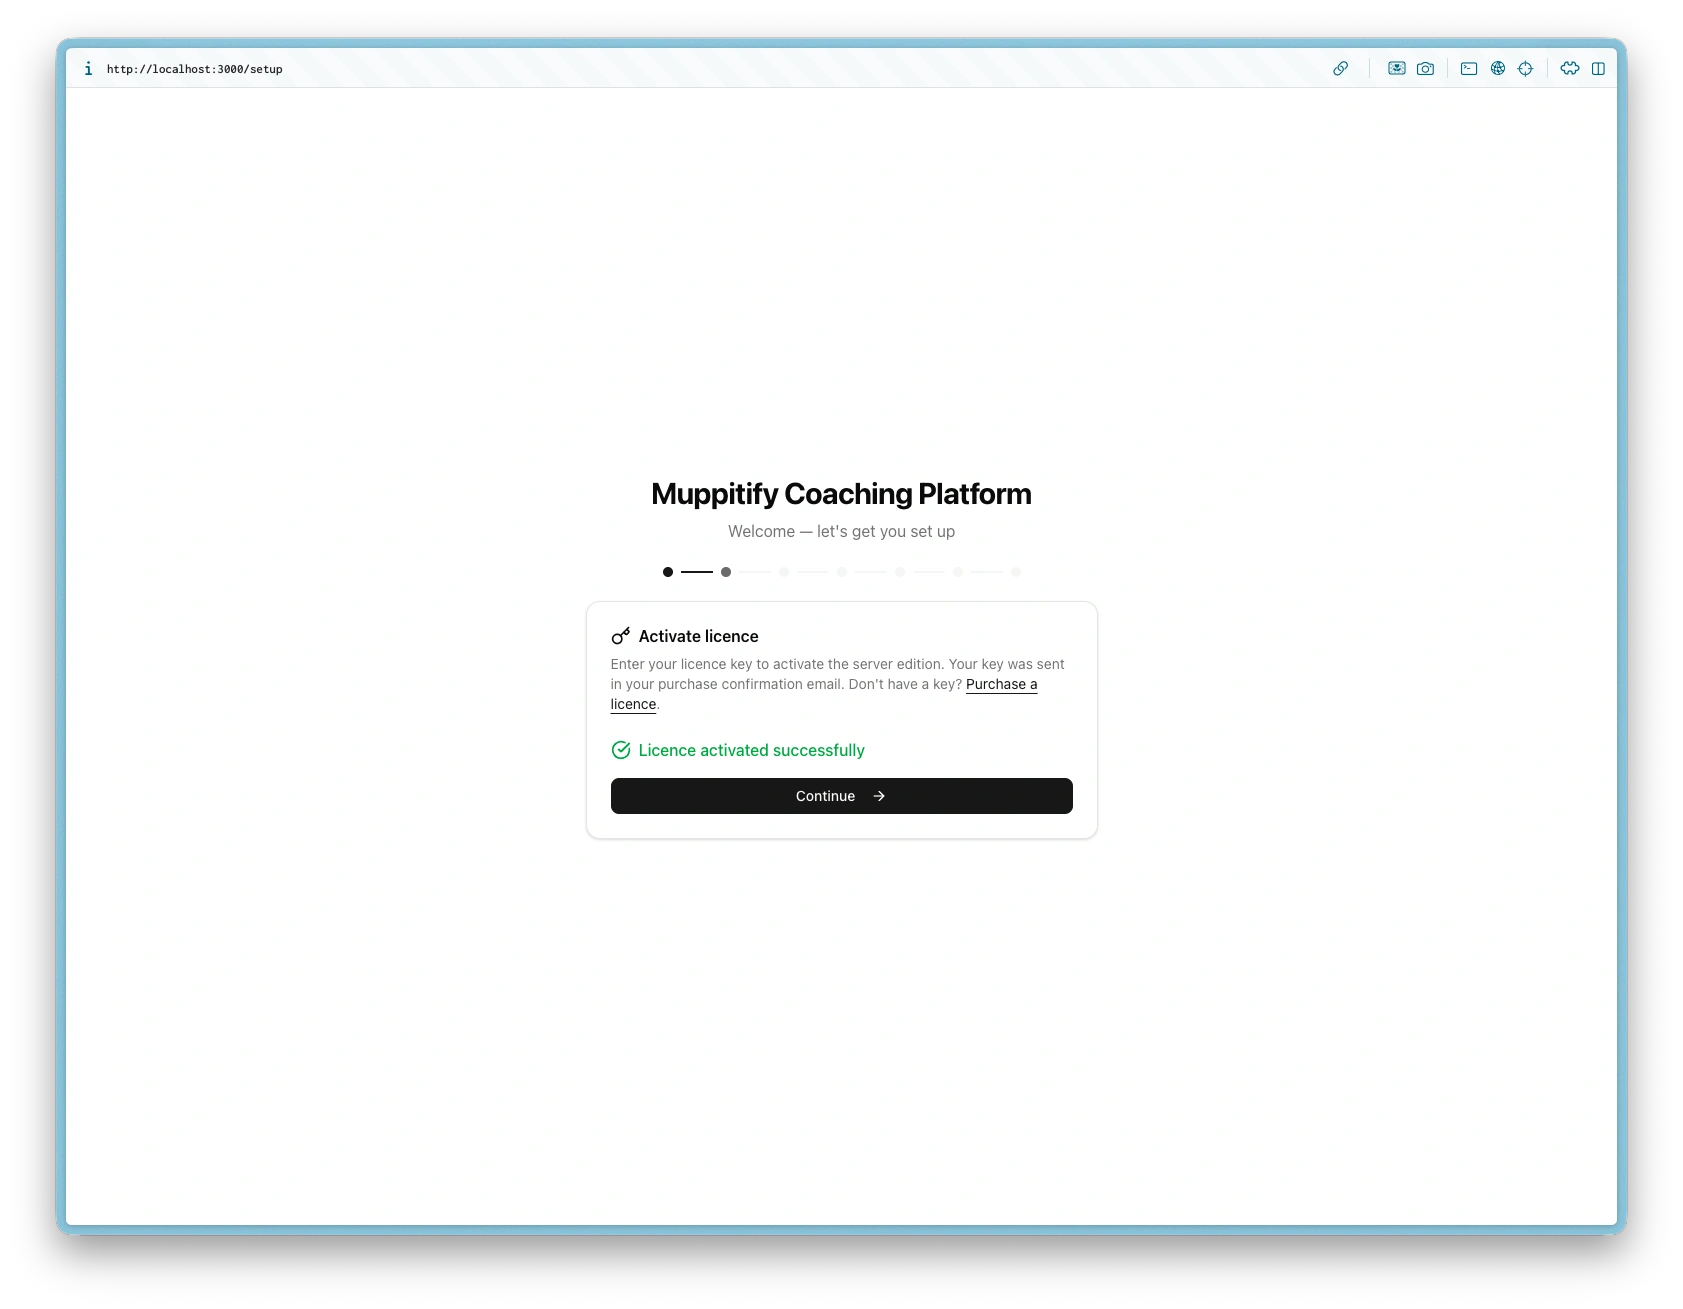
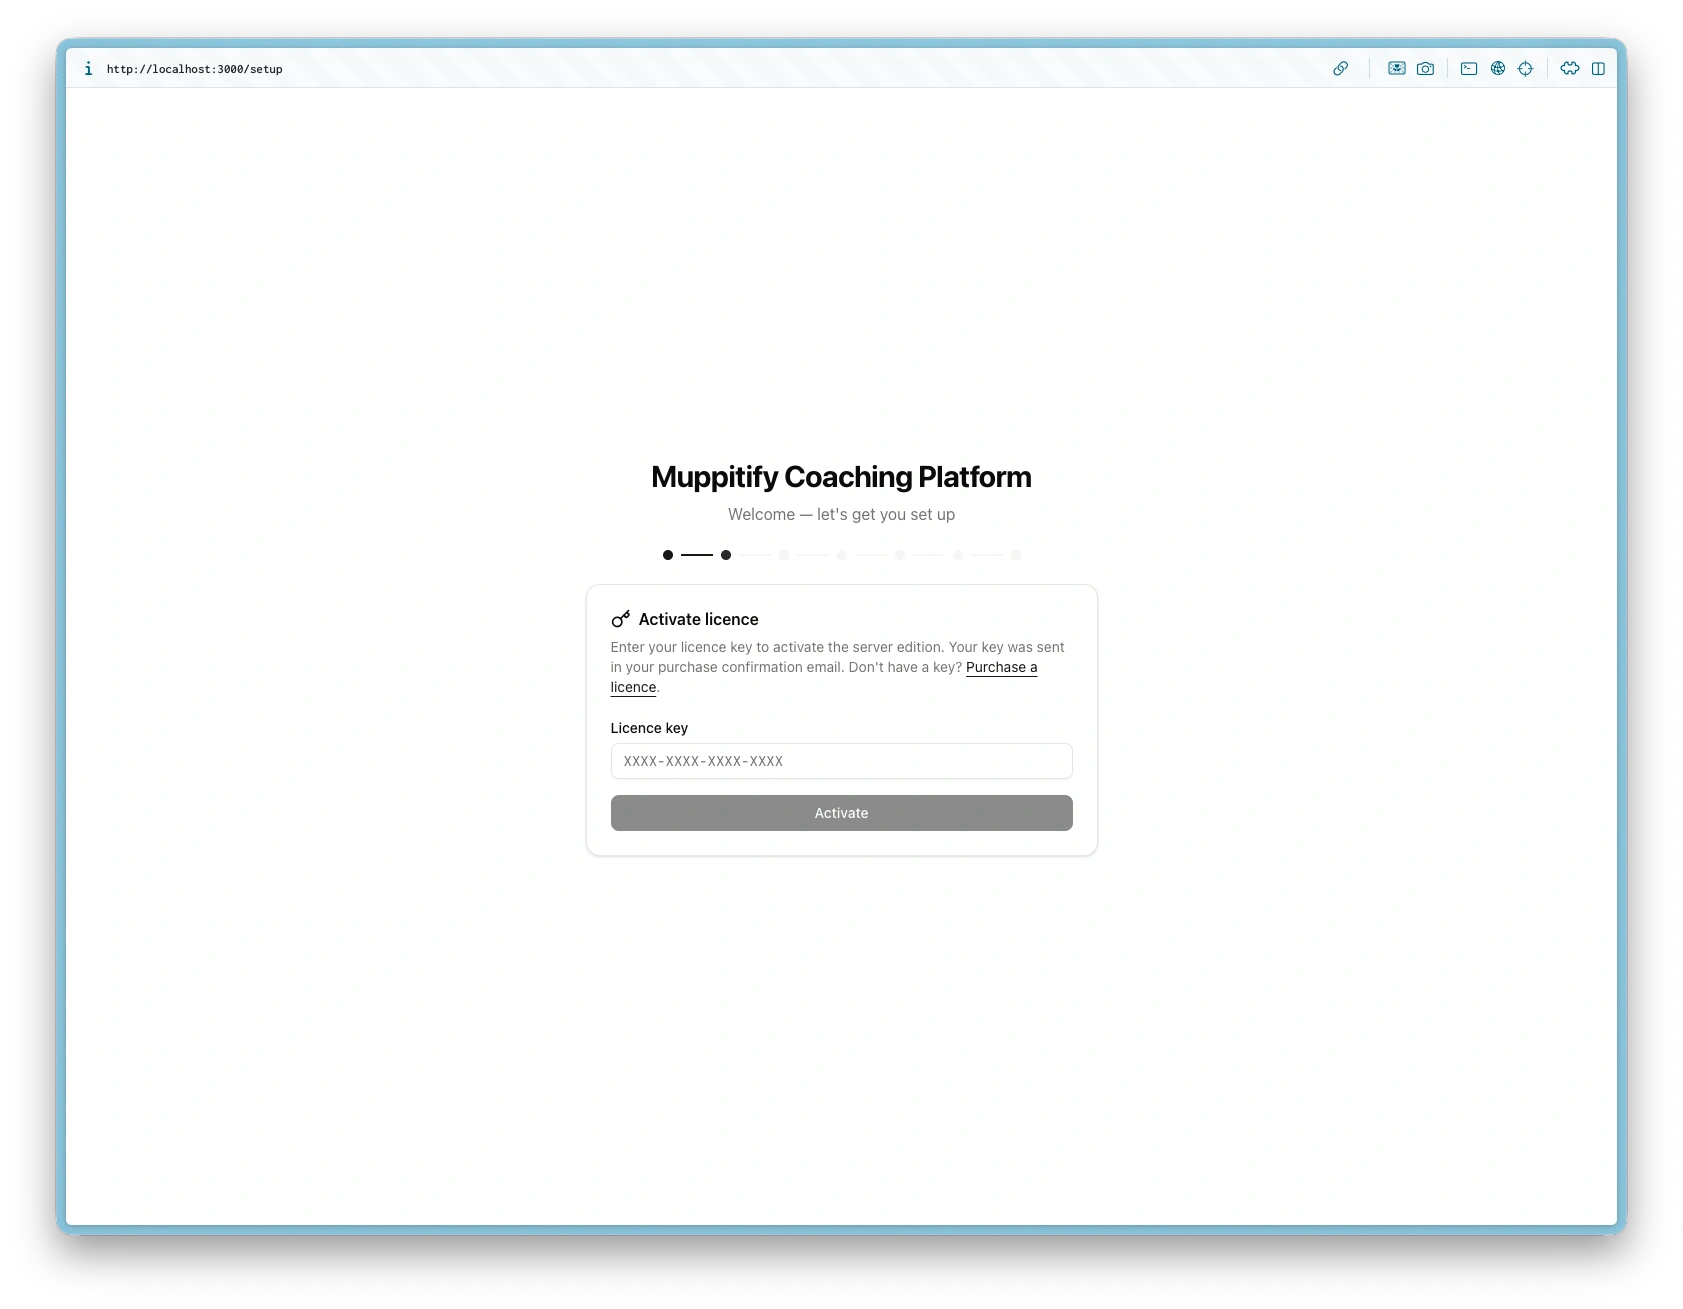
Step 2 — Activate your licence key
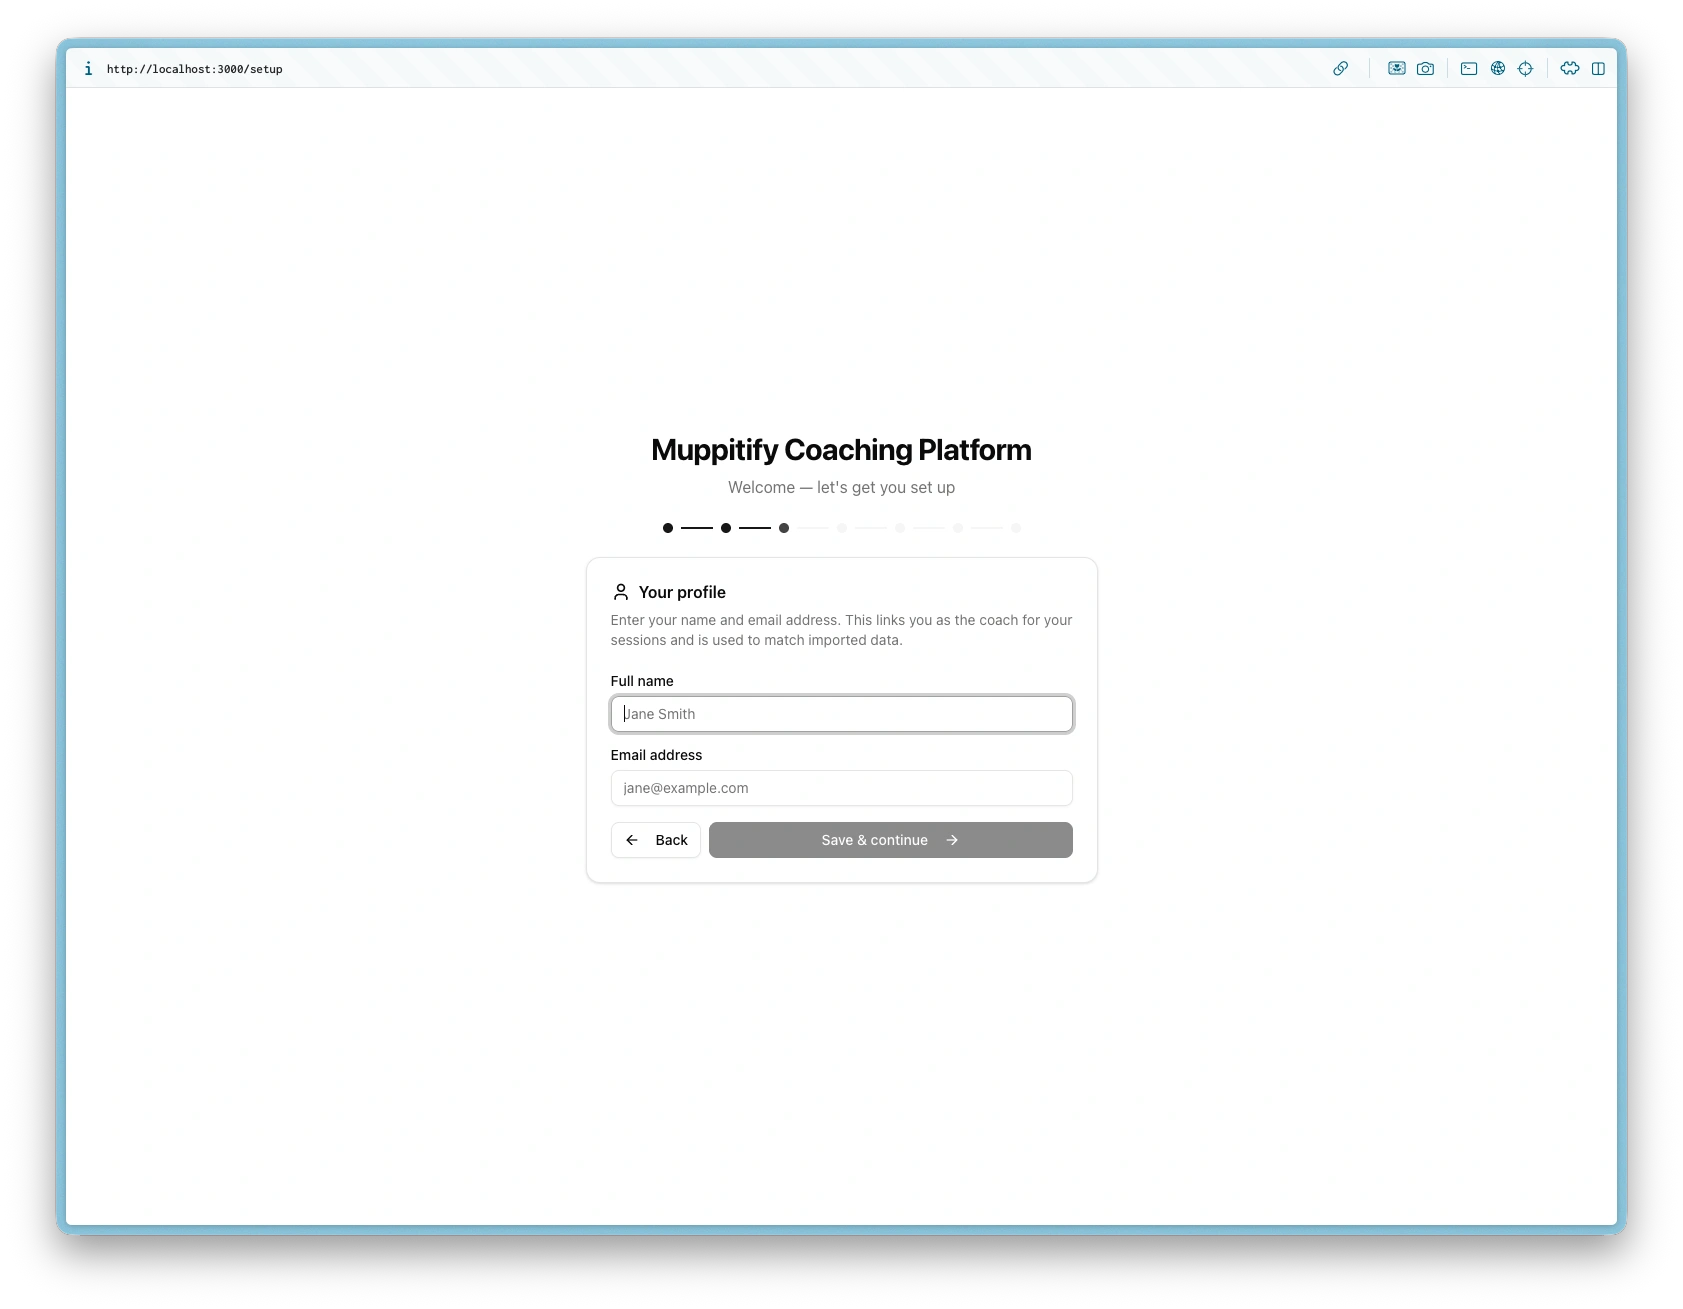
Step 3 — Create your coach profile

Step 4 — Cloudflare Tunnel configuration (optional)
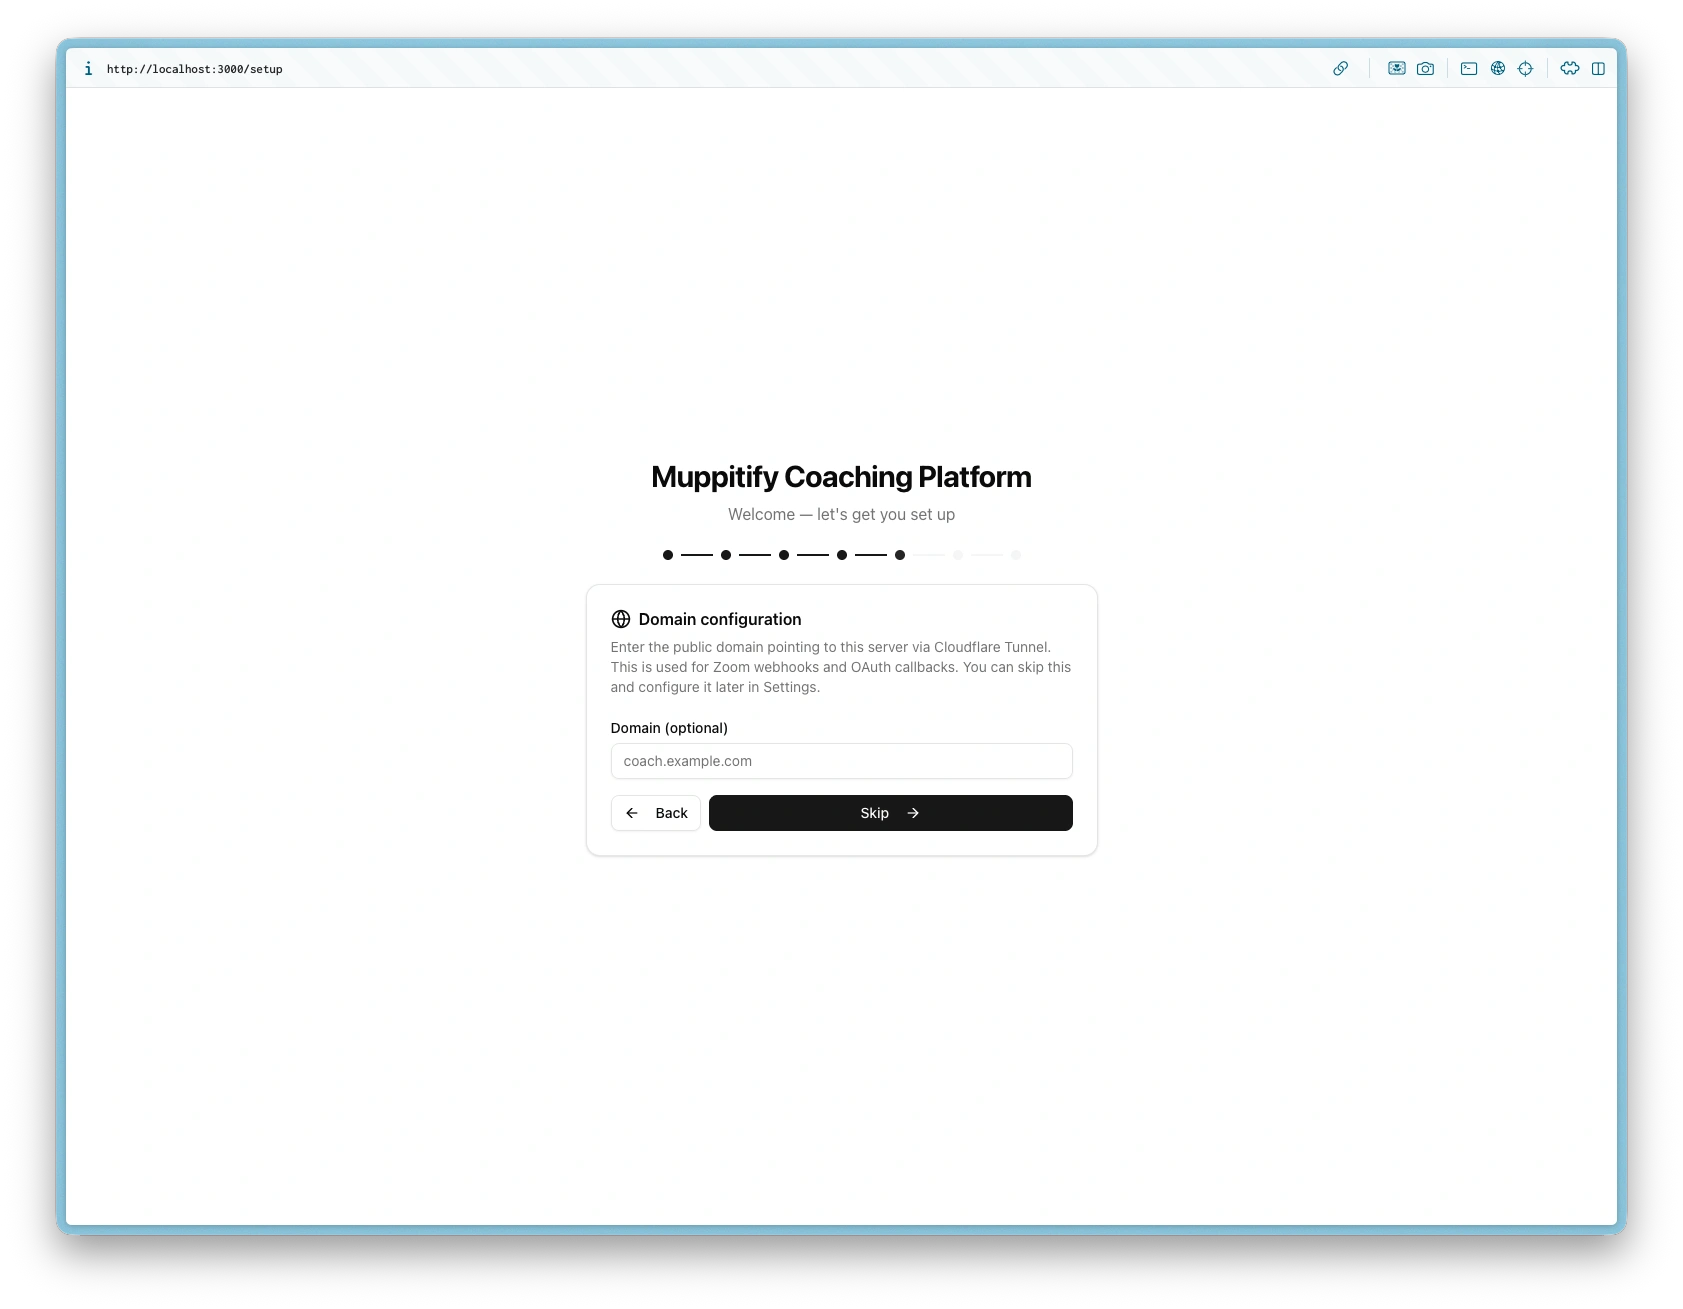
Step 5 — Domain configuration (optional)
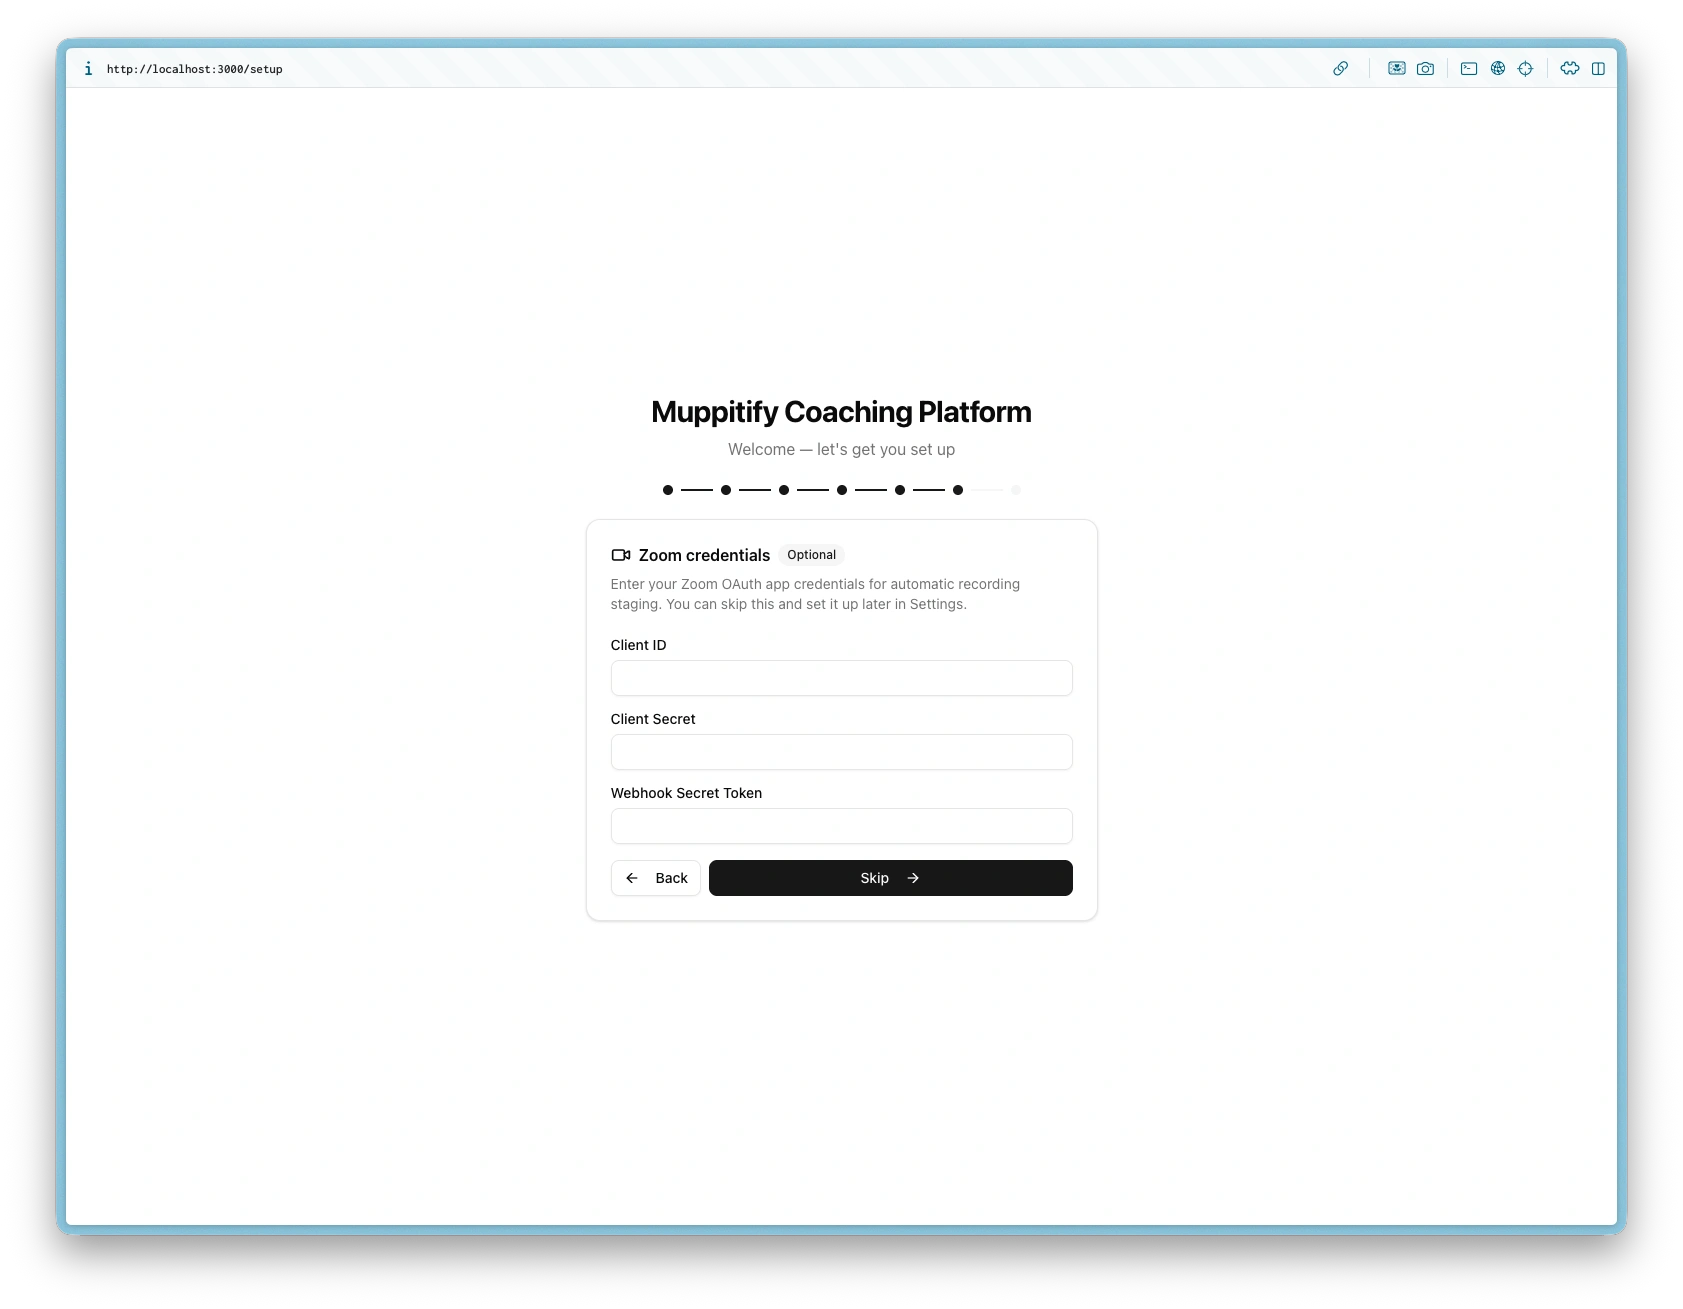
Step 6 — Zoom credentials (optional)
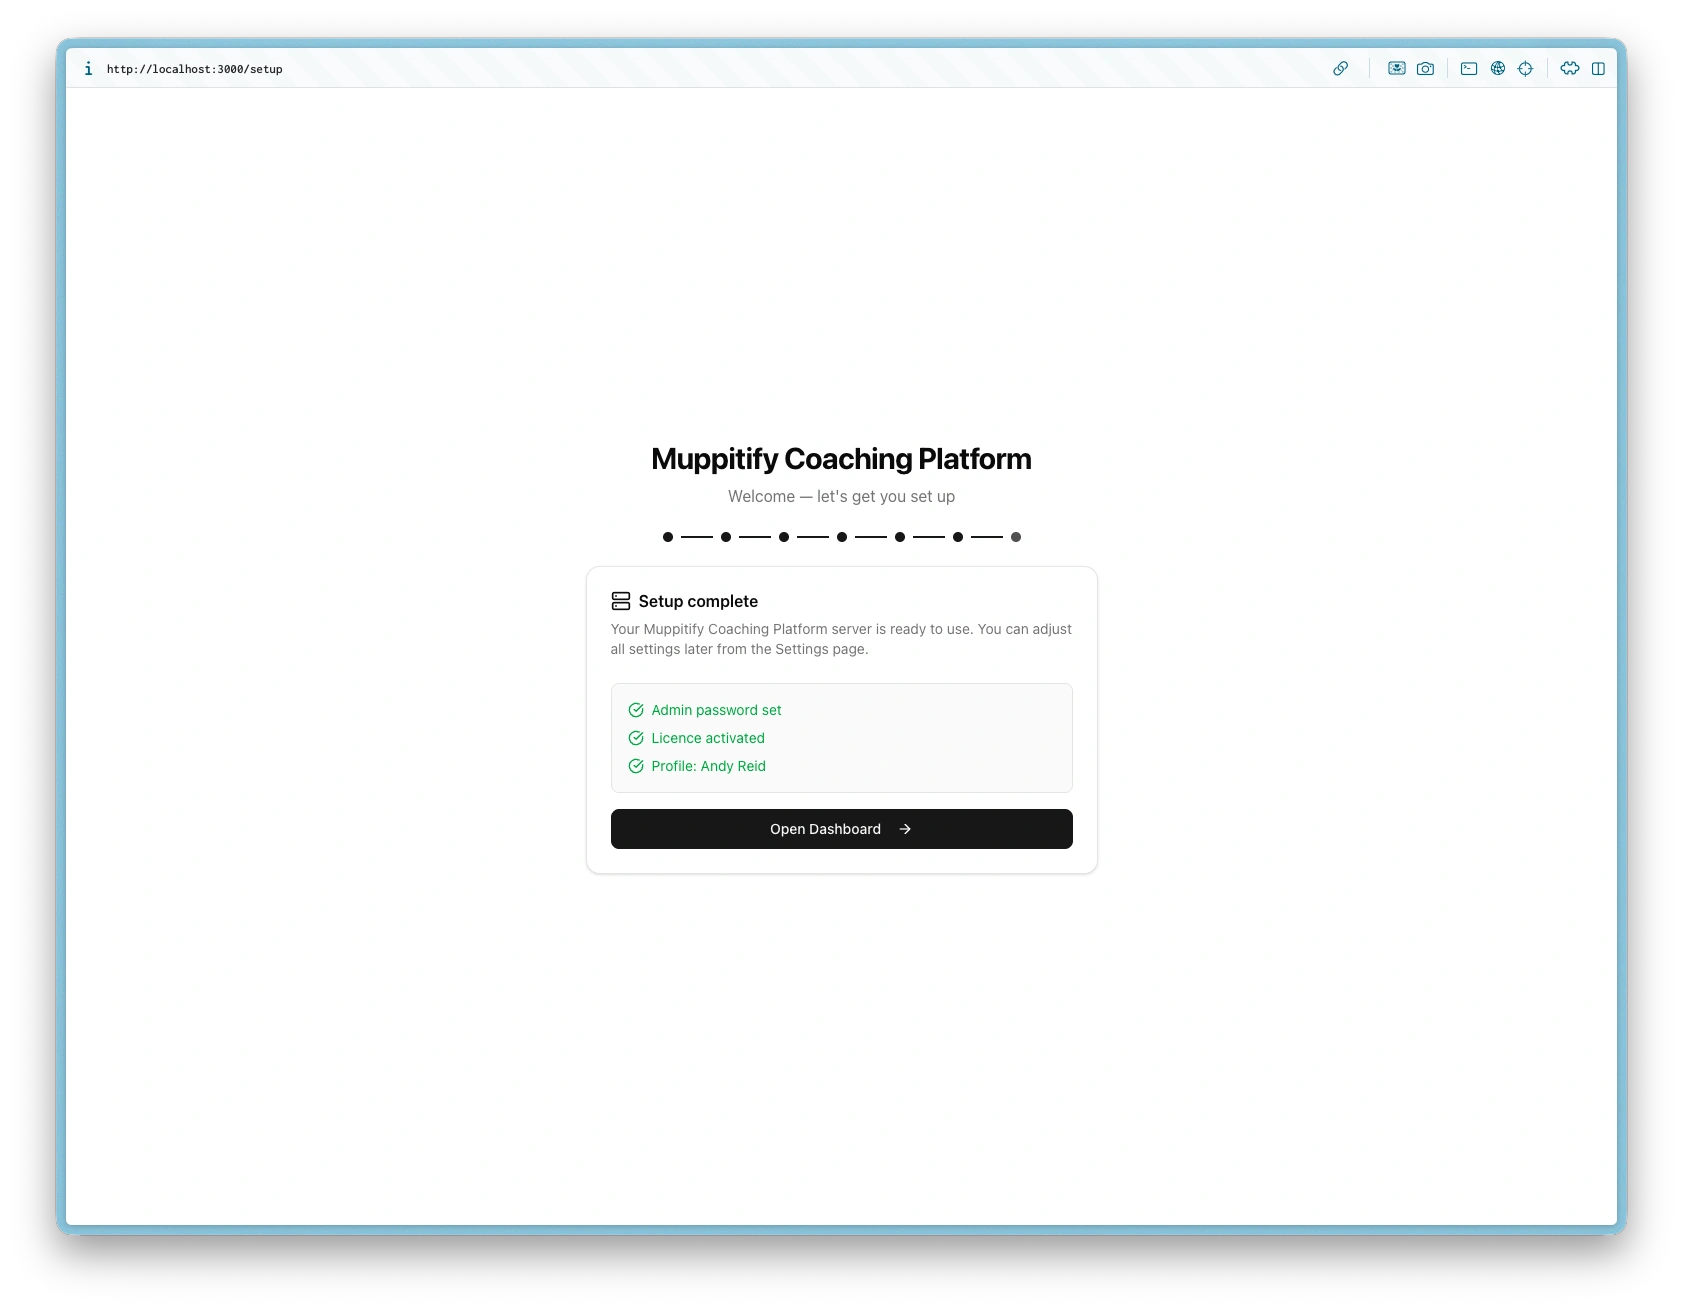
Step 7 — Setup complete
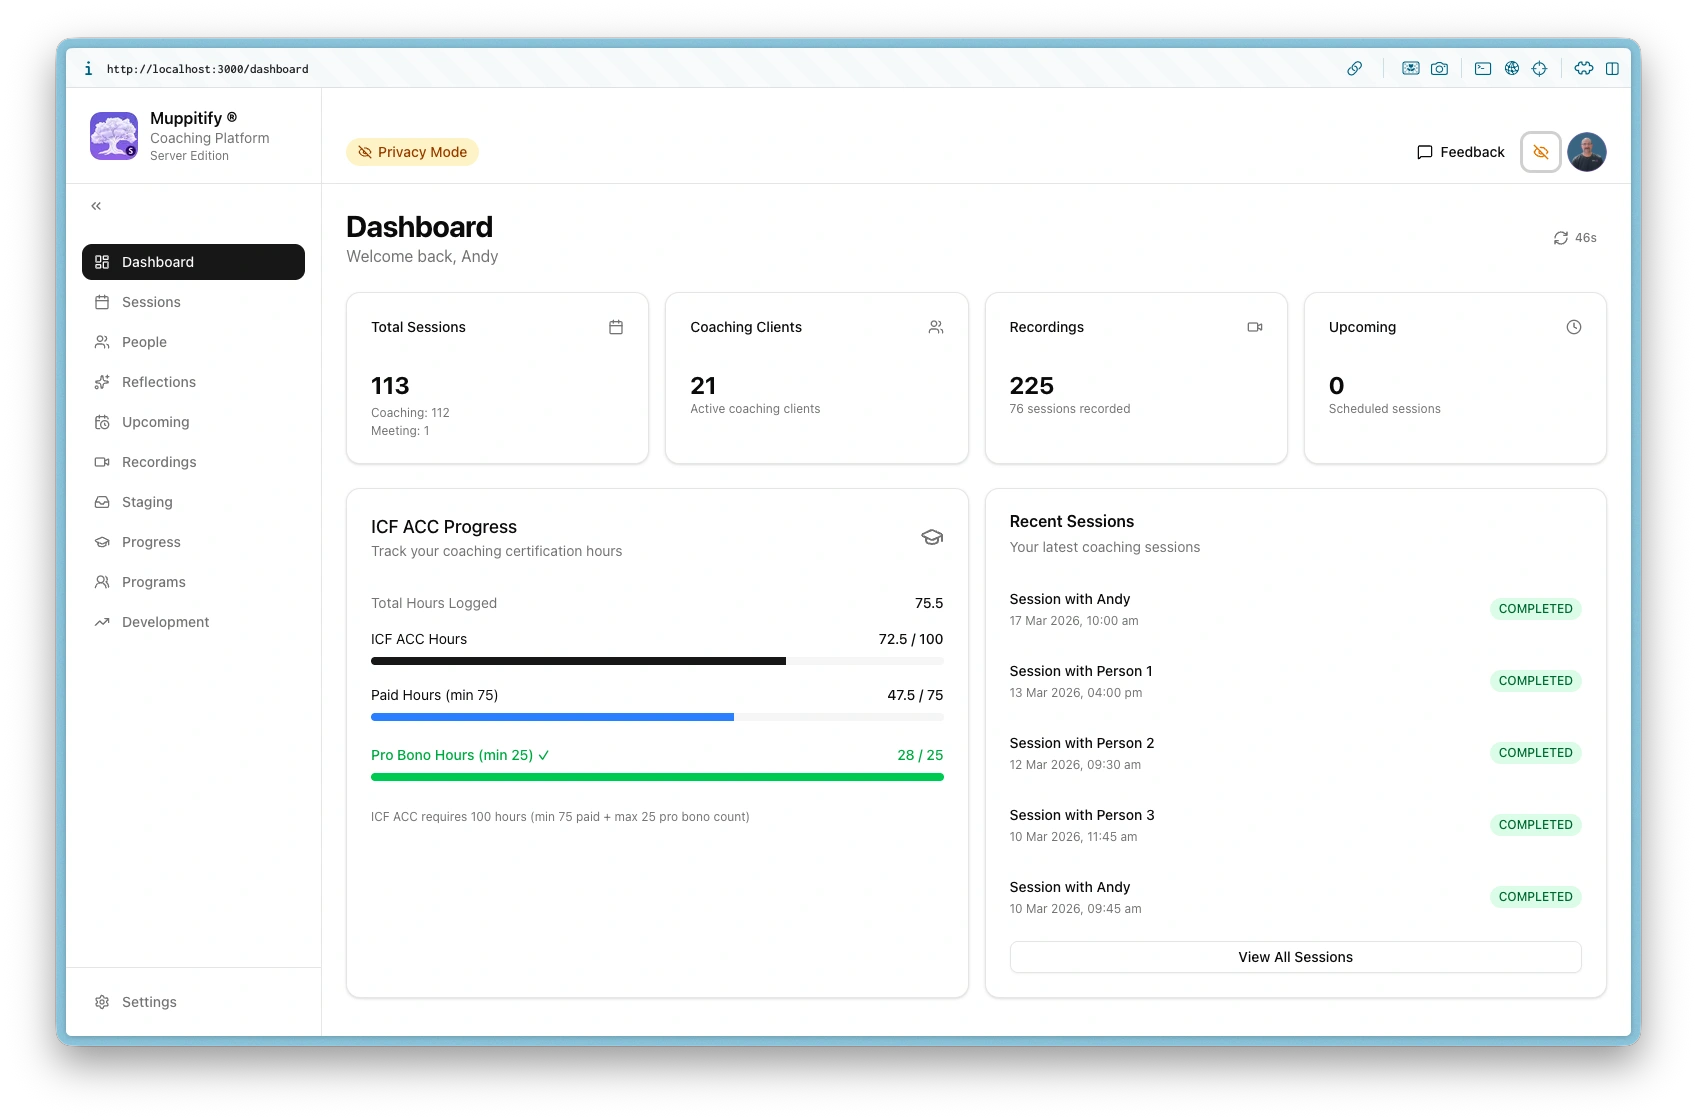
Dashboard after completing setup
Certificate trust
The server generates a self-signed TLS certificate so all traffic between your browser and the server is encrypted, even on your local network. Browsers don't trust self-signed certificates by default, which causes a "Your connection is not private" warning. Chrome's temporary "Proceed anyway" exception expires periodically, which can interrupt your session with recurring security warnings.
The permanent fix is to import the certificate into your operating system's trust store. The setup wizard prompts you to do this on first launch. You can also download the certificate at any time from Settings > Domain & Tunnel > Download Certificate.
macOS
- Download the certificate from the setup wizard or Settings
- Open the downloaded
.pemfile (this opens Keychain Access) - Find Muppitify Coaching Platform in the list and double-click it
- Expand Trust and set "When using this certificate" to Always Trust
- Close the window and enter your Mac password when prompted
- Refresh the browser page
Windows
- Download the certificate from the setup wizard or Settings
- Double-click the downloaded
.pemfile - Select Install Certificate
- Choose Local Machine and click Next
- Select Place all certificates in the following store, click Browse, and choose Trusted Root Certification Authorities
- Click Next, then Finish
- Refresh the browser page
If you access the server through a Cloudflare Tunnel, Cloudflare provides a trusted certificate automatically. Certificate trust is only needed for direct LAN access.
Updating
If you used docker-compose with Watchtower (recommended), updates happen automatically once per day. To check update activity:
docker logs watchtower
Manual update
If you used docker-compose without Watchtower:
docker compose pull
docker compose up -d
If you used docker run:
docker pull muppit/muppitify-coach-server:latest
docker stop coach && docker rm coach
docker run -d --restart unless-stopped -p 3000:3000 -v coach-data:/data --name coach muppit/muppitify-coach-server:latest
Your data is stored in the Docker volume and persists across updates.
Backup and restore
Backup
Your data lives in the coach-data Docker volume. To create a backup:
docker run --rm -v coach-data:/data -v $(pwd):/backup alpine tar czf /backup/coach-backup.tar.gz -C /data .
Restore
docker run --rm -v coach-data:/data -v $(pwd):/backup alpine sh -c "cd /data && tar xzf /backup/coach-backup.tar.gz"
Exporting data from desktop to server
You can export data from Desktop Edition to the Server Edition:
- From Desktop Edition navigate to Settings > Data > Export. Save the zip file
- From Server Edition navigate to Settings > Data > Import. Select the zip file

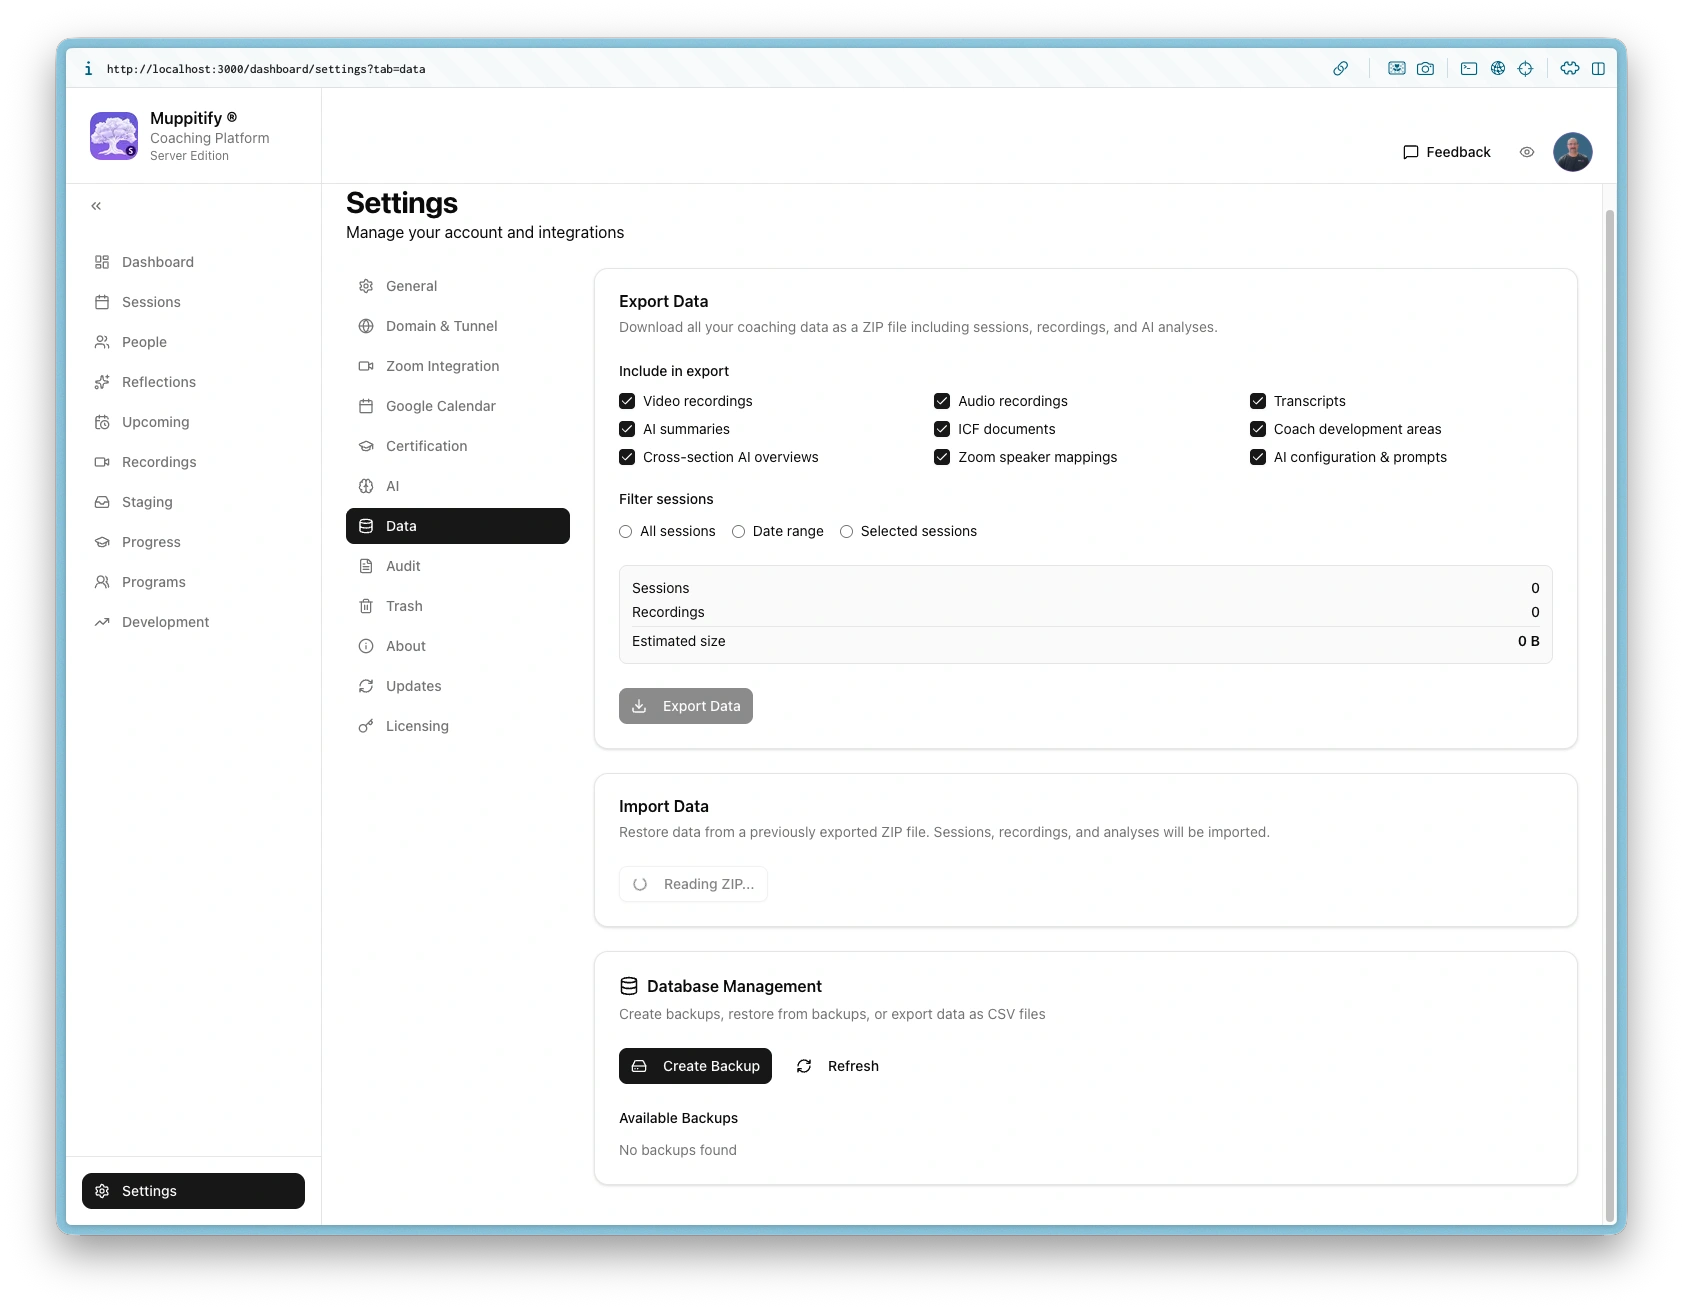
Select data to export
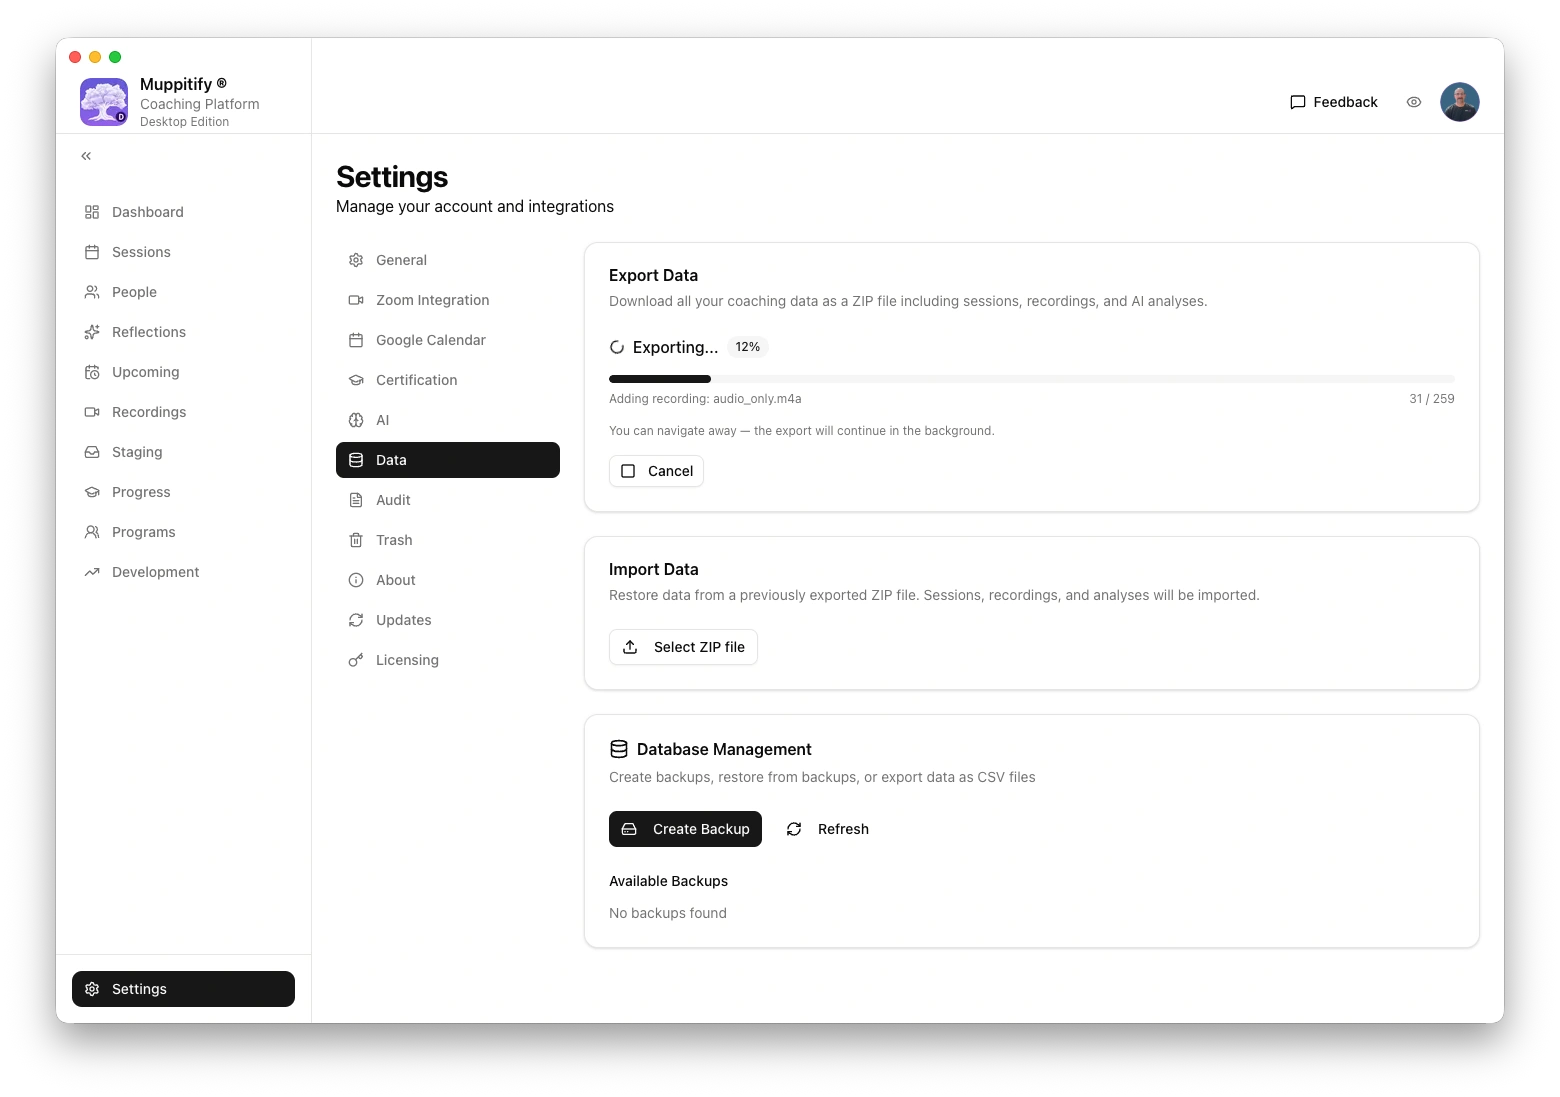
Wait for data to be exported
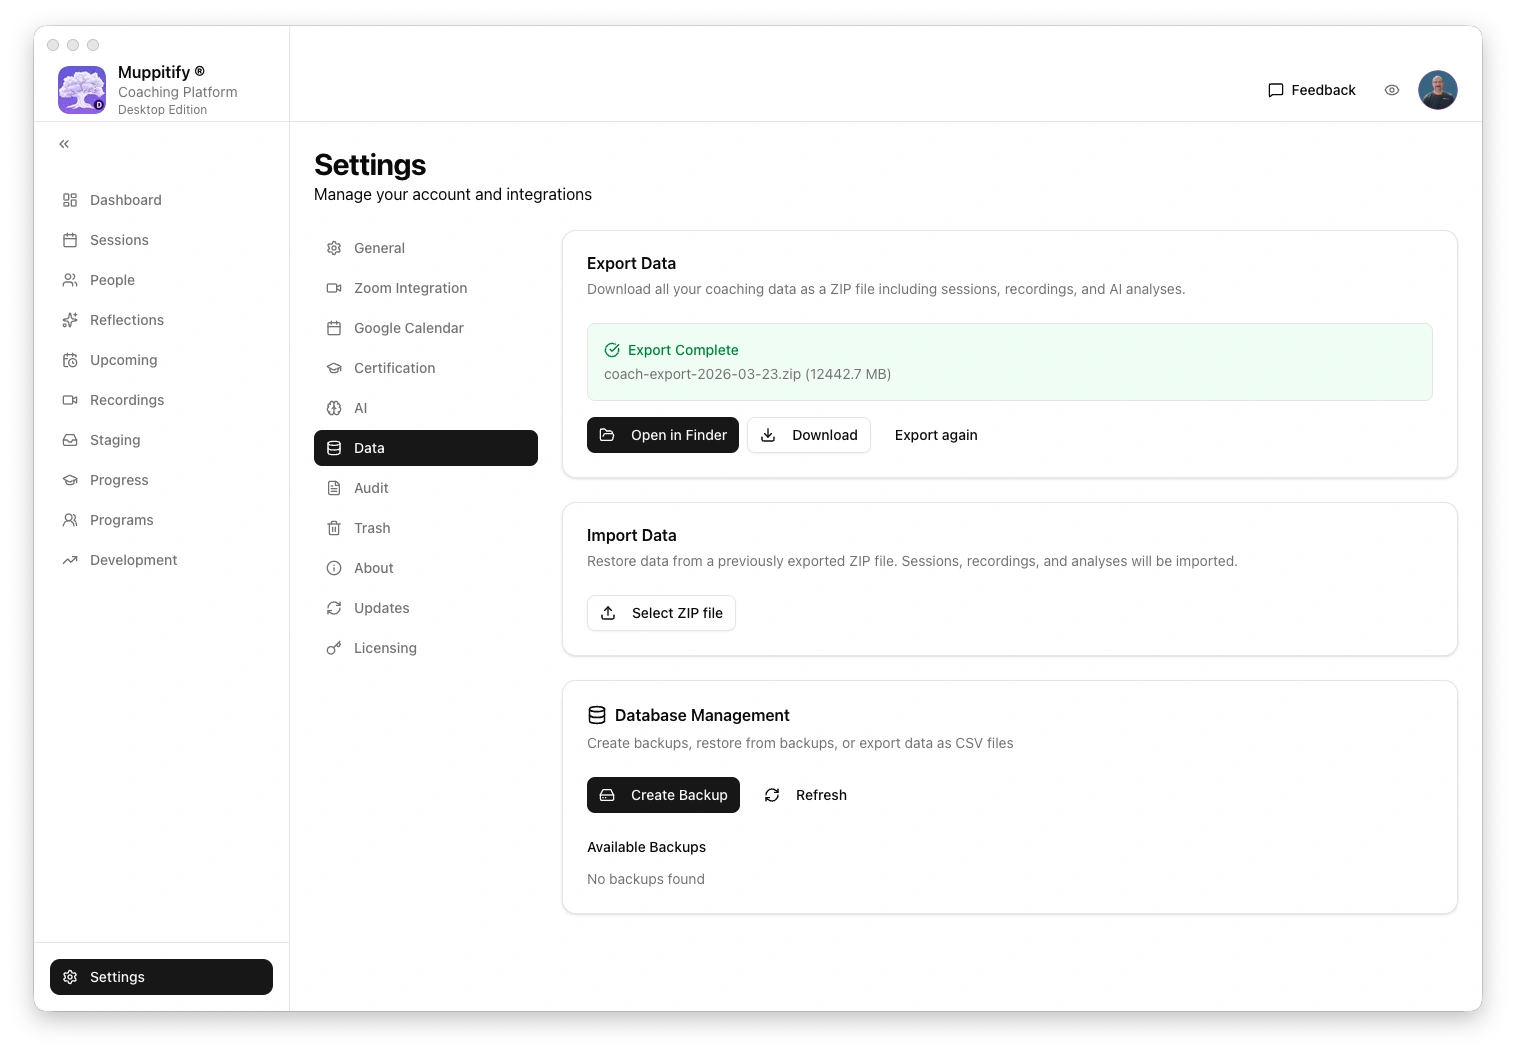
Once data has been exported save the file
Select zip file to import and wait for it to be read
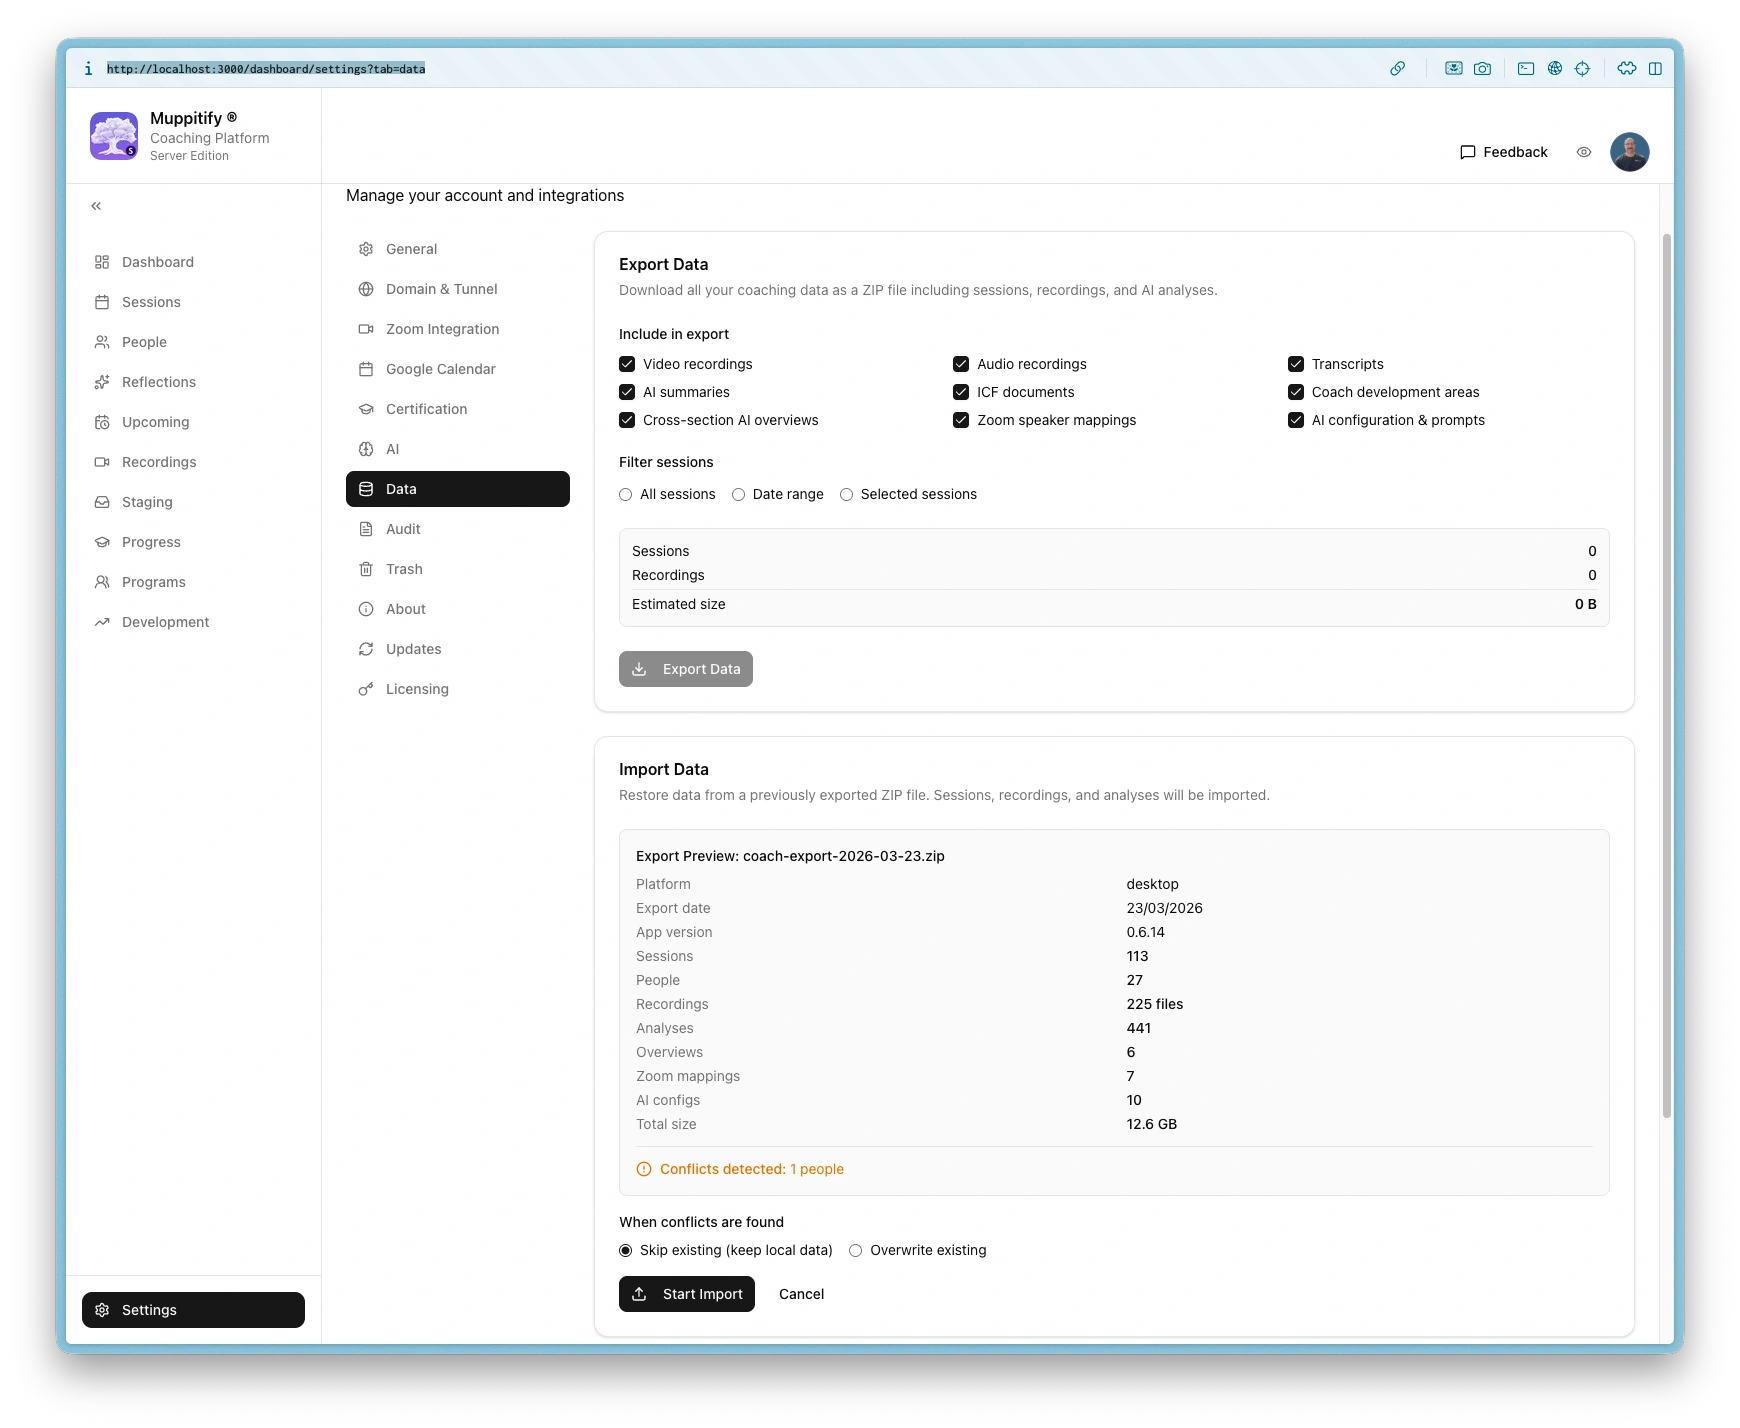
Start import and either skip or overwrite conflicting data
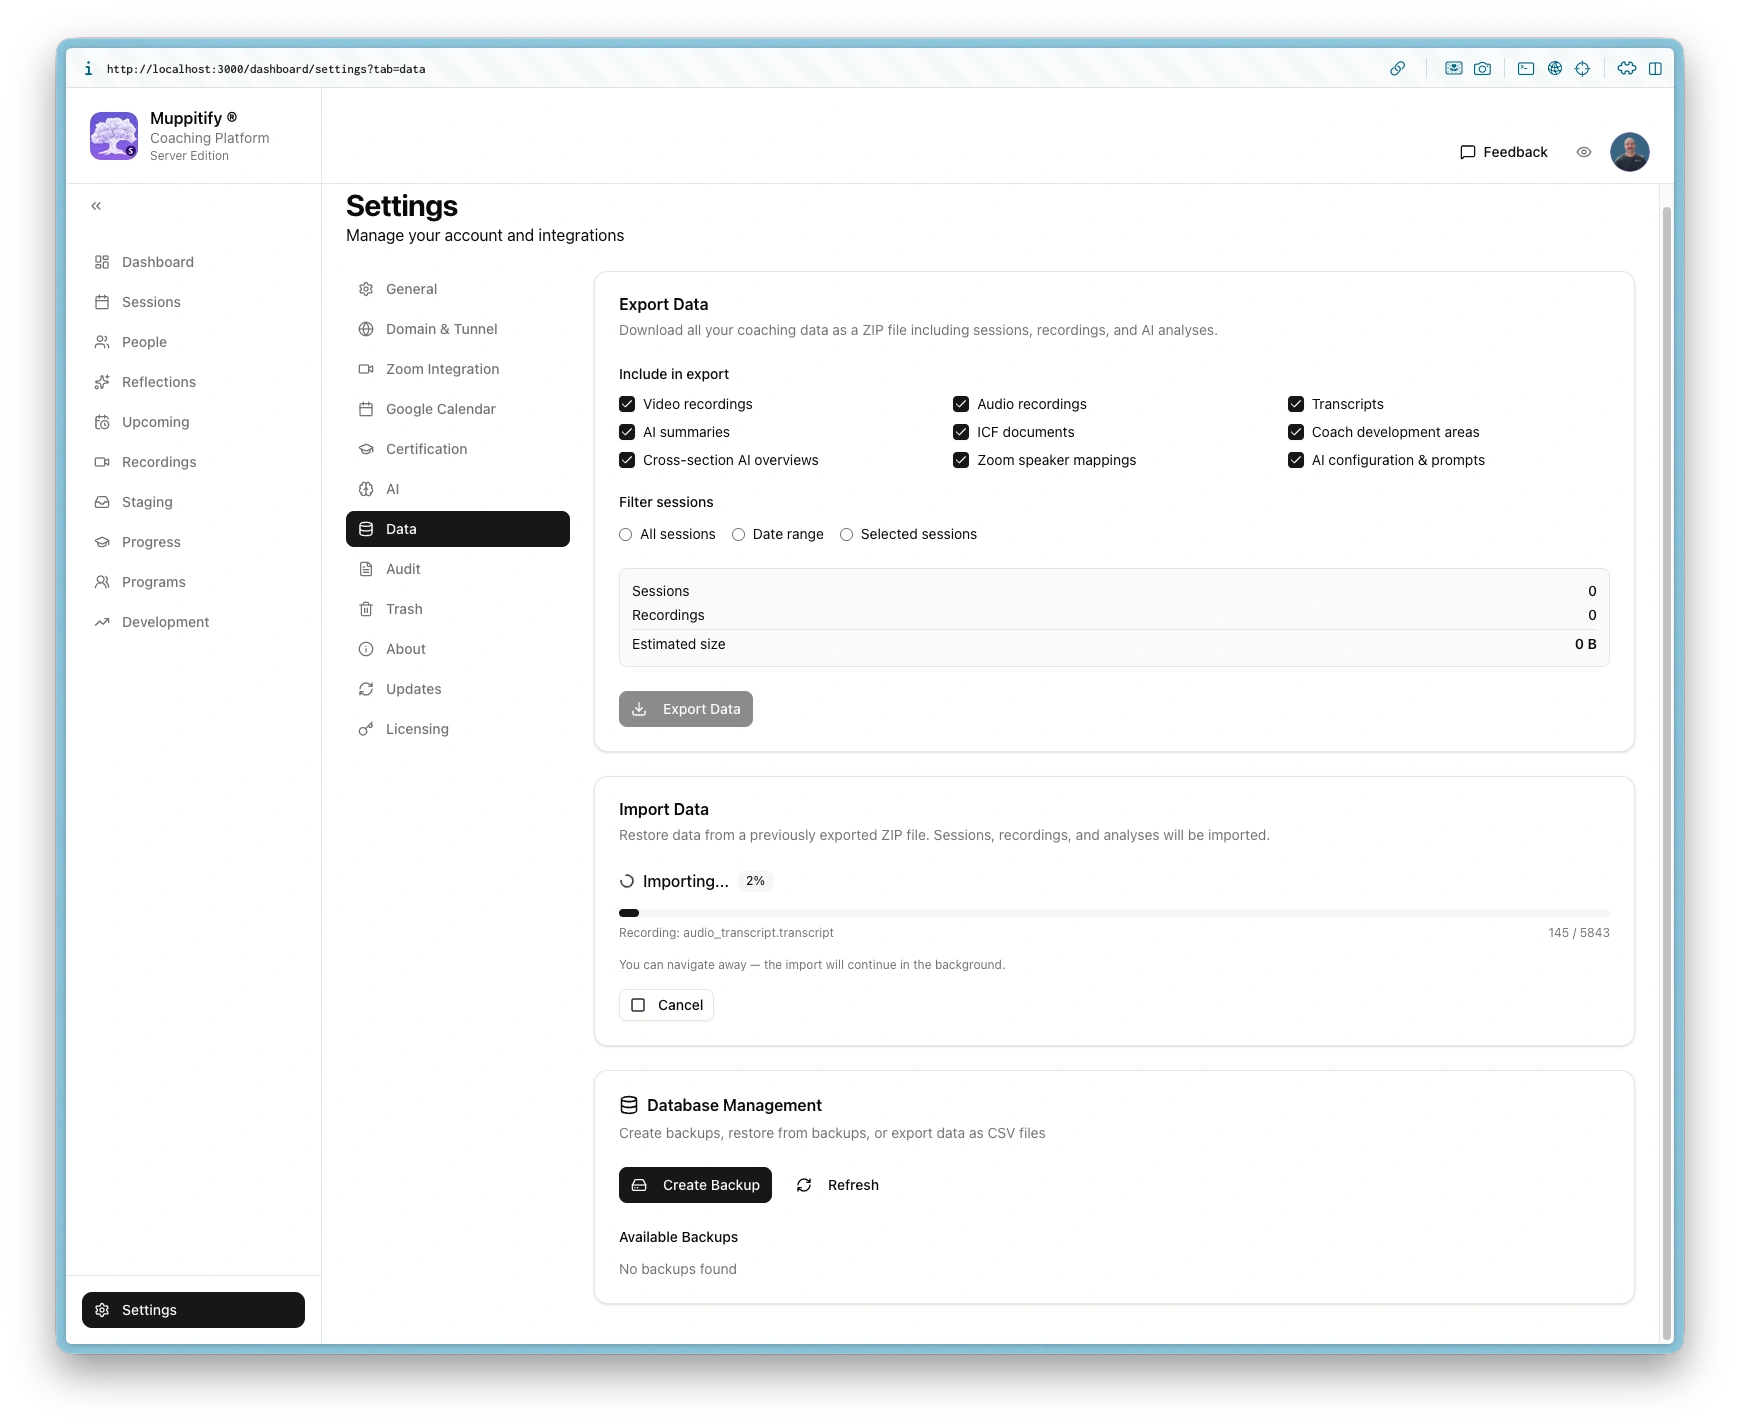
Wait for data to be imported
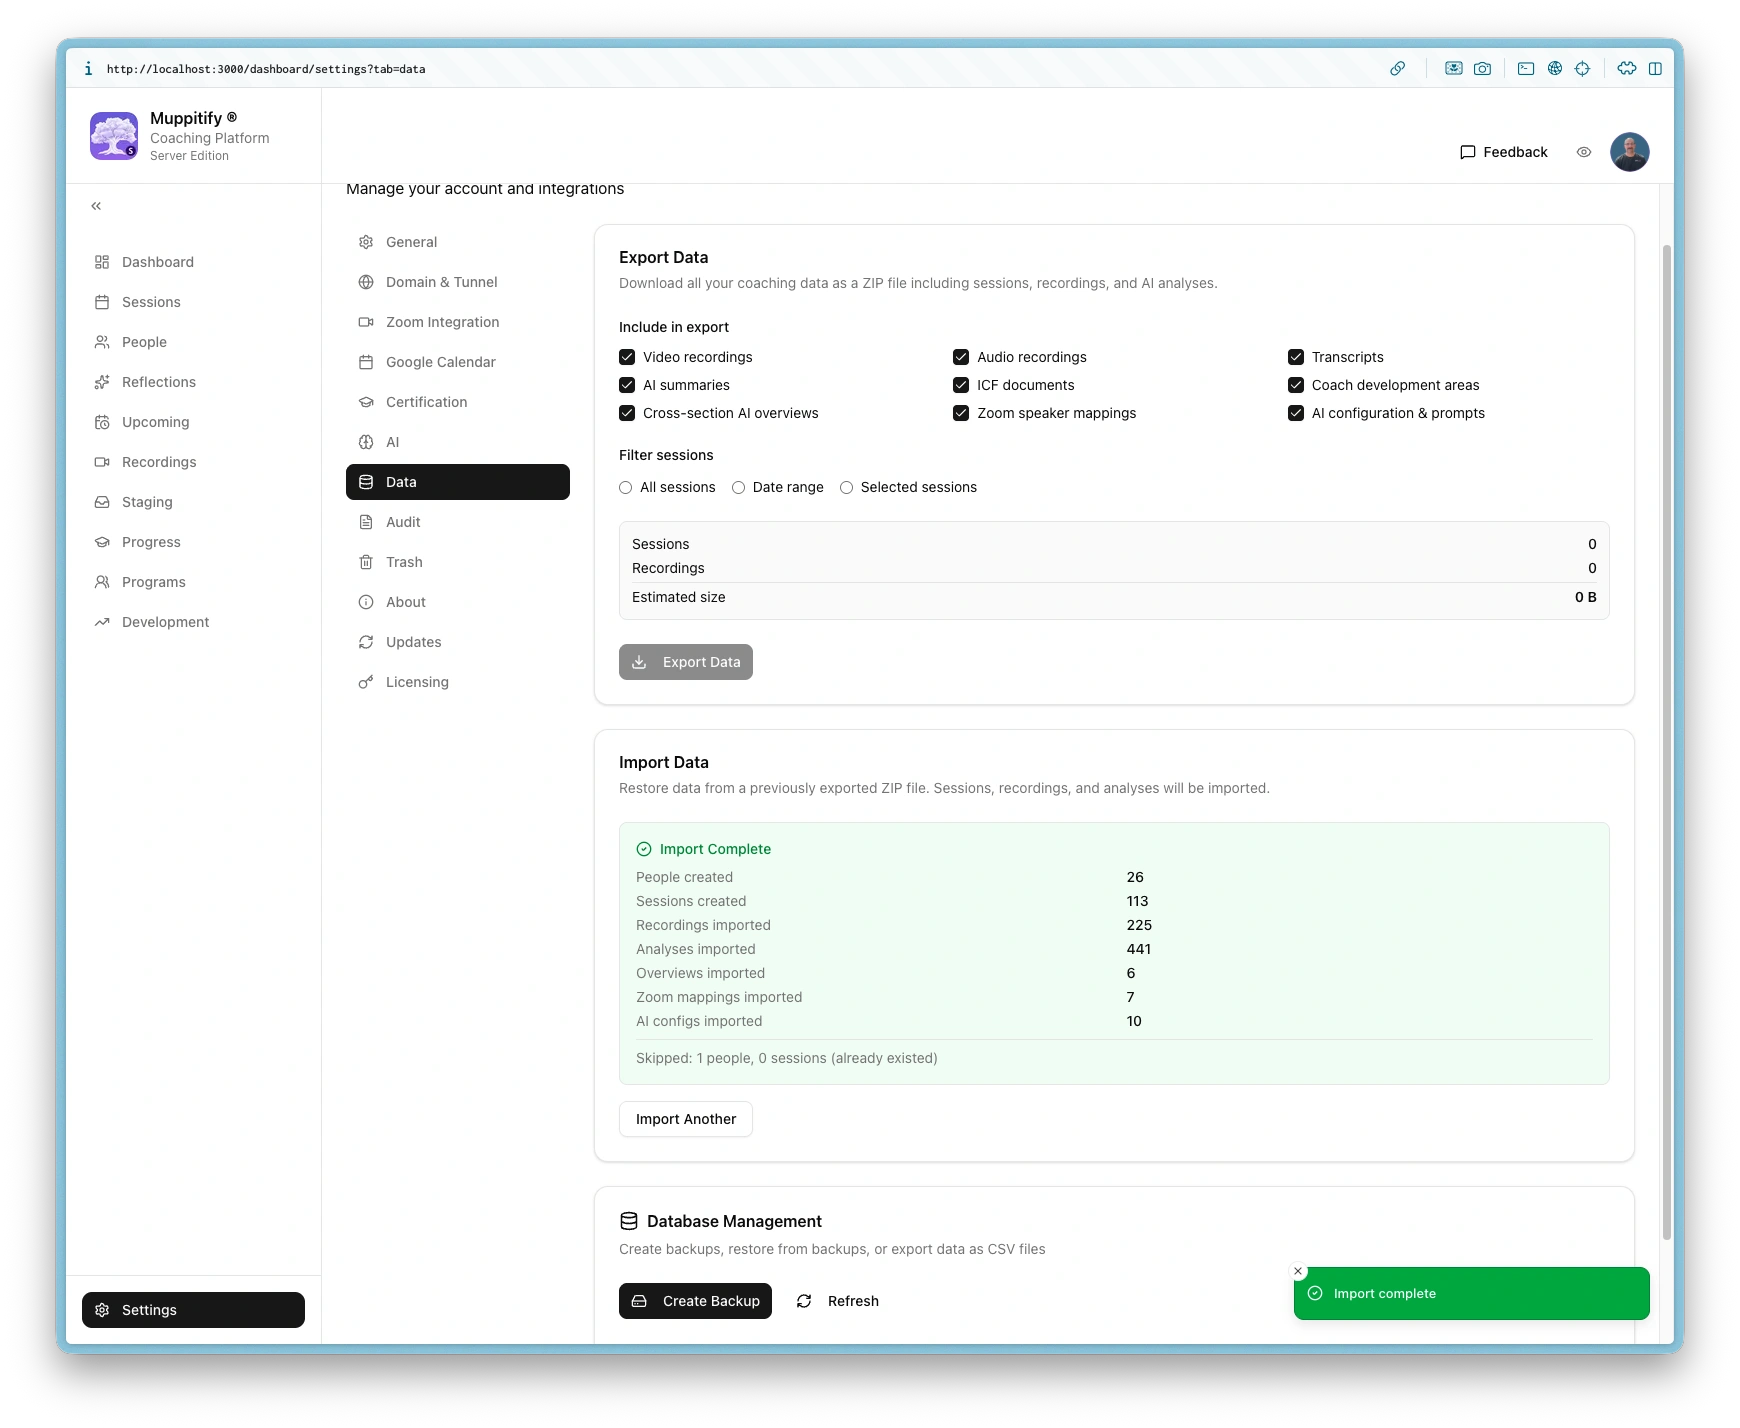
Wait for import to complete
Server reflects imported sessions
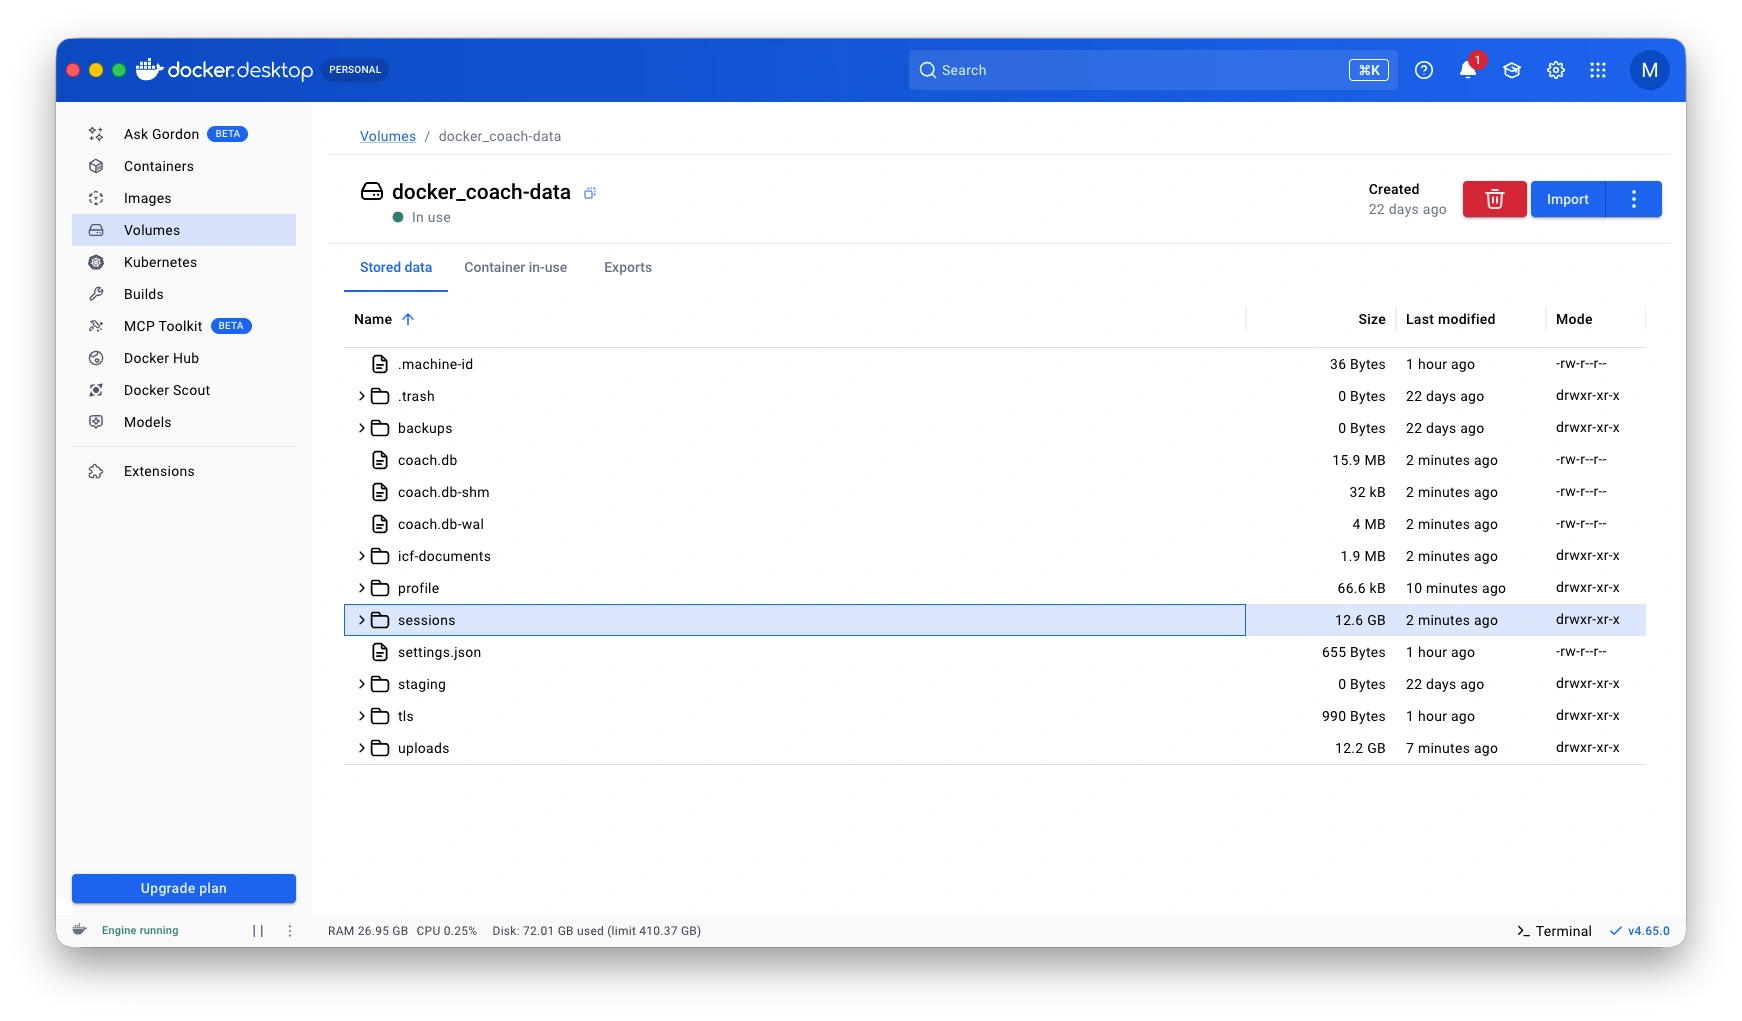
All imported data is stored in the Docker volume
Troubleshooting
Certificate warning keeps appearing
If Chrome shows "Your connection is not private" repeatedly, the temporary certificate exception has expired. Import the certificate into your OS trust store for a permanent fix — see Certificate trust above.
Licence activation fails
- Ensure the server has internet access
- Check that you haven't exceeded the 2-device limit
- If migrating from desktop, deactivate the desktop licence first (Settings > Licensing > Deactivate)
Container won't start
- Check logs:
docker logs coach - Ensure the
/datavolume is writable - Verify the image can be pulled:
docker pull muppit/muppitify-coach-server:latest
Port already in use
If you see Bind for 0.0.0.0:3000 failed: port is already allocated, another service is using port 3000. Use a different host port:
docker run -d --restart unless-stopped -p 3001:3000 -v coach-data:/data --name coach muppit/muppitify-coach-server:latest
Then access the app at https://localhost:3001 and set the local port to 3001 in Settings > Domain & Tunnel.