Domain and tunnel setup for Zoom staging
Automatic recording staging when Zoom meetings end requires the following components:
- Server Edition
- Public domain managed by Cloudflare
- Cloudflare Tunnel
- Zoom Webhook
If you only access the platform on your local network and use manual Zoom recording fetch, you do not need a domain, tunnel or webhook.
The Coaching Platform Server Edition includes a built-in Cloudflare Tunnel connector. You create the tunnel in Cloudflare and paste the token in the app.
To mitigate security risks the Platform does not permit remote access over the tunnel. The platform can be accessed only via your local network. Built-in protection automatically disables the tunnel if Cloudflare security rules are missing.
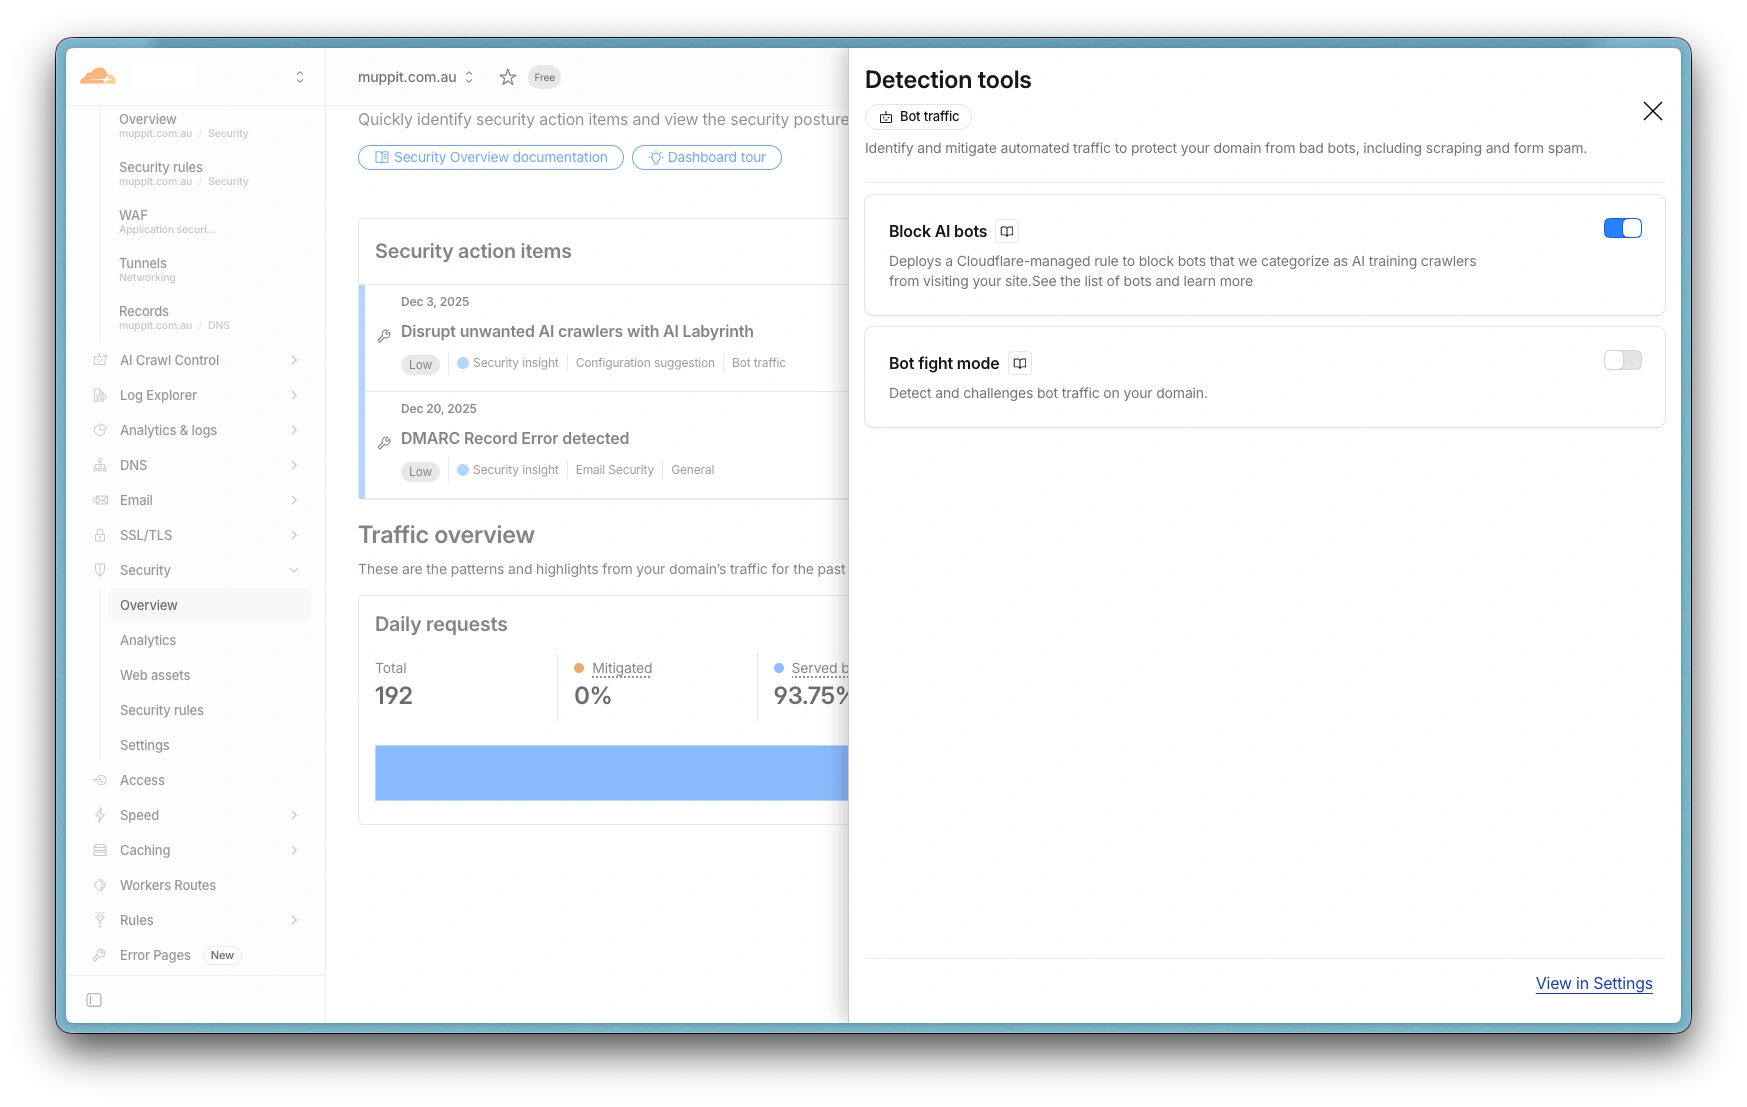
Cloudflare: disable bot fight mode
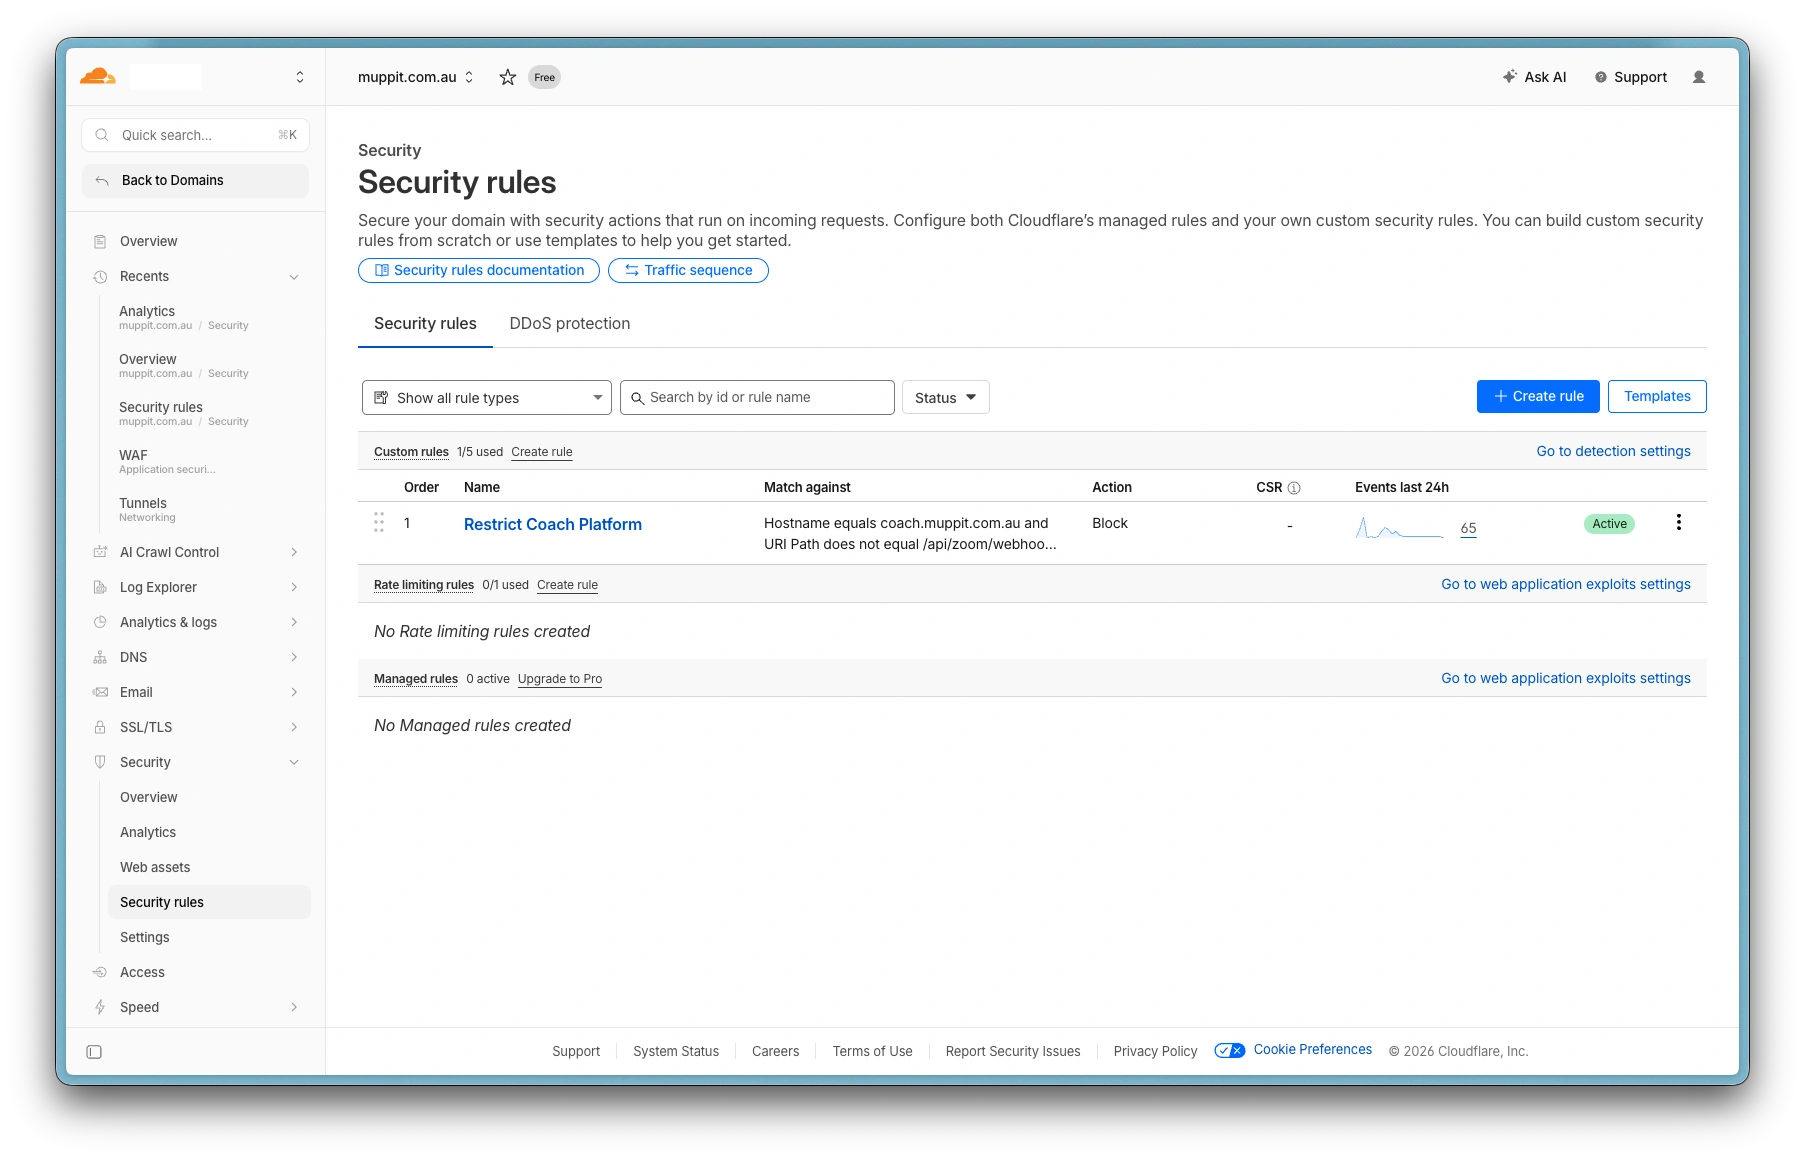
Cloudflare: custom security rules
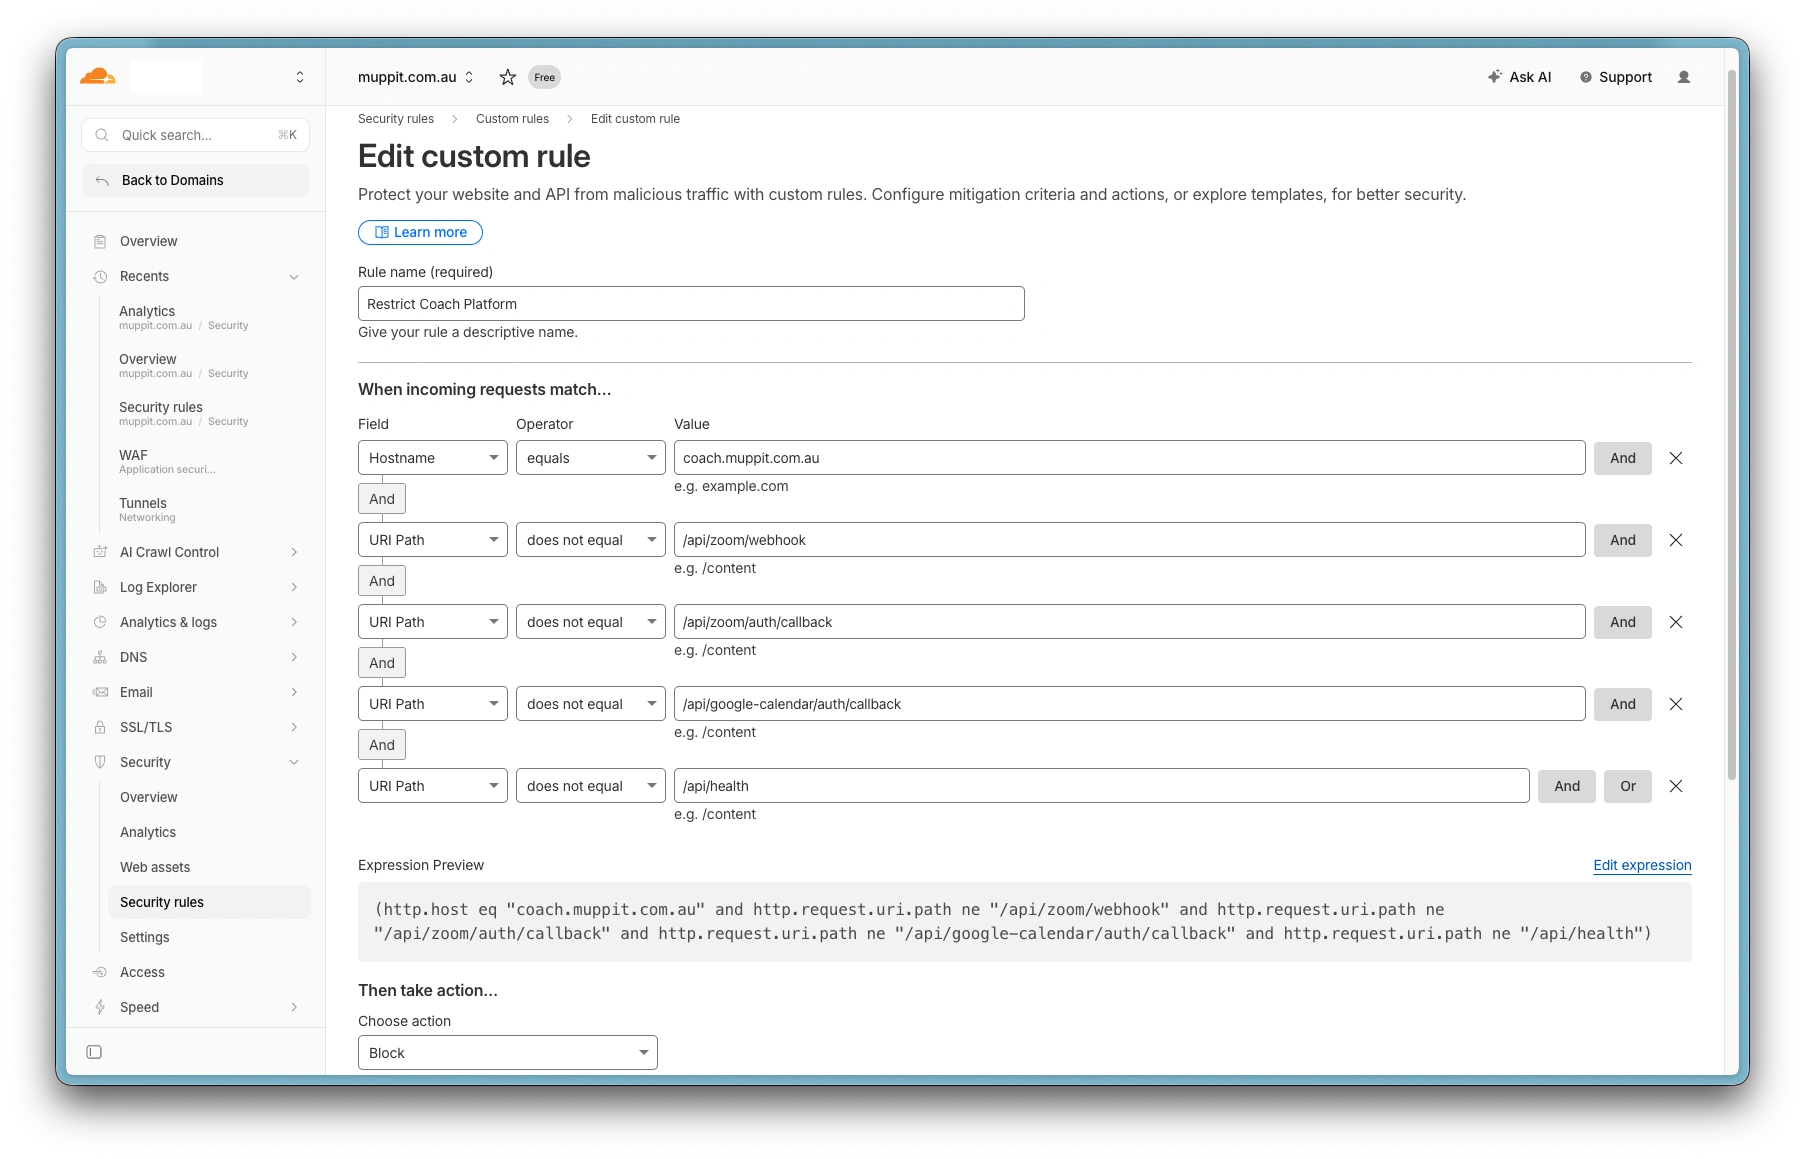
Cloudflare: custom restrict coach platform rule
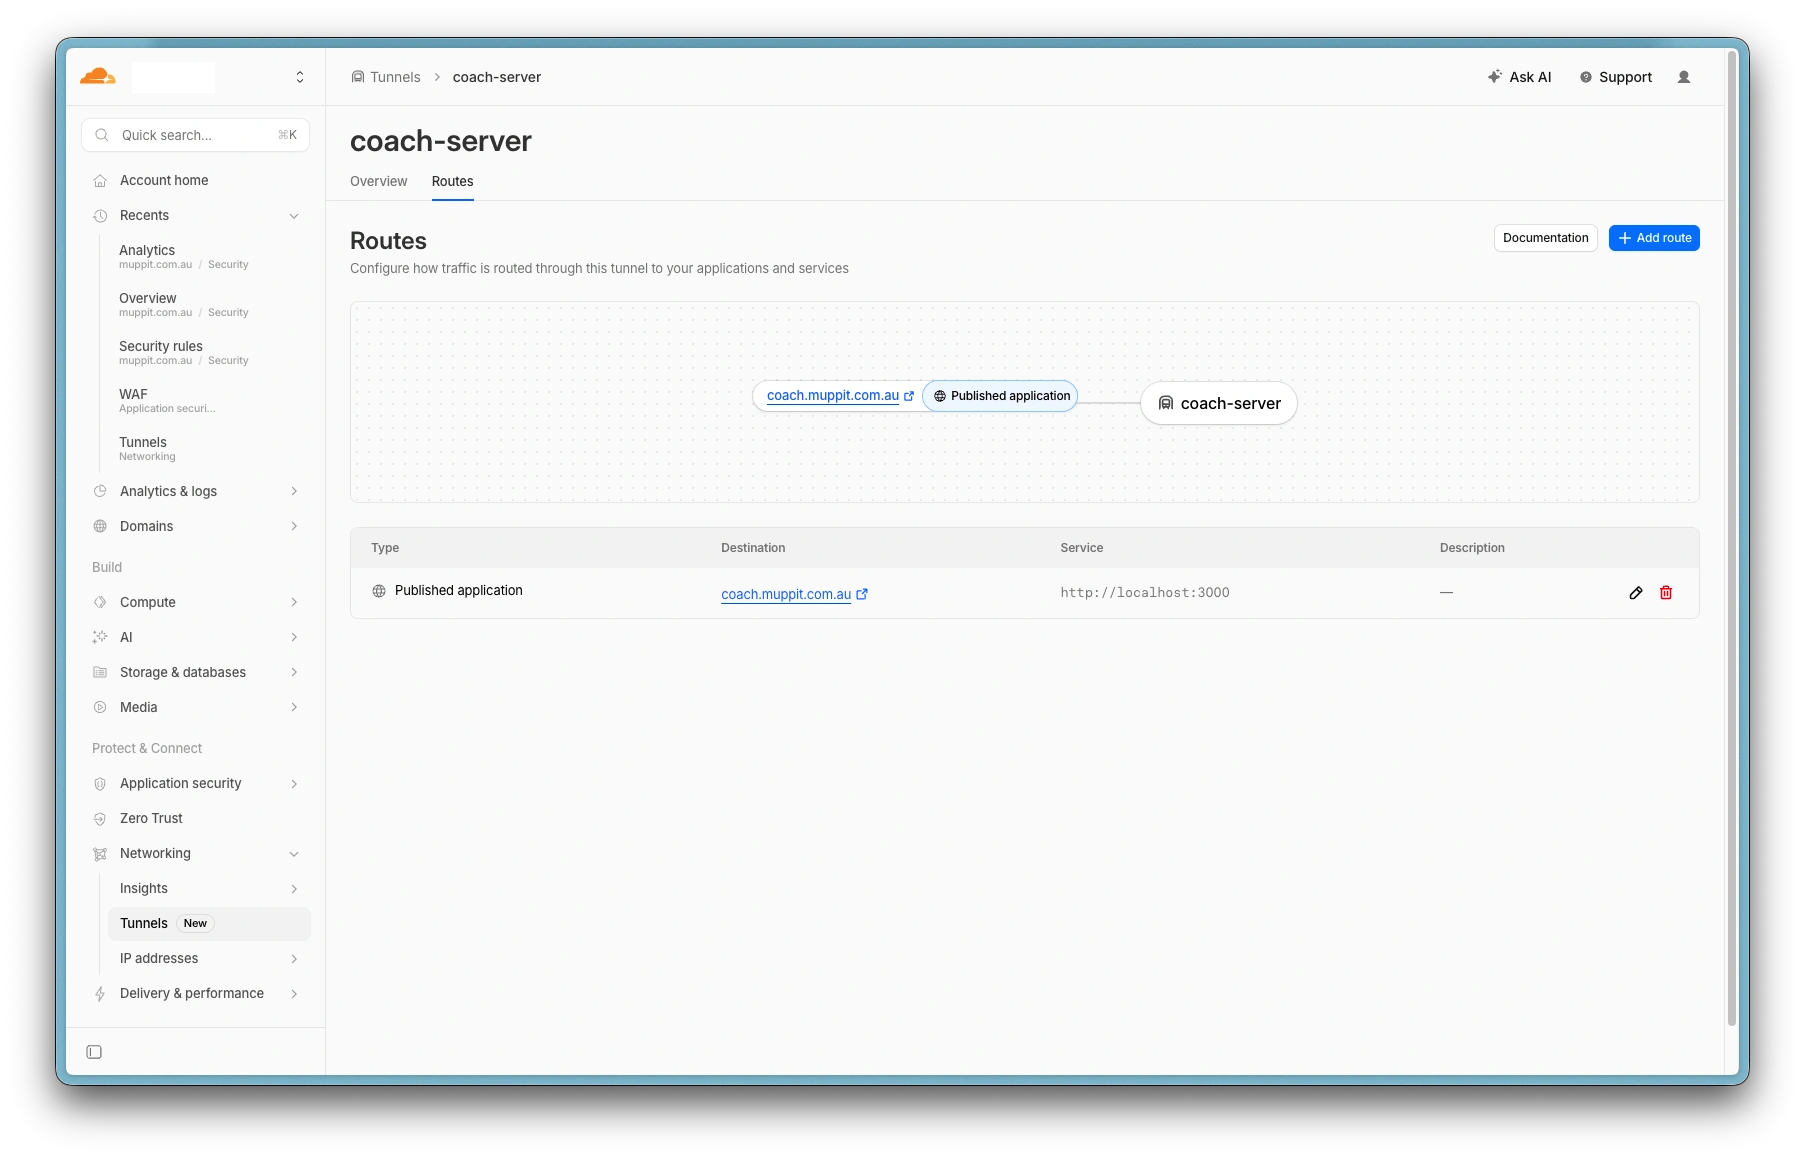
Cloudflare: tunnel rule
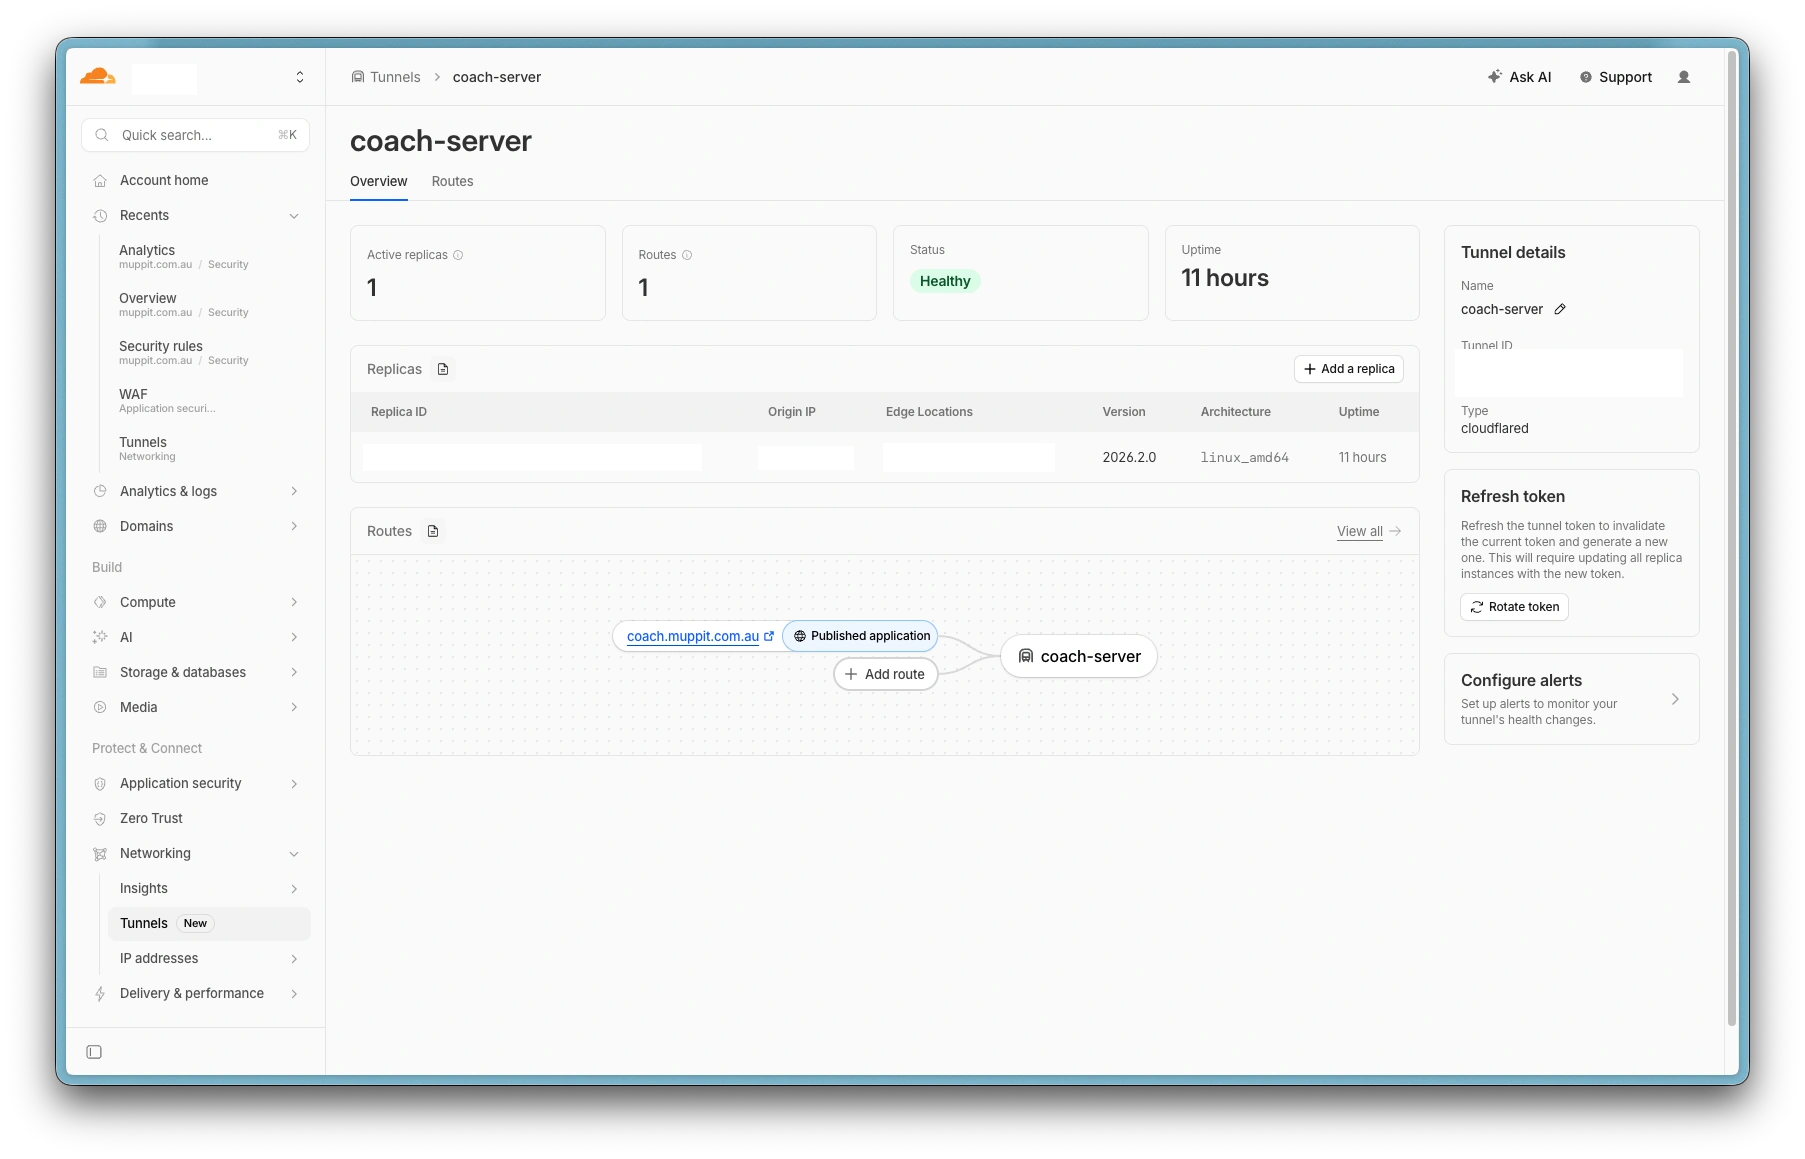
Cloudflare: tunnel status
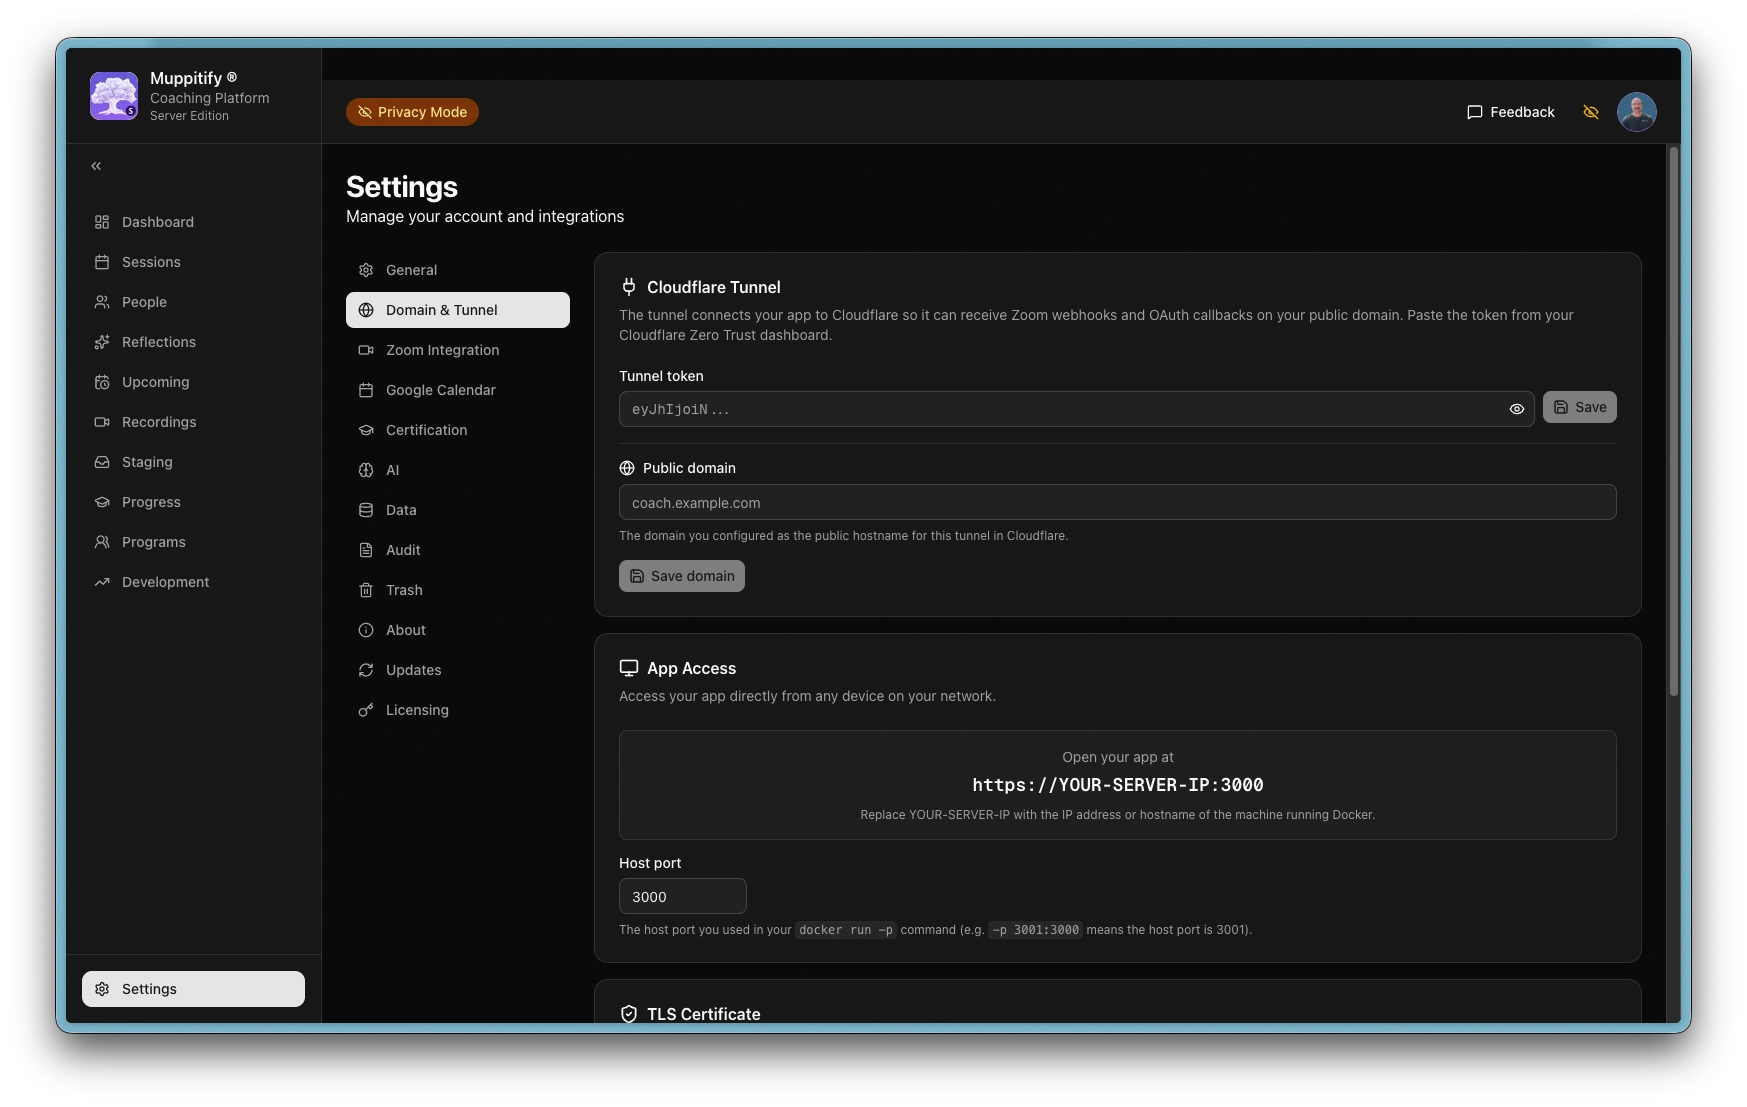
Platform: initial domain and tunnel page
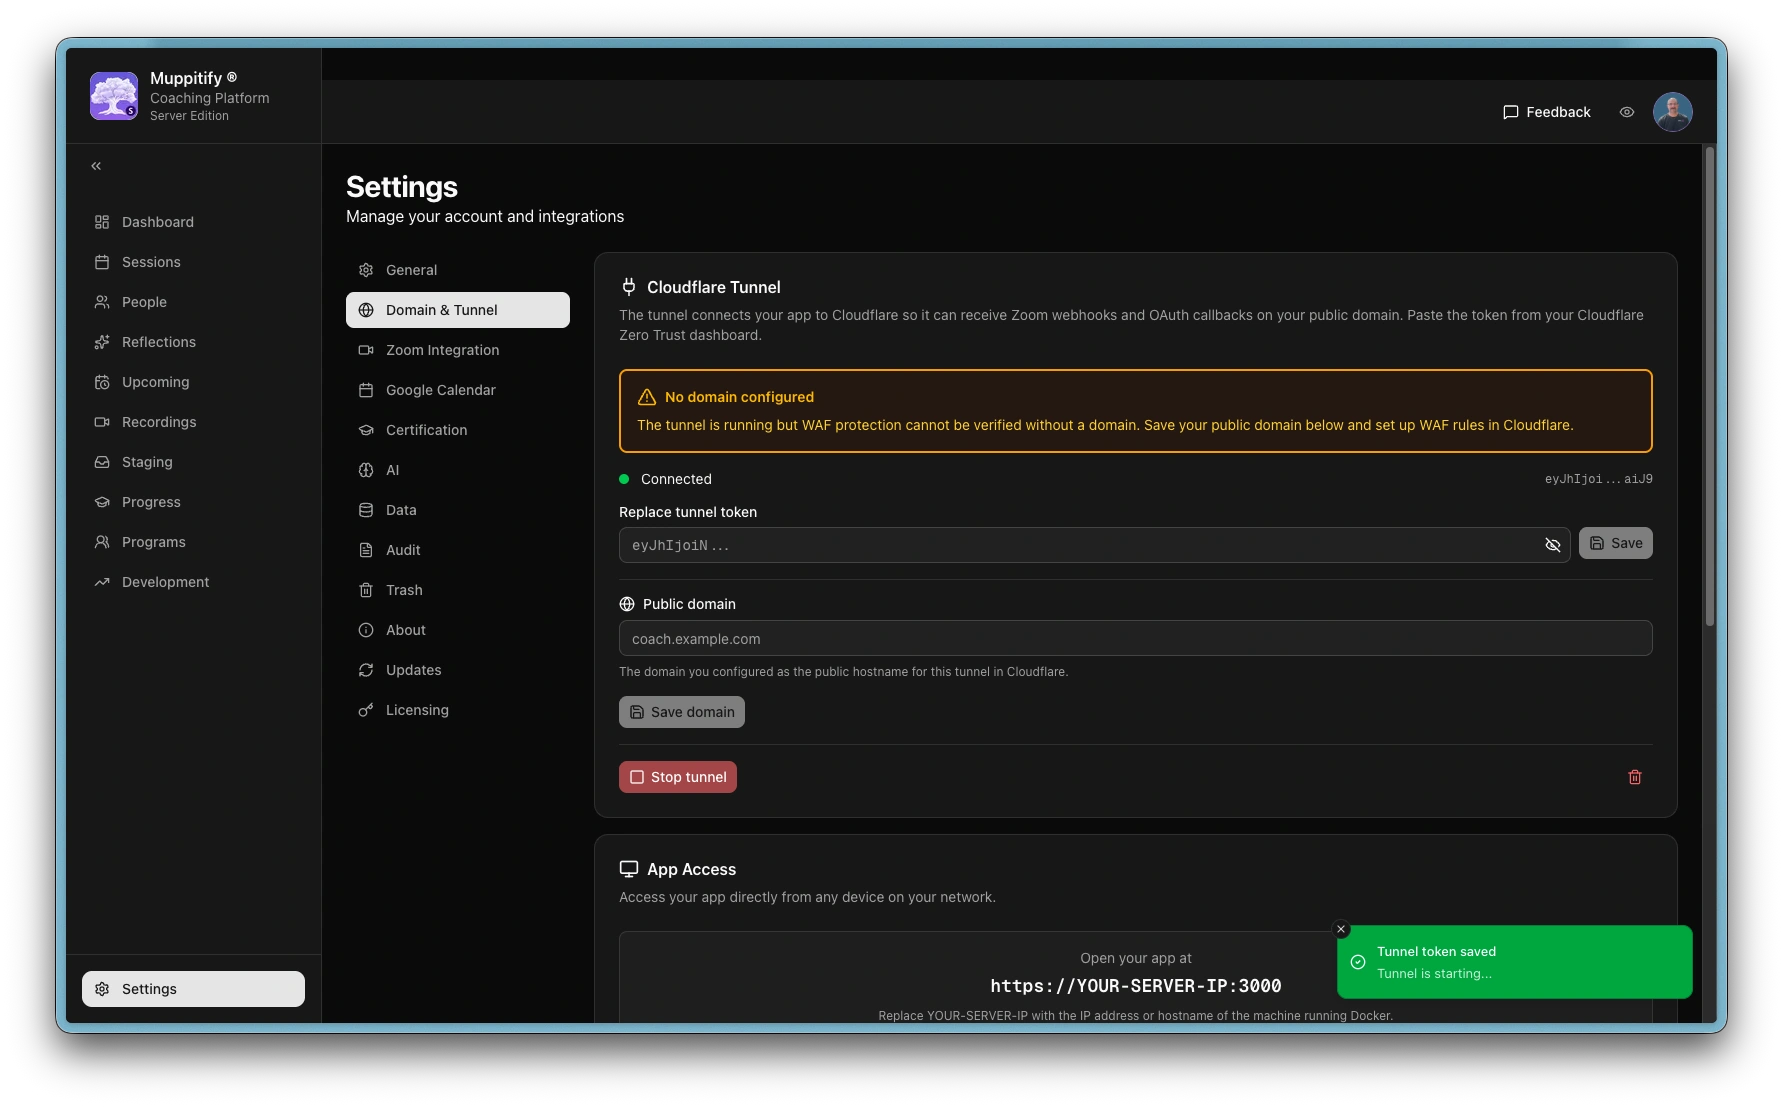
Platform: tunnel connected without public domain
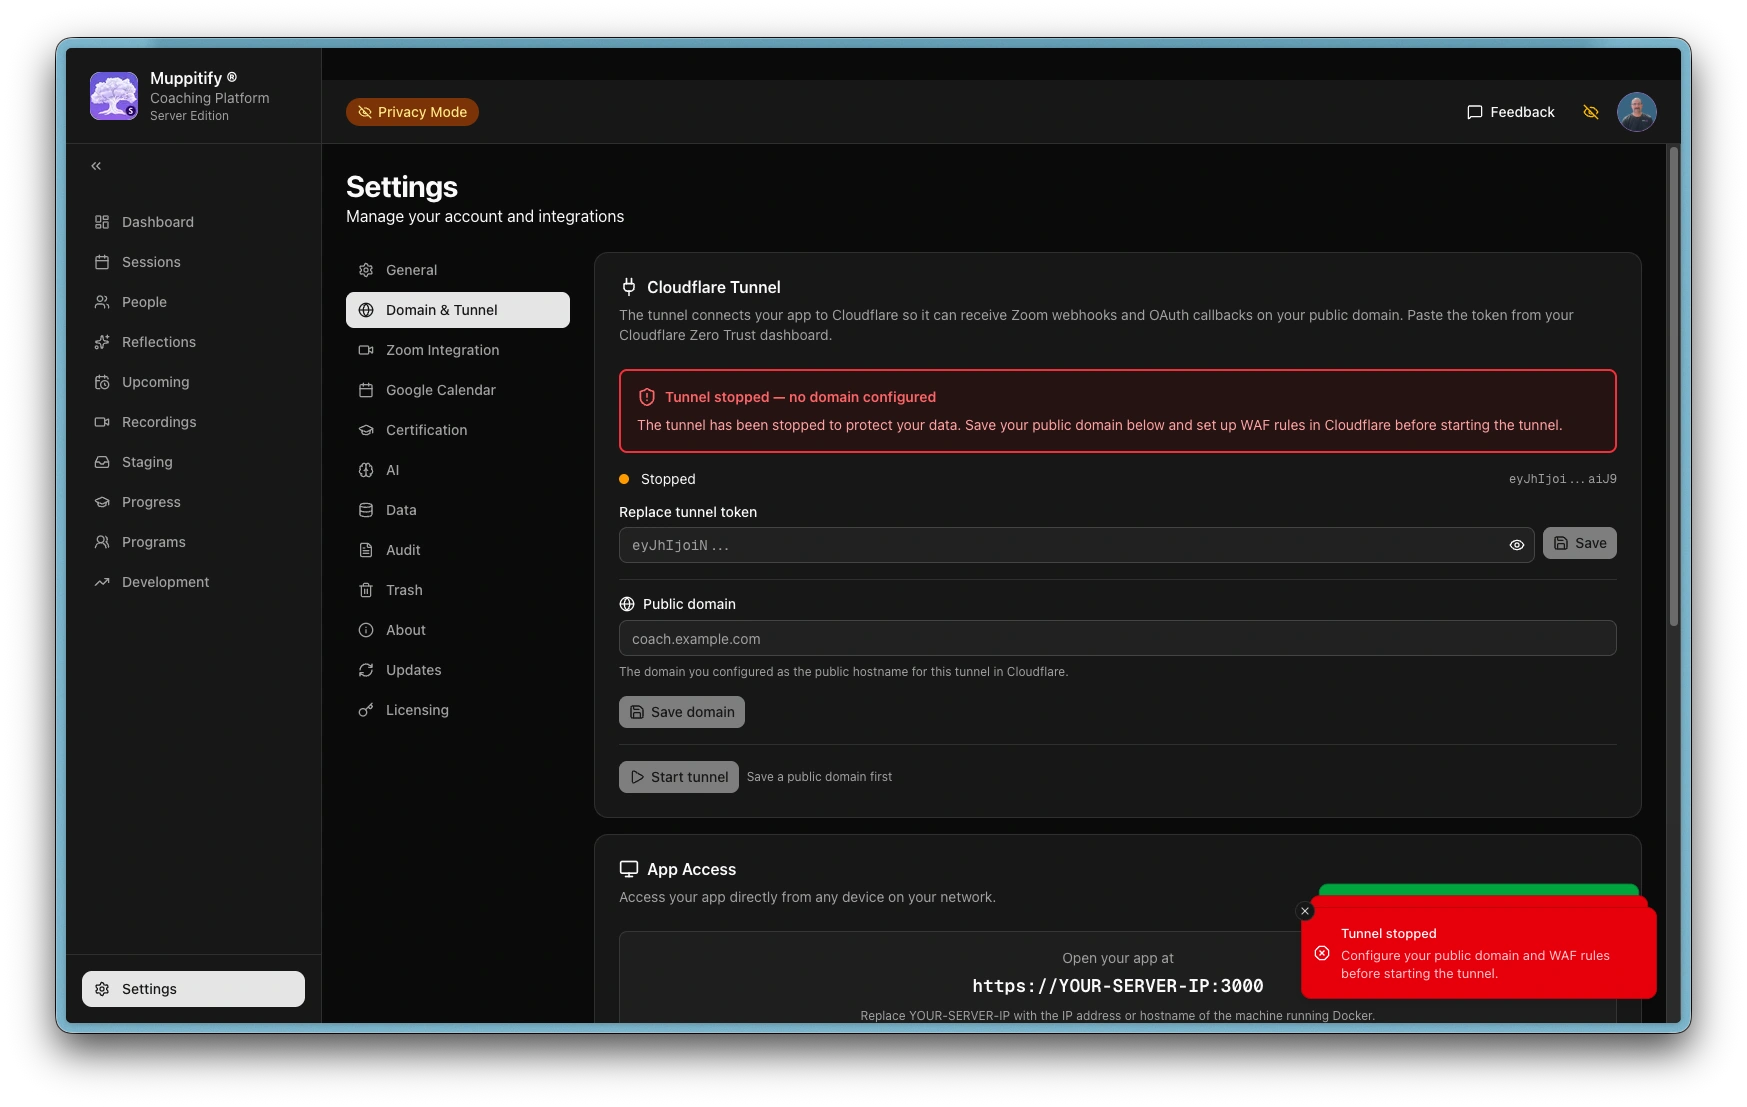
Platform: tunnel stopped automatically without public domain
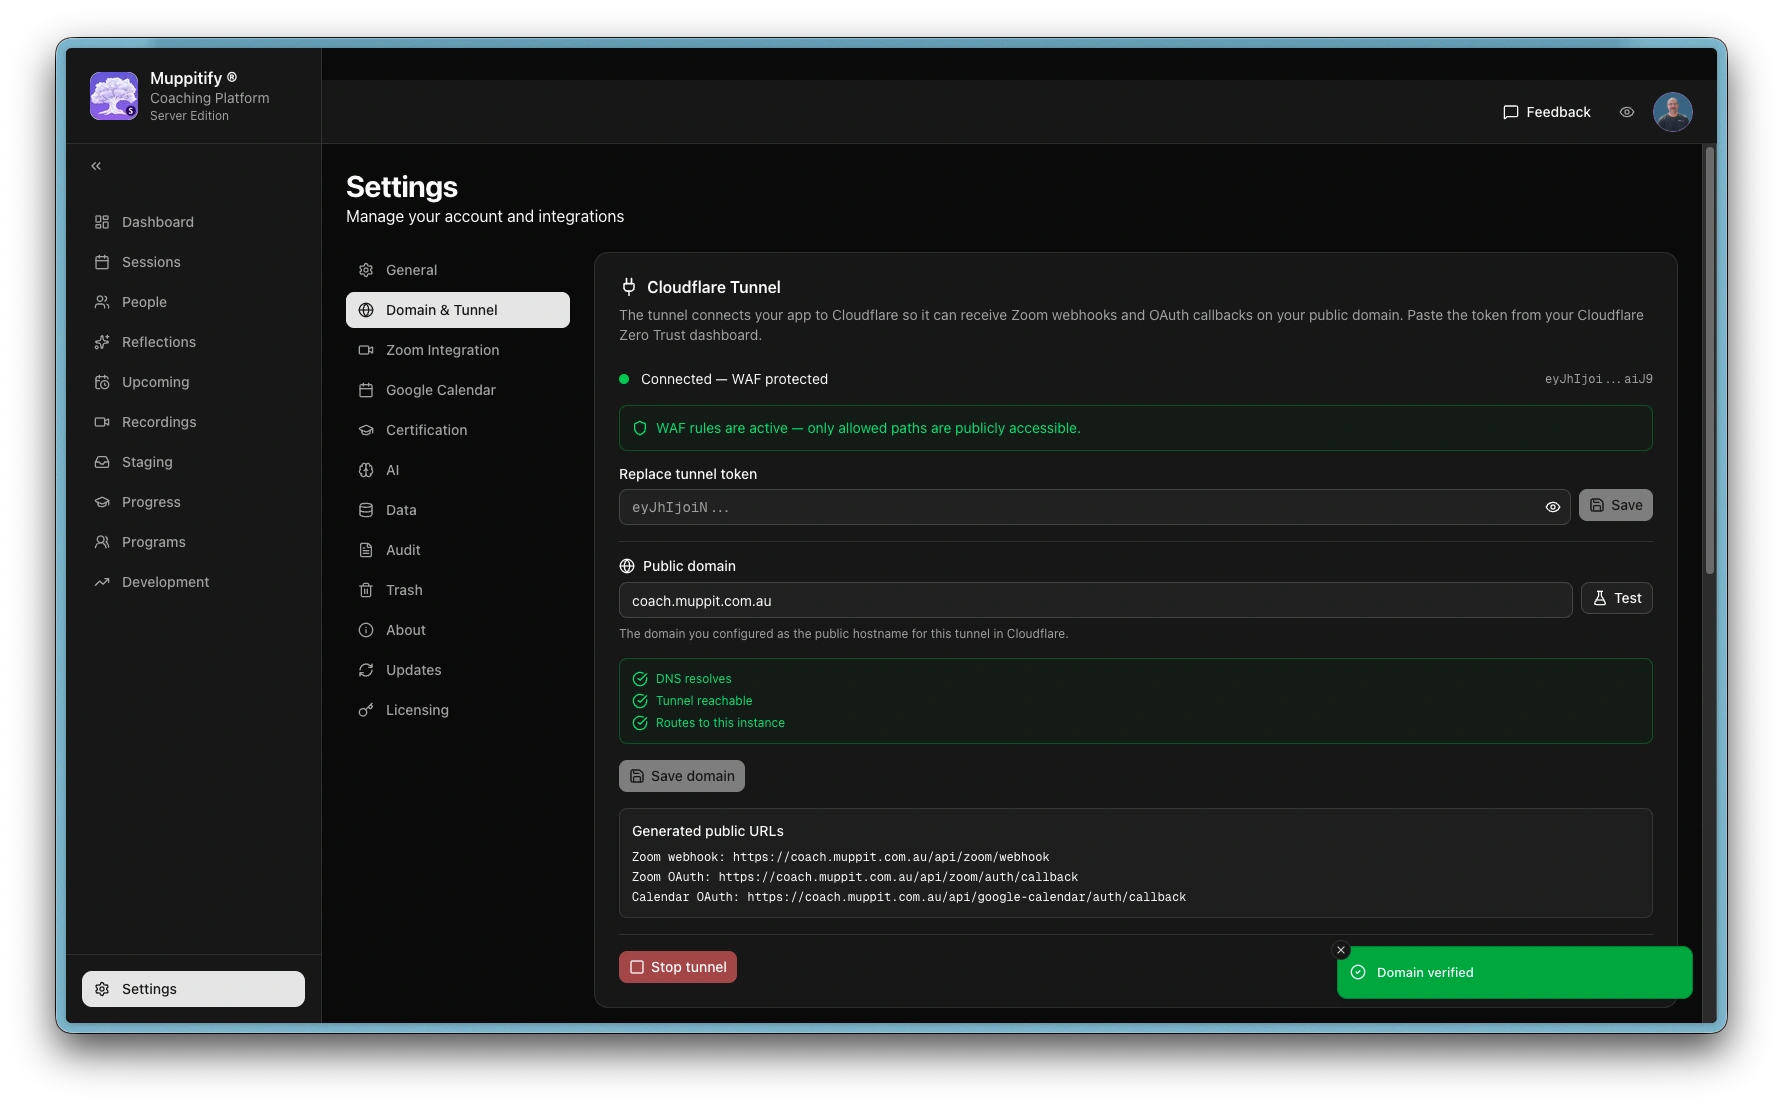
Platform: domain and tunnel operational
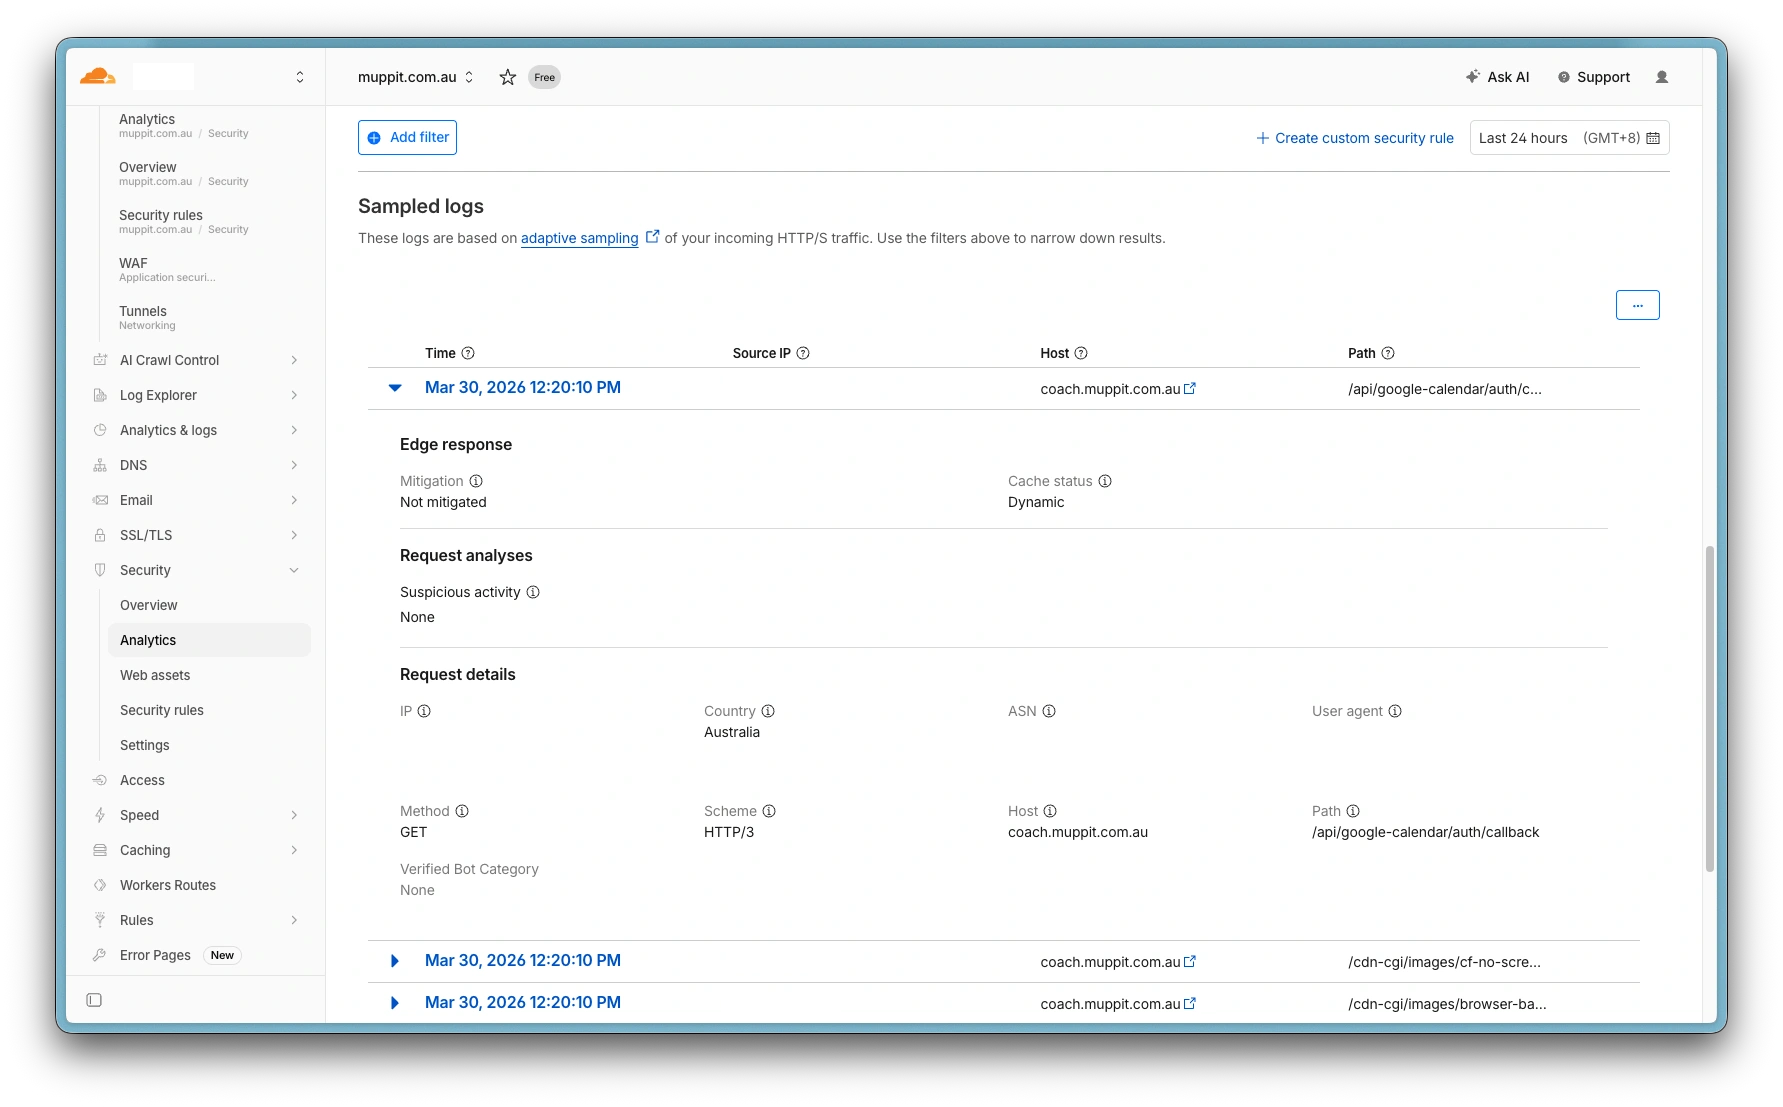
Cloudflare: Google auth callback logs
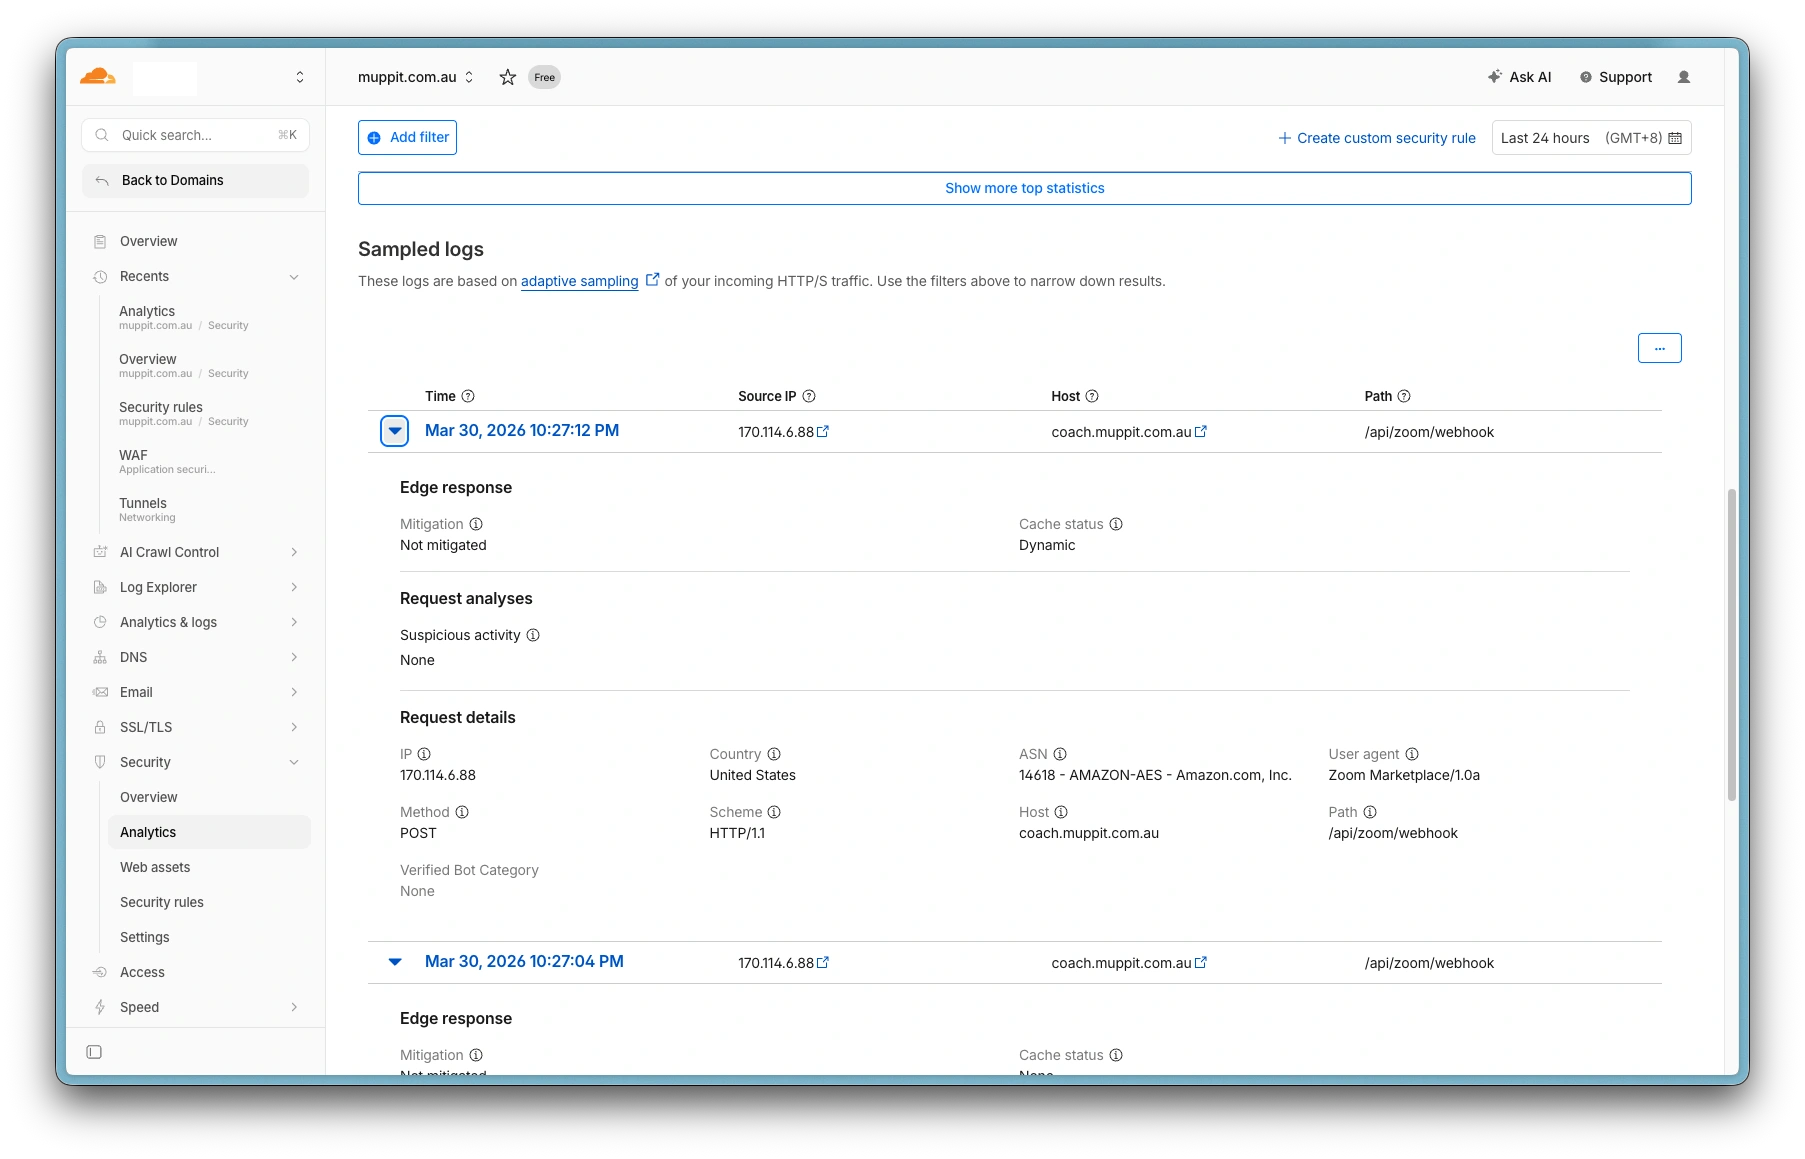
Cloudflare: Zoom webhook logs
Prerequisites
- The Server Edition or QNAP NAS setup completed and running
- A domain name with DNS managed by Cloudflare (free tier)
- A Cloudflare account (free Zero Trust plan)
- A Zoom account (paid plan)
1. Create a Cloudflare account
- Go to Cloudflare Zero Trust and sign in or create a free account
- If prompted for a team name, pick anything. It's just a label for your account
- Select the Free plan. Cloudflare requires a payment method even for the free plan, but you will not be charged
- Your domain's DNS must be managed by Cloudflare. If it isn't, go to Websites in the main Cloudflare dashboard, add your domain, and update your registrar's nameservers to the ones Cloudflare provides
2. Secure the tunnel
Before connecting the tunnel, you must set up WAF rules in Cloudflare to restrict public access. Without a WAF rule, the tunnel exposes your entire application to the internet. The coaching platform enforces this with a server-side WAF watchdog. After the tunnel connects, the server verifies WAF protection after 10 seconds and then every 60 minutes. If WAF rules are not detected, the tunnel is automatically stopped and the reason is shown in Settings.
The server automatically stops the tunnel if WAF rules are not detected on your public domain. The stop reason is displayed in Settings > Domain & Tunnel. Complete the steps below before connecting the tunnel.
Create a WAF custom rule
The Cloudflare free plan includes up to 5 custom security rules. You need to decide your hostname now (e.g. coach.yourdomain.com) because the WAF rule references it.
- In the Cloudflare dashboard, select your domain
- Navigate to Security > Security rules
- Click Create rule
- Set the rule name to
Restrict Coaching Platform - Add the following conditions (all connected with And):
| Field | Operator | Value |
|---|---|---|
| Hostname | equals | coach.yourdomain.com |
| URI Path | does not equal | /api/zoom/webhook |
| URI Path | does not equal | /api/zoom/auth/callback |
| URI Path | does not equal | /api/google-calendar/auth/callback |
| URI Path | does not equal | /api/health |
- Set the action to Block
- Click Deploy
This blocks all public requests except:
| Path | Purpose |
|---|---|
/api/zoom/webhook | Zoom recording webhooks |
/api/zoom/auth/callback | Zoom OAuth callback |
/api/google-calendar/auth/callback | Google Calendar OAuth callback |
/api/health | Health check and domain test |
Everything else (dashboard, sessions, settings, etc.) returns 403 Forbidden when accessed via the public domain. Use https://localhost:3000 for normal access.
Disable Bot Fight Mode
Cloudflare's Bot Fight Mode blocks Zoom webhook requests because they come from automated servers. On the free plan, you must disable it globally:
- In the Cloudflare dashboard, select your domain
- Navigate to Security > Settings
- Turn off Bot Fight Mode
Without this, Zoom webhook validation will fail silently and recordings will not be staged automatically.
On paid Cloudflare plans (Pro or above), you can create a WAF skip rule for the webhook path instead of disabling Bot Fight Mode entirely.
3. Create a tunnel
- In the Zero Trust dashboard, navigate to Networks > Connectors > Create a tunnel
- Choose Cloudflared as the connector and name the tunnel (e.g.
muppitify-coach) - On the install screen, ignore the installation commands. Your app handles the connector automatically. Copy only the tunnel token (the long string starting with
eyJ) - Continue to the hostname screen and add a public hostname:
- Subdomain: your preferred subdomain (e.g.
coach) - Domain: select your Cloudflare domain
- Leave Path empty
- Service type: HTTP
- URL:
localhost:3000
- Subdomain: your preferred subdomain (e.g.
- Click Complete setup
The tunnel connector runs inside the same container as the app, so it reaches the app at localhost:3000. This is not the port on your computer. Your host port (e.g. 3001) is separate and only for local browser access.
4. Connect the tunnel
- Open the coaching platform in your browser at
https://localhost:3000(or your chosen port) - Go to Settings > Domain & Tunnel
- Paste the tunnel token in the Cloudflare Tunnel section and click Save. The tunnel connects automatically within a few seconds, and you'll see the status change to "Connected"
- Enter your full domain (e.g.
coach.yourdomain.com) in the Public domain field - Click Test to verify, then Save
Troubleshooting
The server must be fully operational for Zoom notifications to be received. Zoom sends notifications once the recordings have been processed on their systems. Often the video notification is received before the transcript. There is no mechanism to instruct Zoom to resend a notification.
Zoom webhook URL validation failed
- Ensure the URL is
https://yourdomain.com/api/zoom/webhook— not/api/zoom/auth/callback(that is the OAuth redirect URL, not the webhook) - The Webhook Secret Token must be saved in the coaching platform and the container restarted before validation works
- See the Zoom webhook setup guide for the correct order
Zoom webhooks not firing
- Verify the webhook URL in your Zoom app matches
https://yourdomain.com/api/zoom/webhook - Ensure the
cloud_recording:read:list_recording_filesscope is added in the Zoom Marketplace (see Zoom setup guide) - Check the Zoom app is activated (not in draft mode)
- If using Cloudflare, ensure Bot Fight Mode is disabled
- Check container logs:
docker logs coach
Tunnel not connecting
- Check the tunnel status in Settings > Domain & Tunnel. If it shows "Not running", verify the token is correct
- Check container logs:
docker logs coach - Ensure the public hostname service URL in Cloudflare is set to
localhost:3000(the tunnel connector runs inside the same container as the app)
Tunnel keeps stopping
The server-side WAF watchdog automatically stops the tunnel if it cannot detect WAF rules on your public domain. The stop reason is shown in Settings > Domain & Tunnel (e.g., "WAF rules not detected on coach.yourdomain.com").
- Check Settings > Domain & Tunnel for the stop reason
- Verify the WAF rule exists in the Cloudflare dashboard (Security > Security rules)
- Ensure the rule hostname matches your configured domain exactly
- Check container logs for
[tunnel] WAFentries:docker logs coach - See the Secure the tunnel section for the required rule configuration