Zoom integration
Connect your Zoom account to fetch cloud recordings directly into your coaching sessions. This requires creating a free OAuth app on the Zoom Marketplace.
On the Server Edition with public domain and tunnel configured, the server automatically downloads Zoom recordings into the staging area ready for import into a session. You can also manually fetch recordings from the Recordings page.
Prerequisites
- A Zoom account with cloud recording enabled
- Coaching platform Server Edition installed
- Public domain configured via Cloudflare Tunnel

Zoom App Marketplace
Zoom: Create general app
Zoom: Save client ID and secret
Zoom: Change app name
Platform: Copy redirect URI
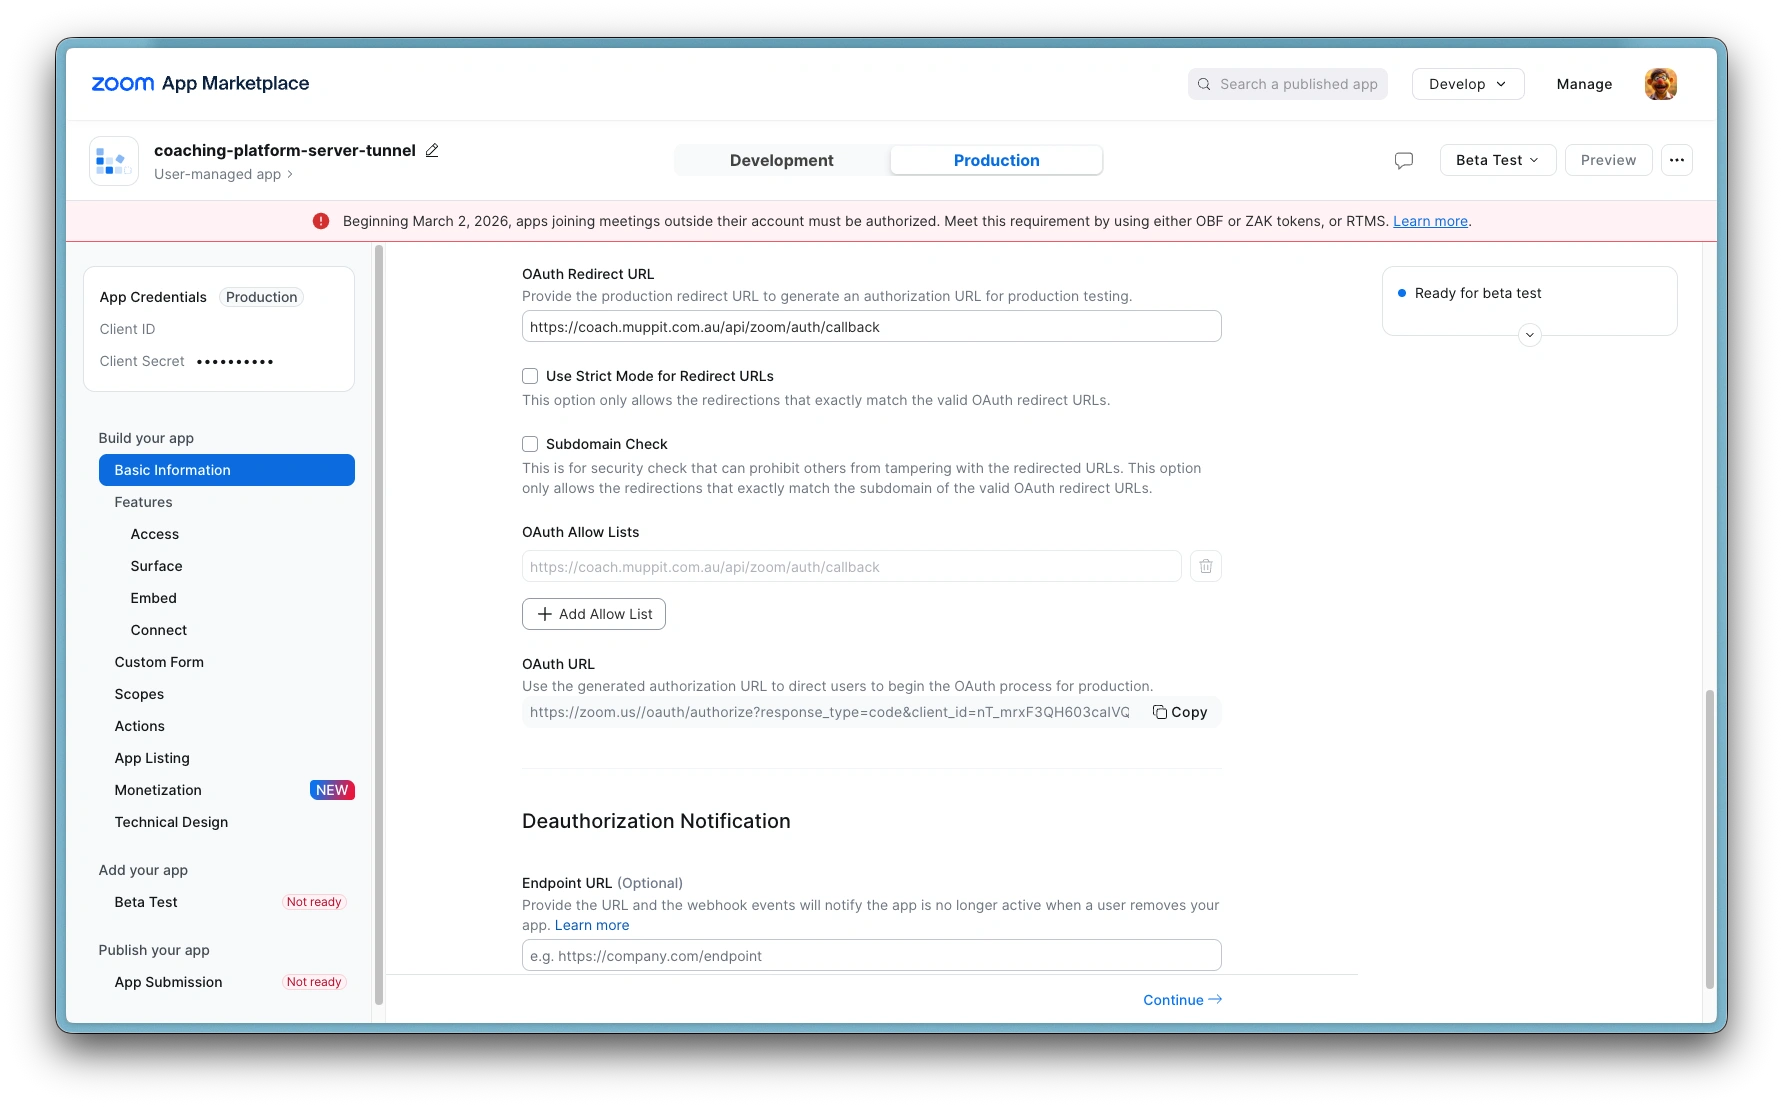
Zoom: Paste into OAuth redirect URL
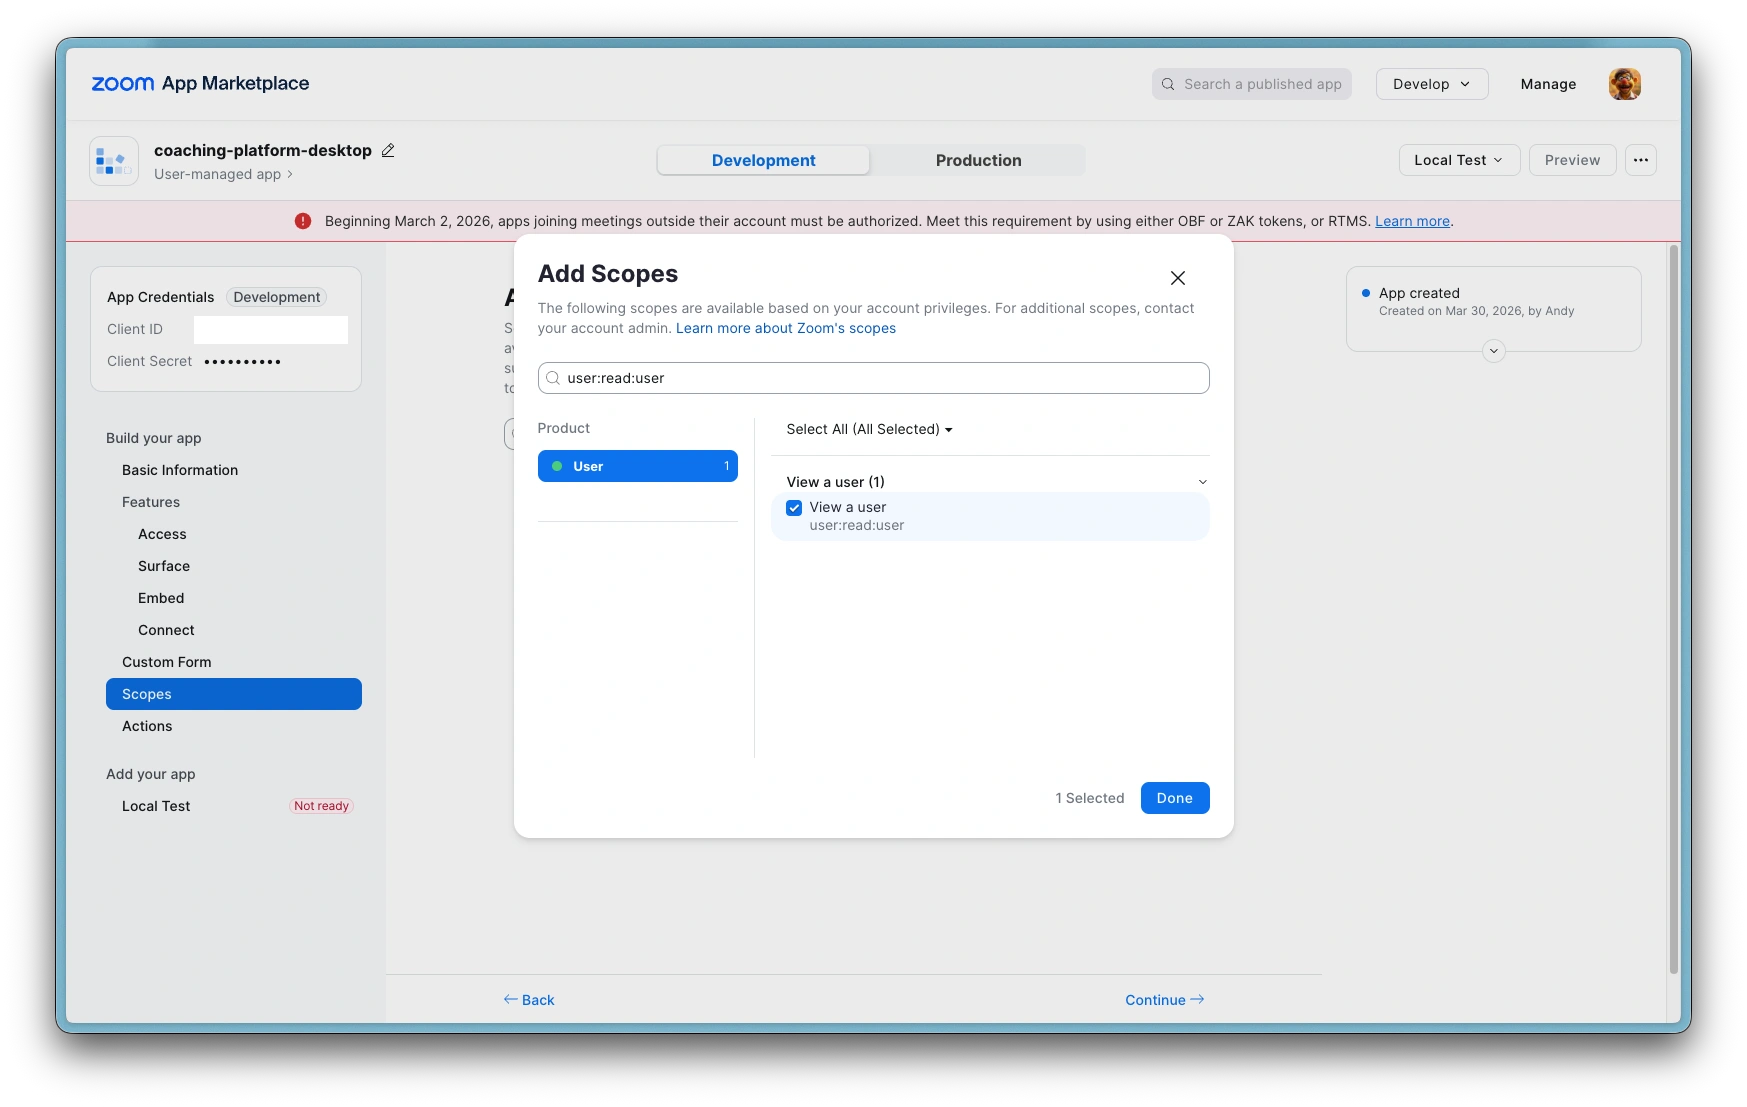
Zoom: Add scope: View a user
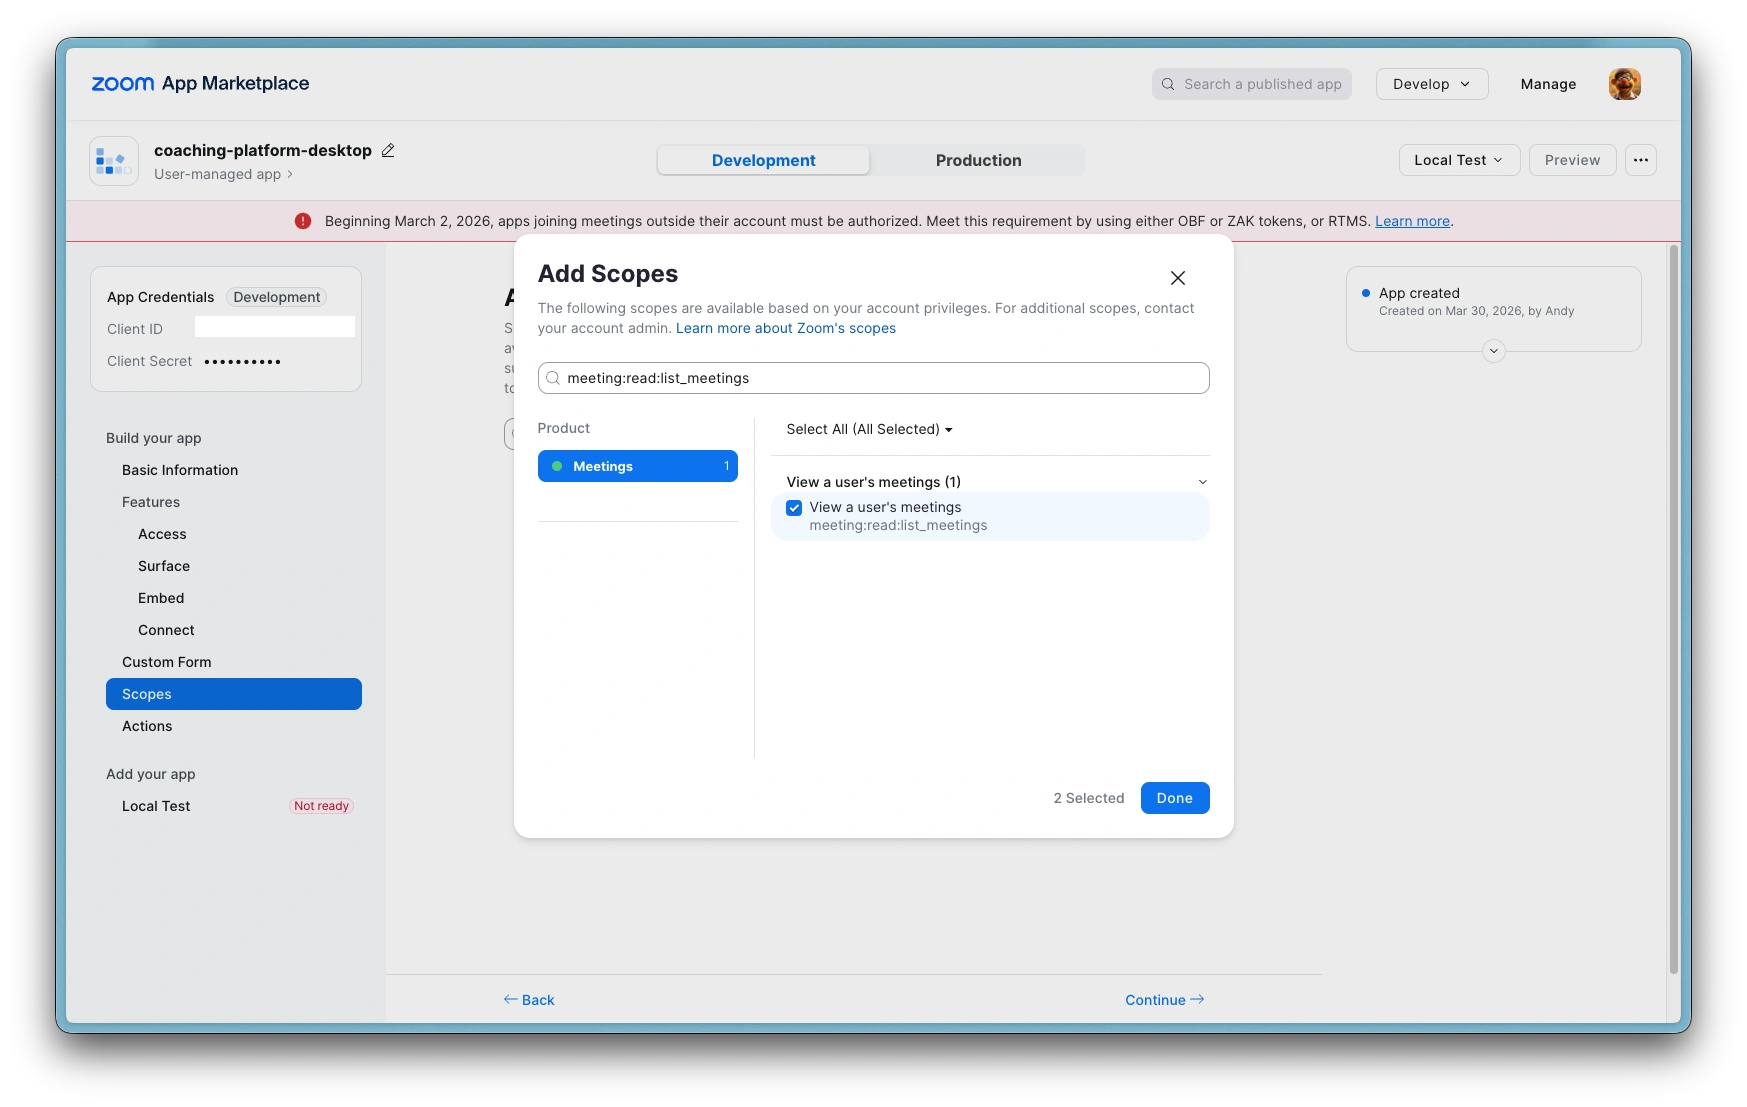
Zoom: Add scope: View a users meeting
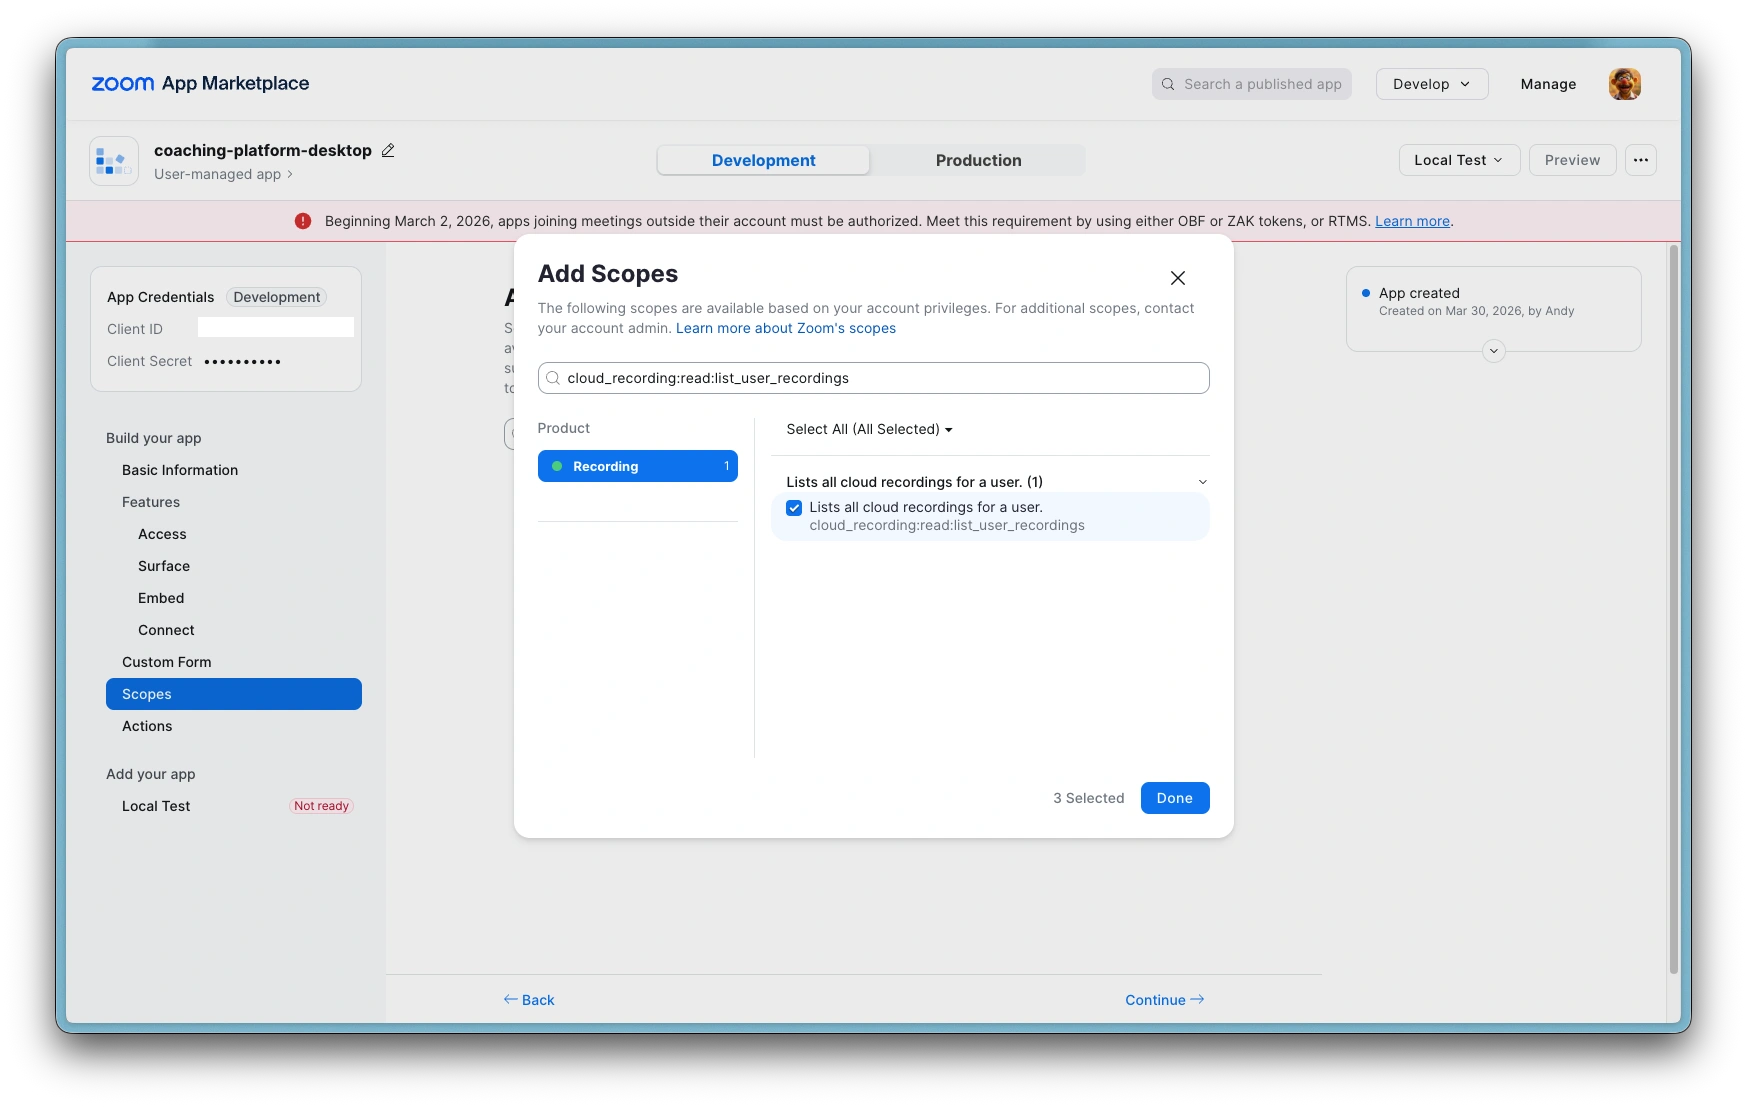
Zoom: Add scope: List all cloud recordings
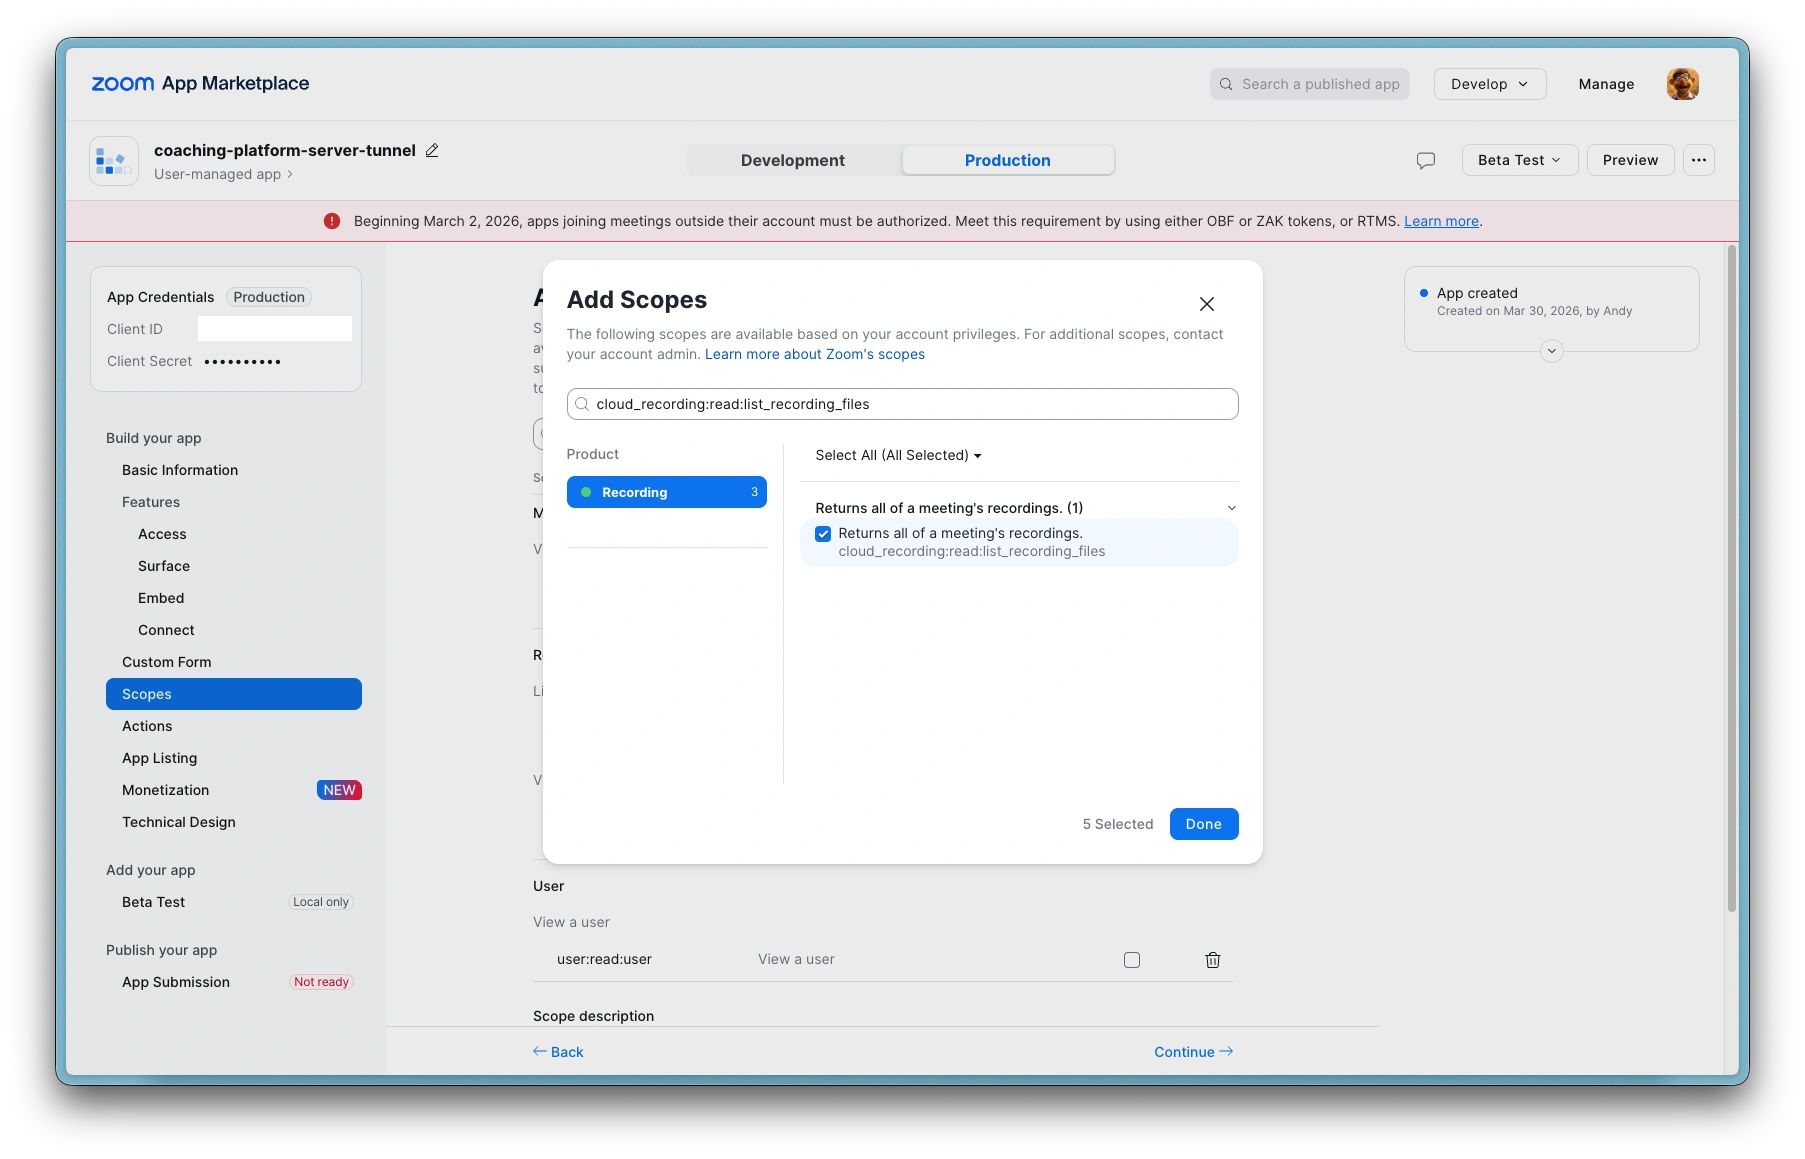
Zoom: Add scope: Returns all of a meetings recordings
Zoom: Scopes added
Zoom: Access secret token
Zoom: Access event types
Zoom: Access event validated URL
Platform: Save Zoom credentials and restart app
Platform: Connect Zoom and enter credentials
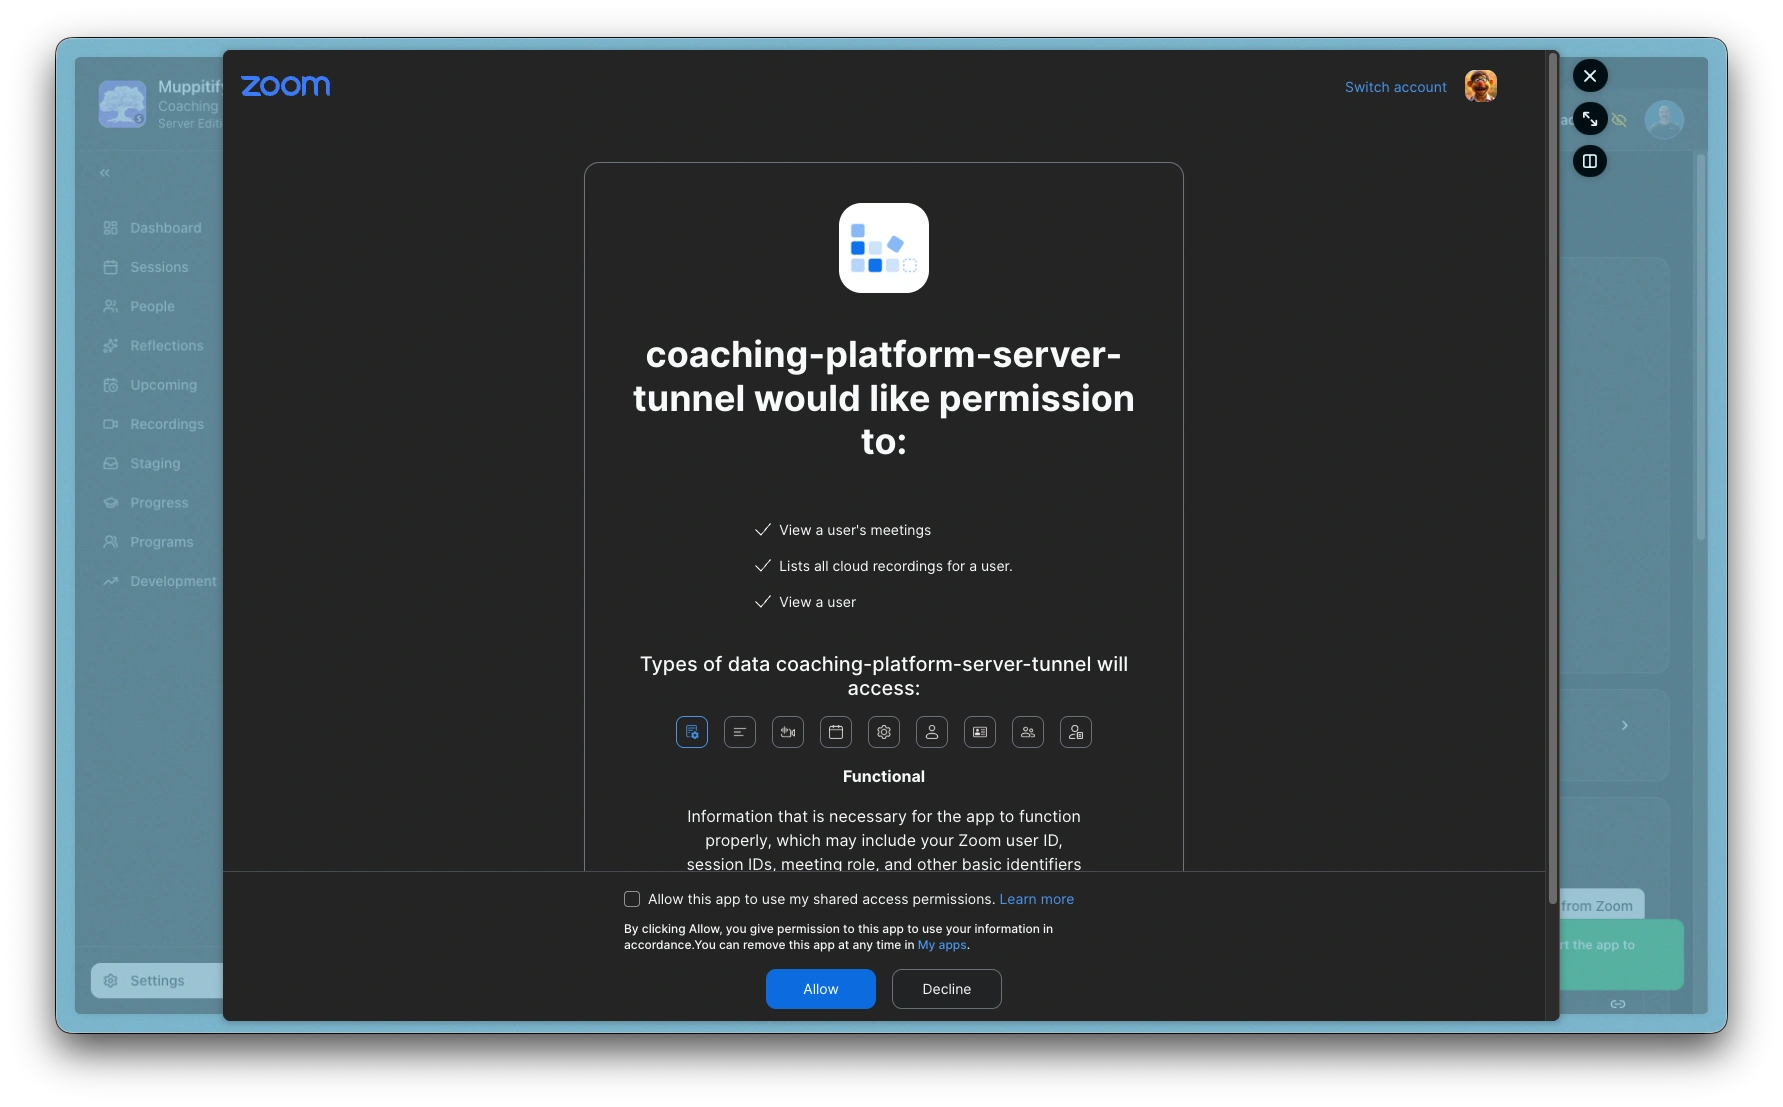
Zoom: Allow permission
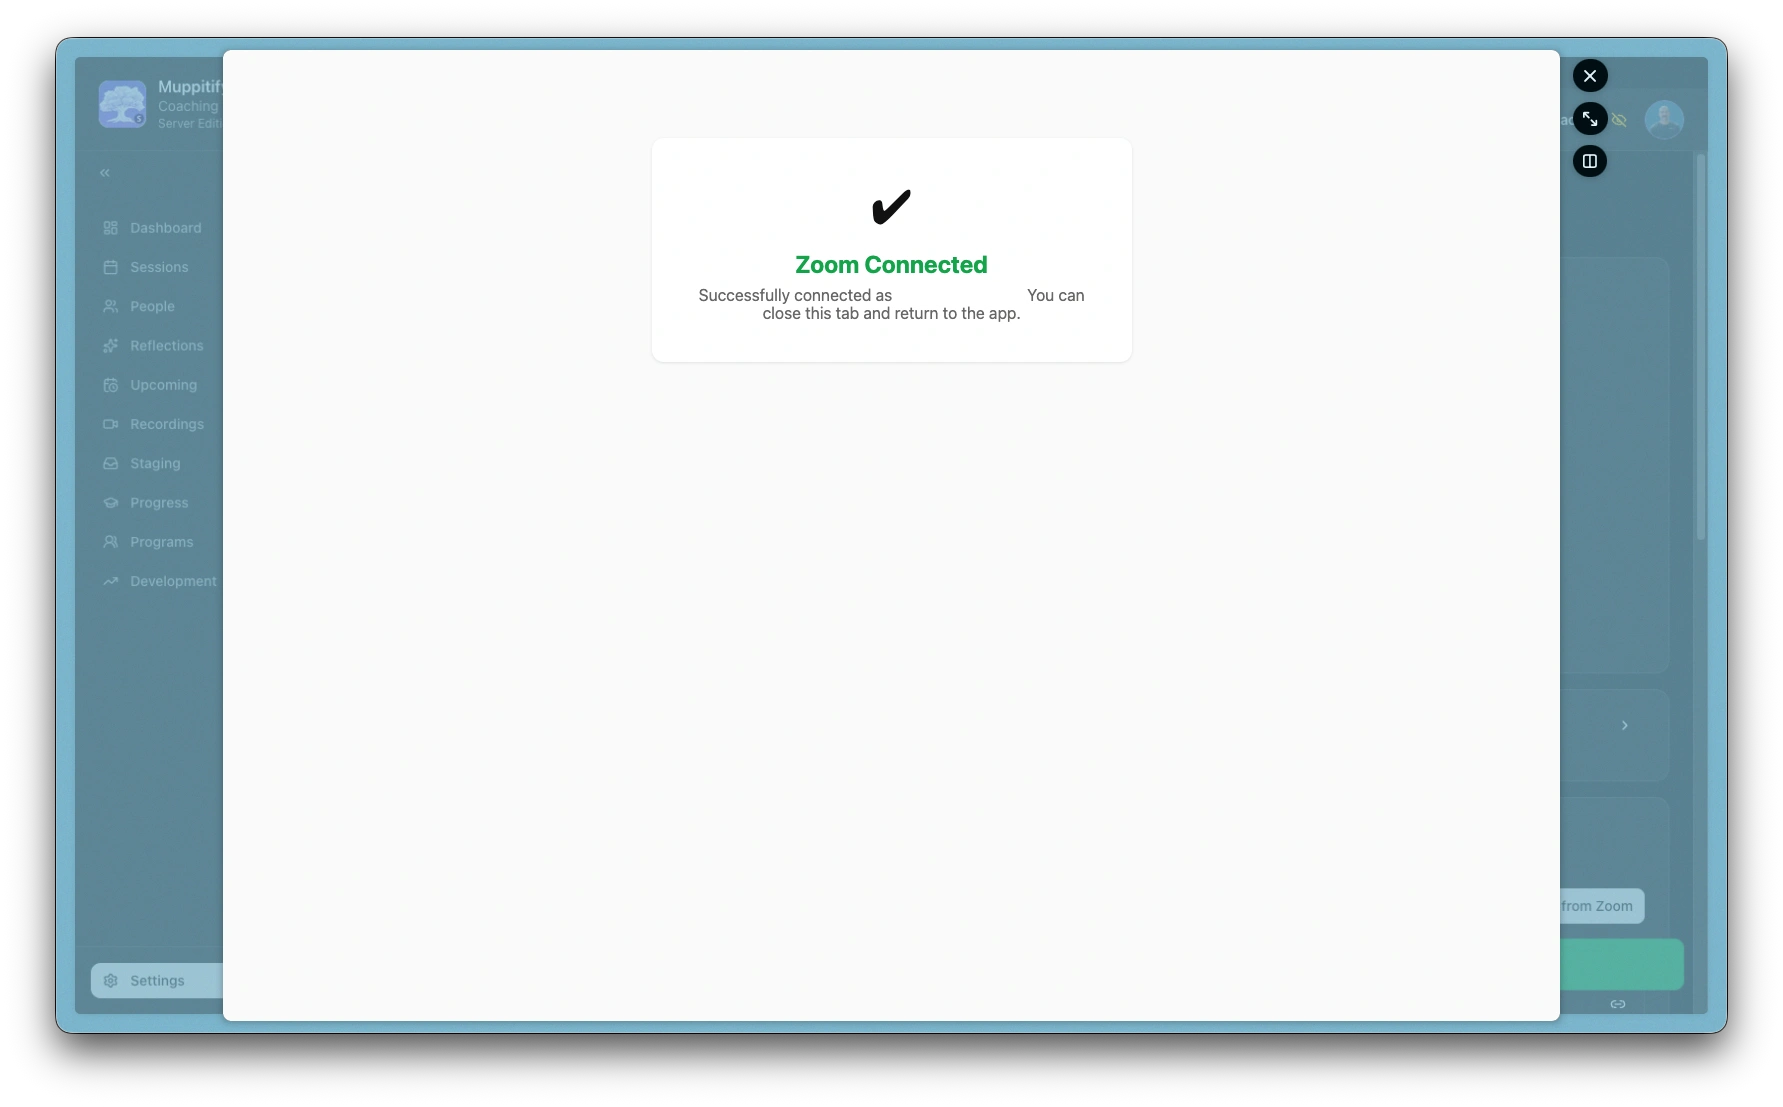
Zoom: Connected
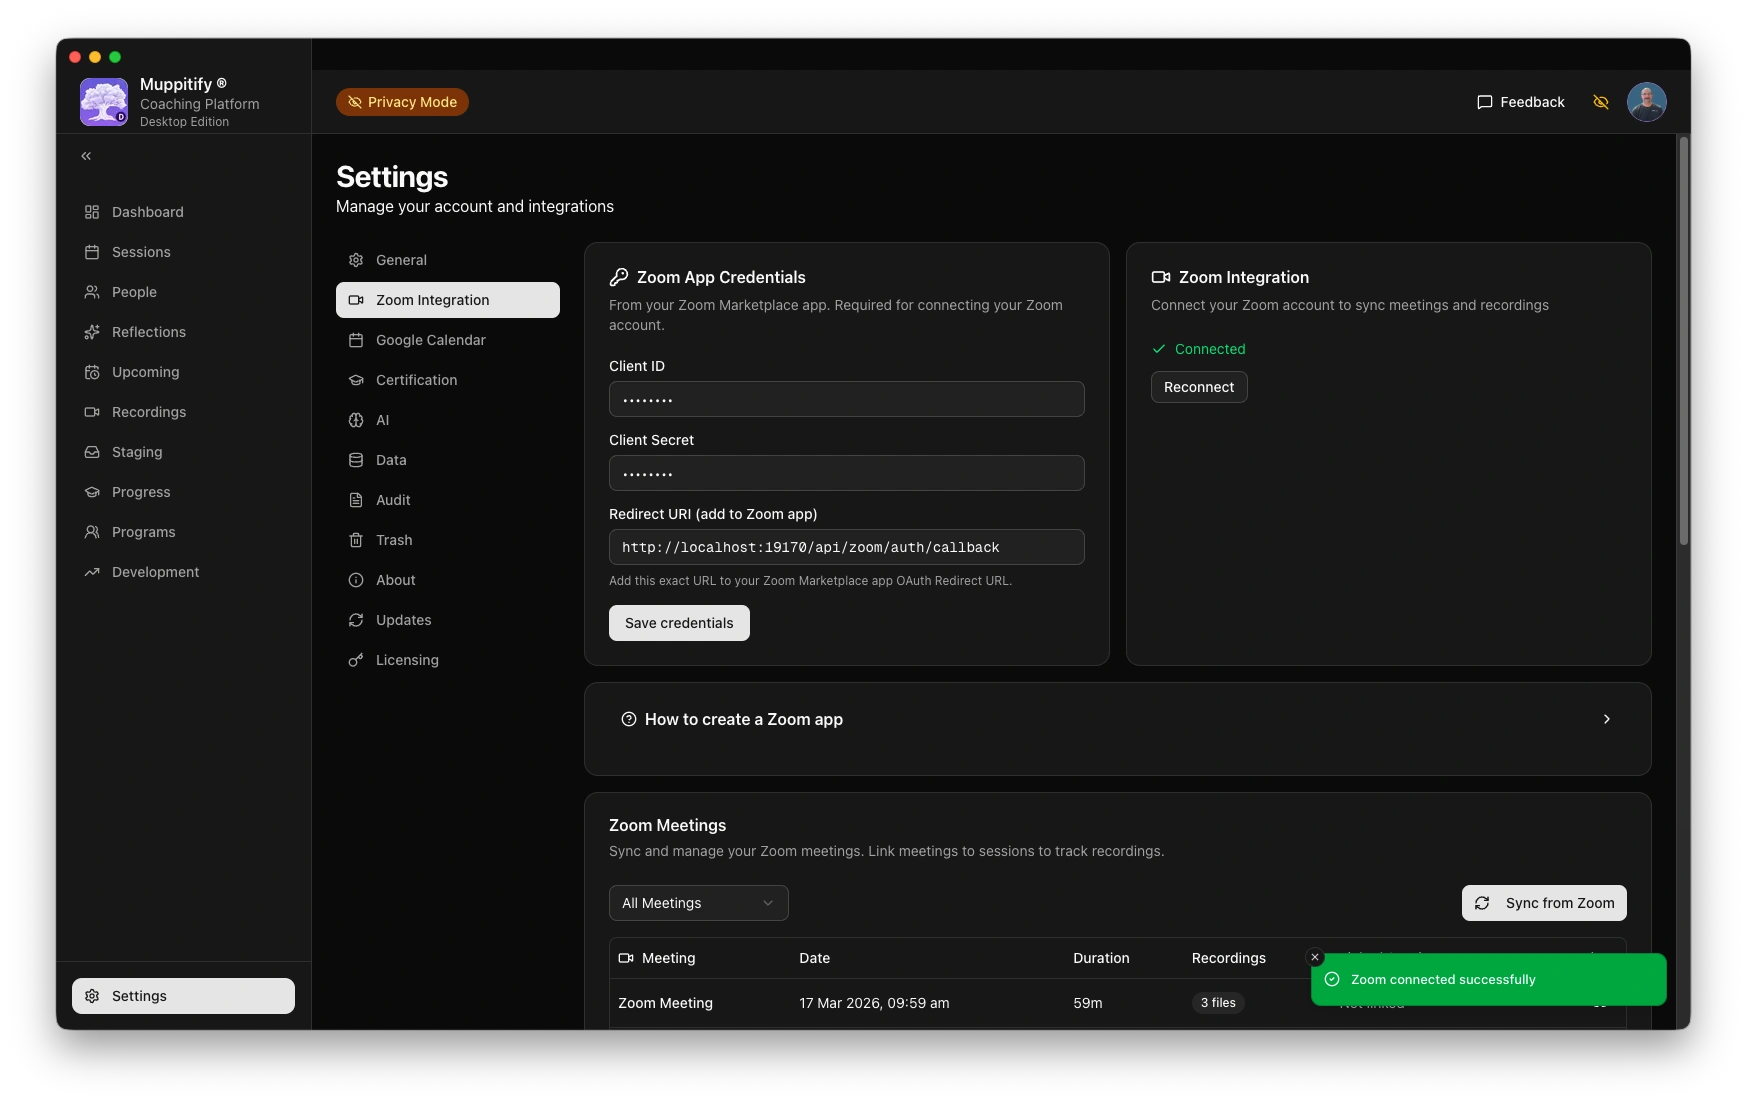
Platform: Zoom connected

Platform: Recordings
Platform: Fetch recordings
Platform: New Zoom staged recording
Platform: Import Zoom staged recording
Zoom: App has been added
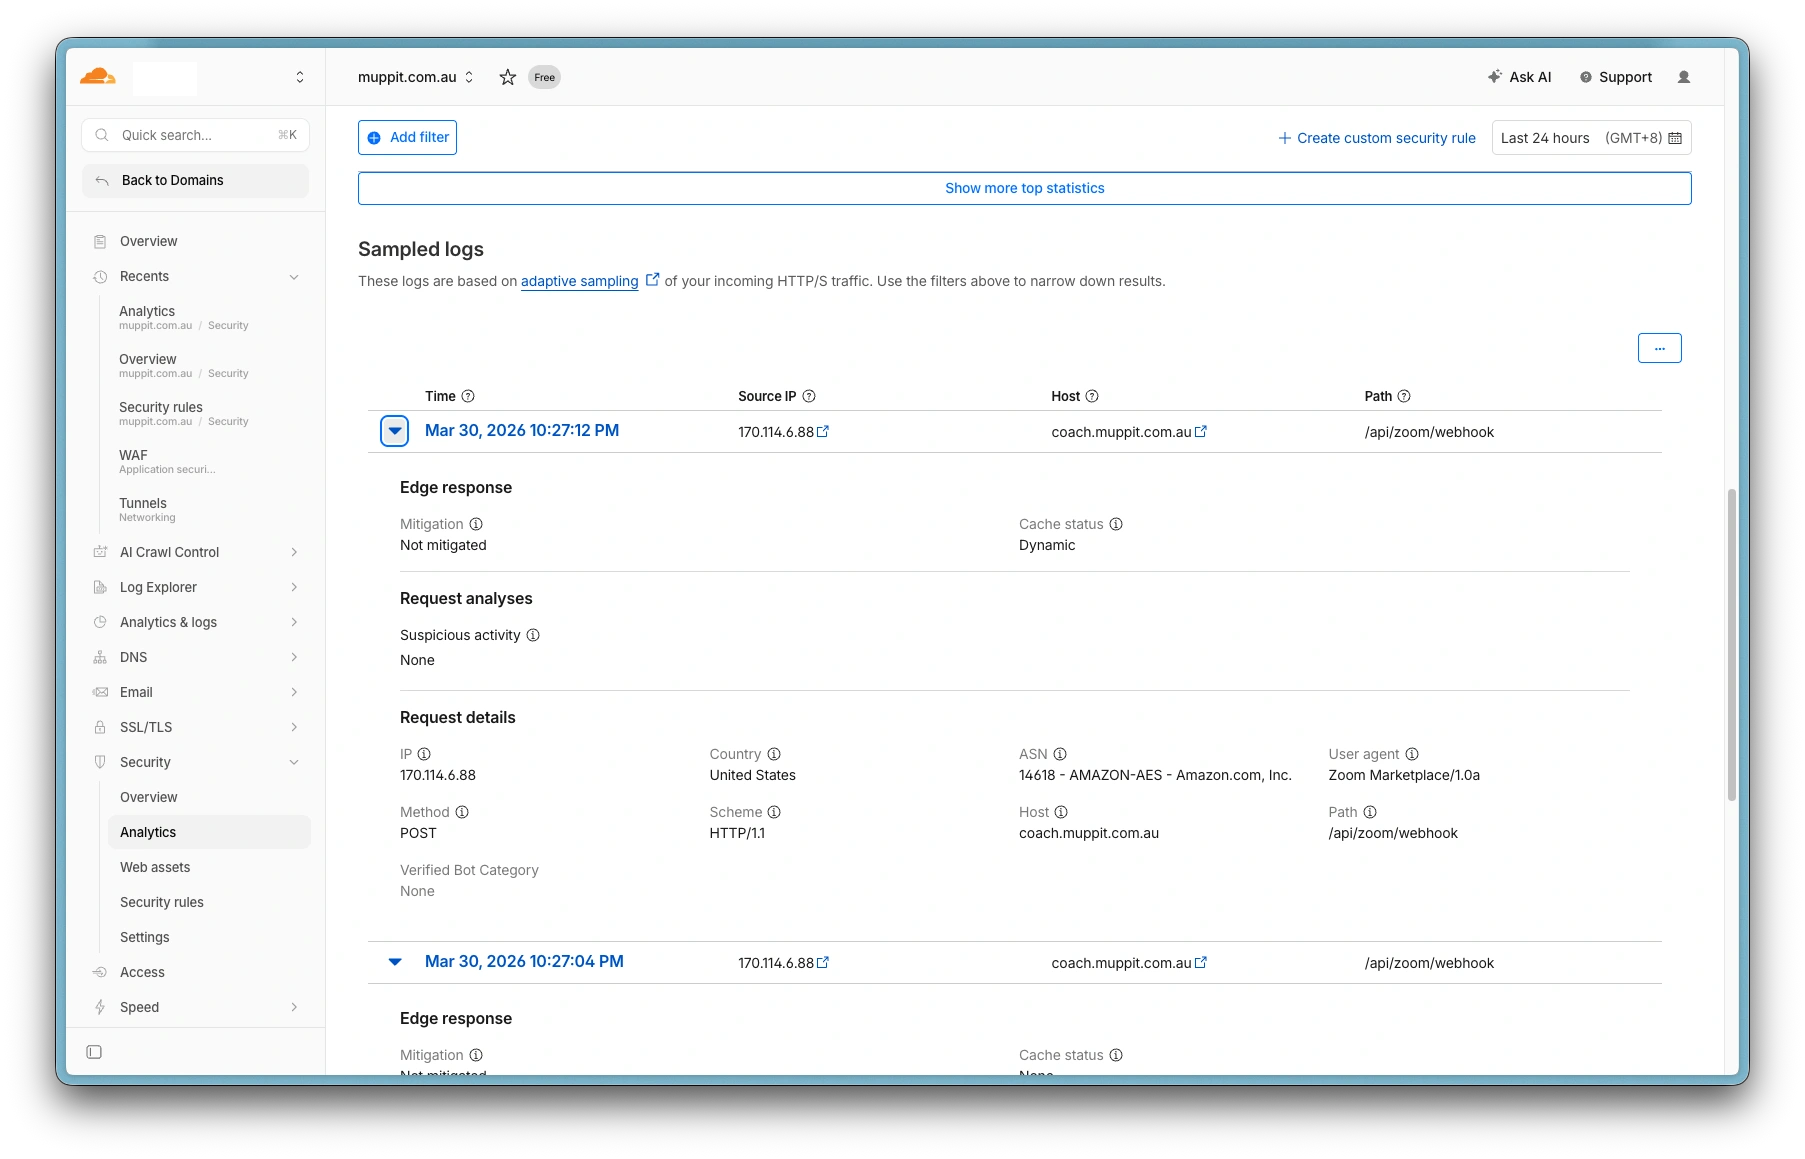
Cloudflare: Zoom webhook logs
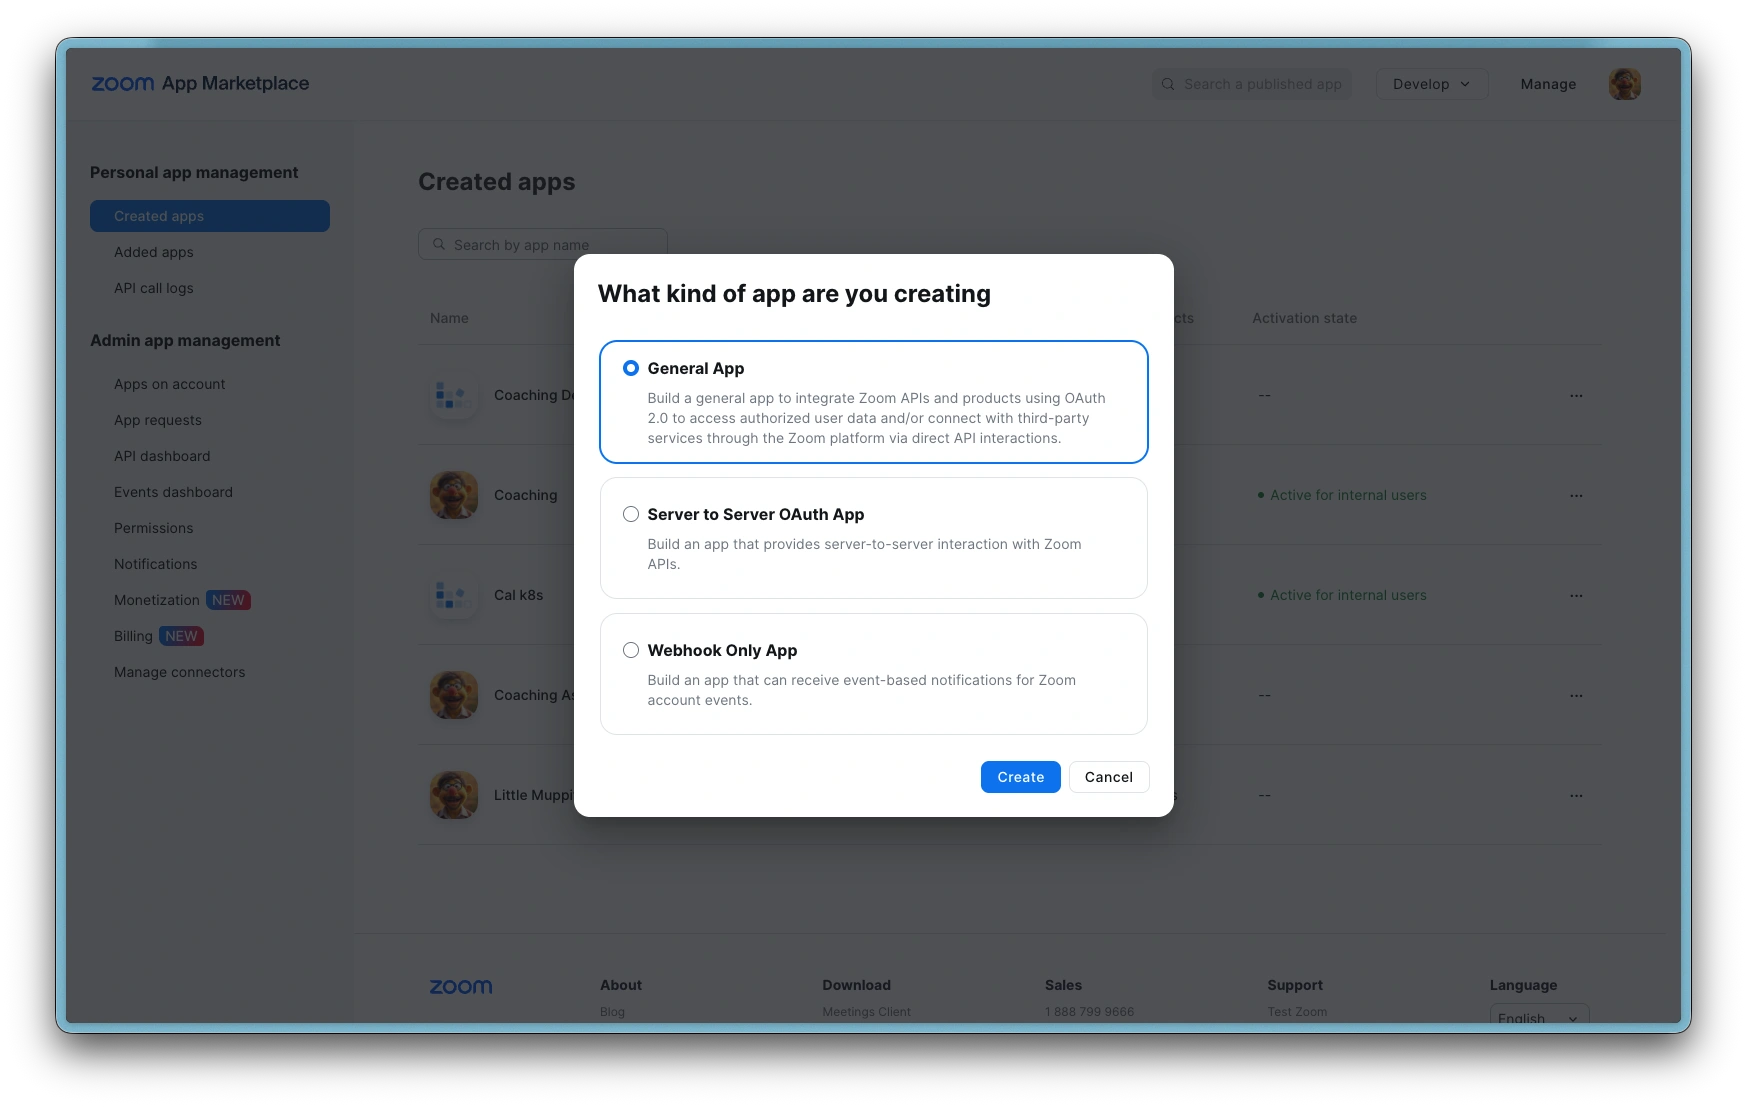
Step 1: Create a Zoom OAuth app
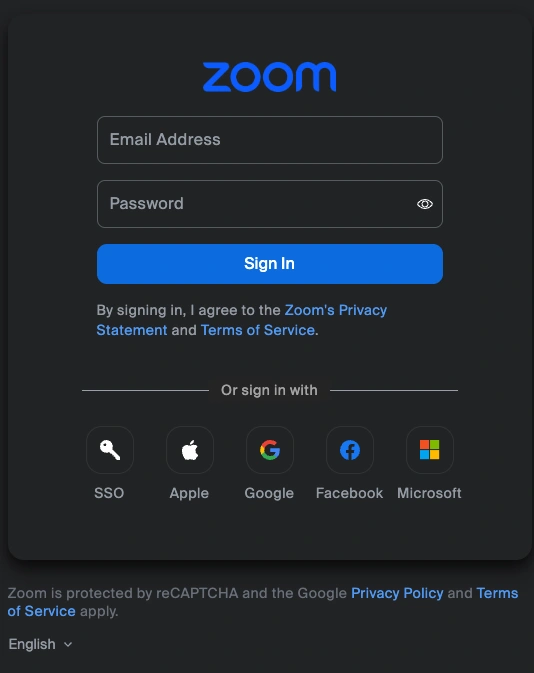
- Go to the Zoom App Marketplace and sign in with your Zoom account
- Click Develop in the top menu, then Build App
- Choose General App as the app type
- Give your app a name (e.g. "Coaching Platform") and click Create
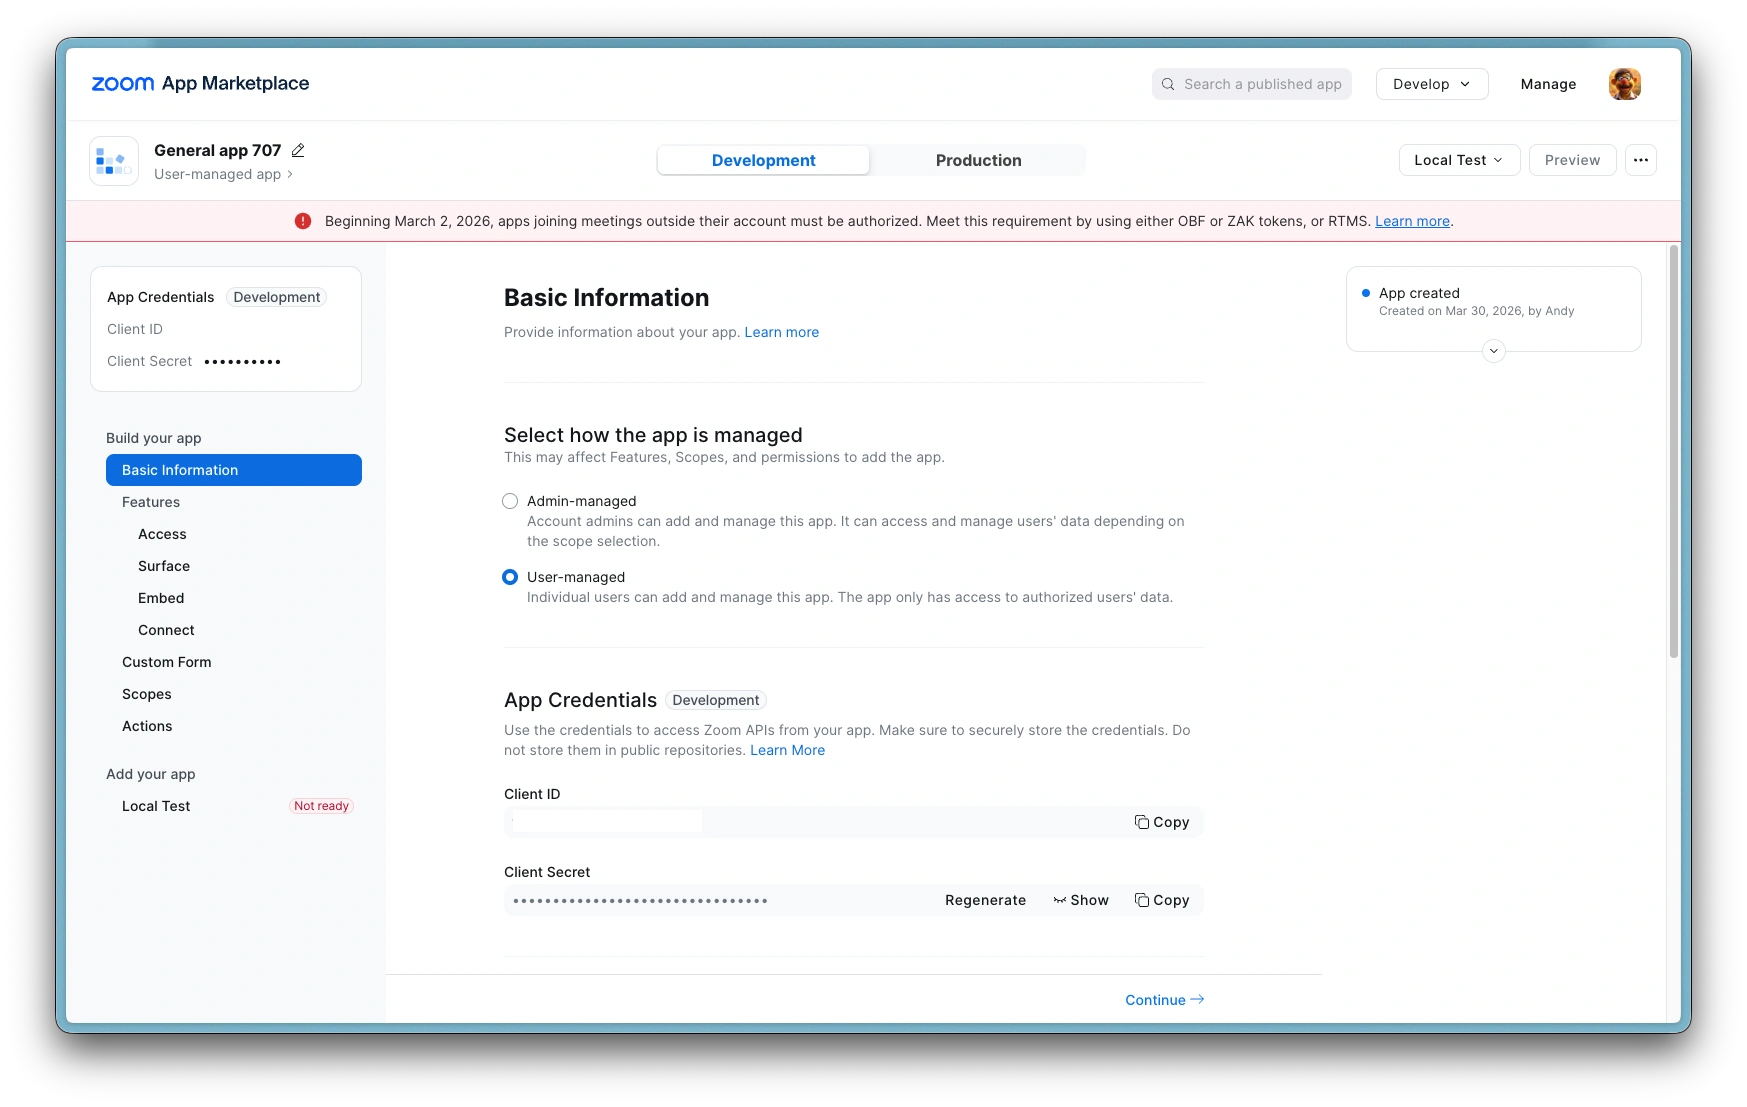
Zoom apps have Development and Production tabs with different credentials. Server Edition requires the Production tab because event subscriptions (webhooks) are only available there. Always copy credentials from the Production tab. The Development tab credentials will not work for Server Edition.
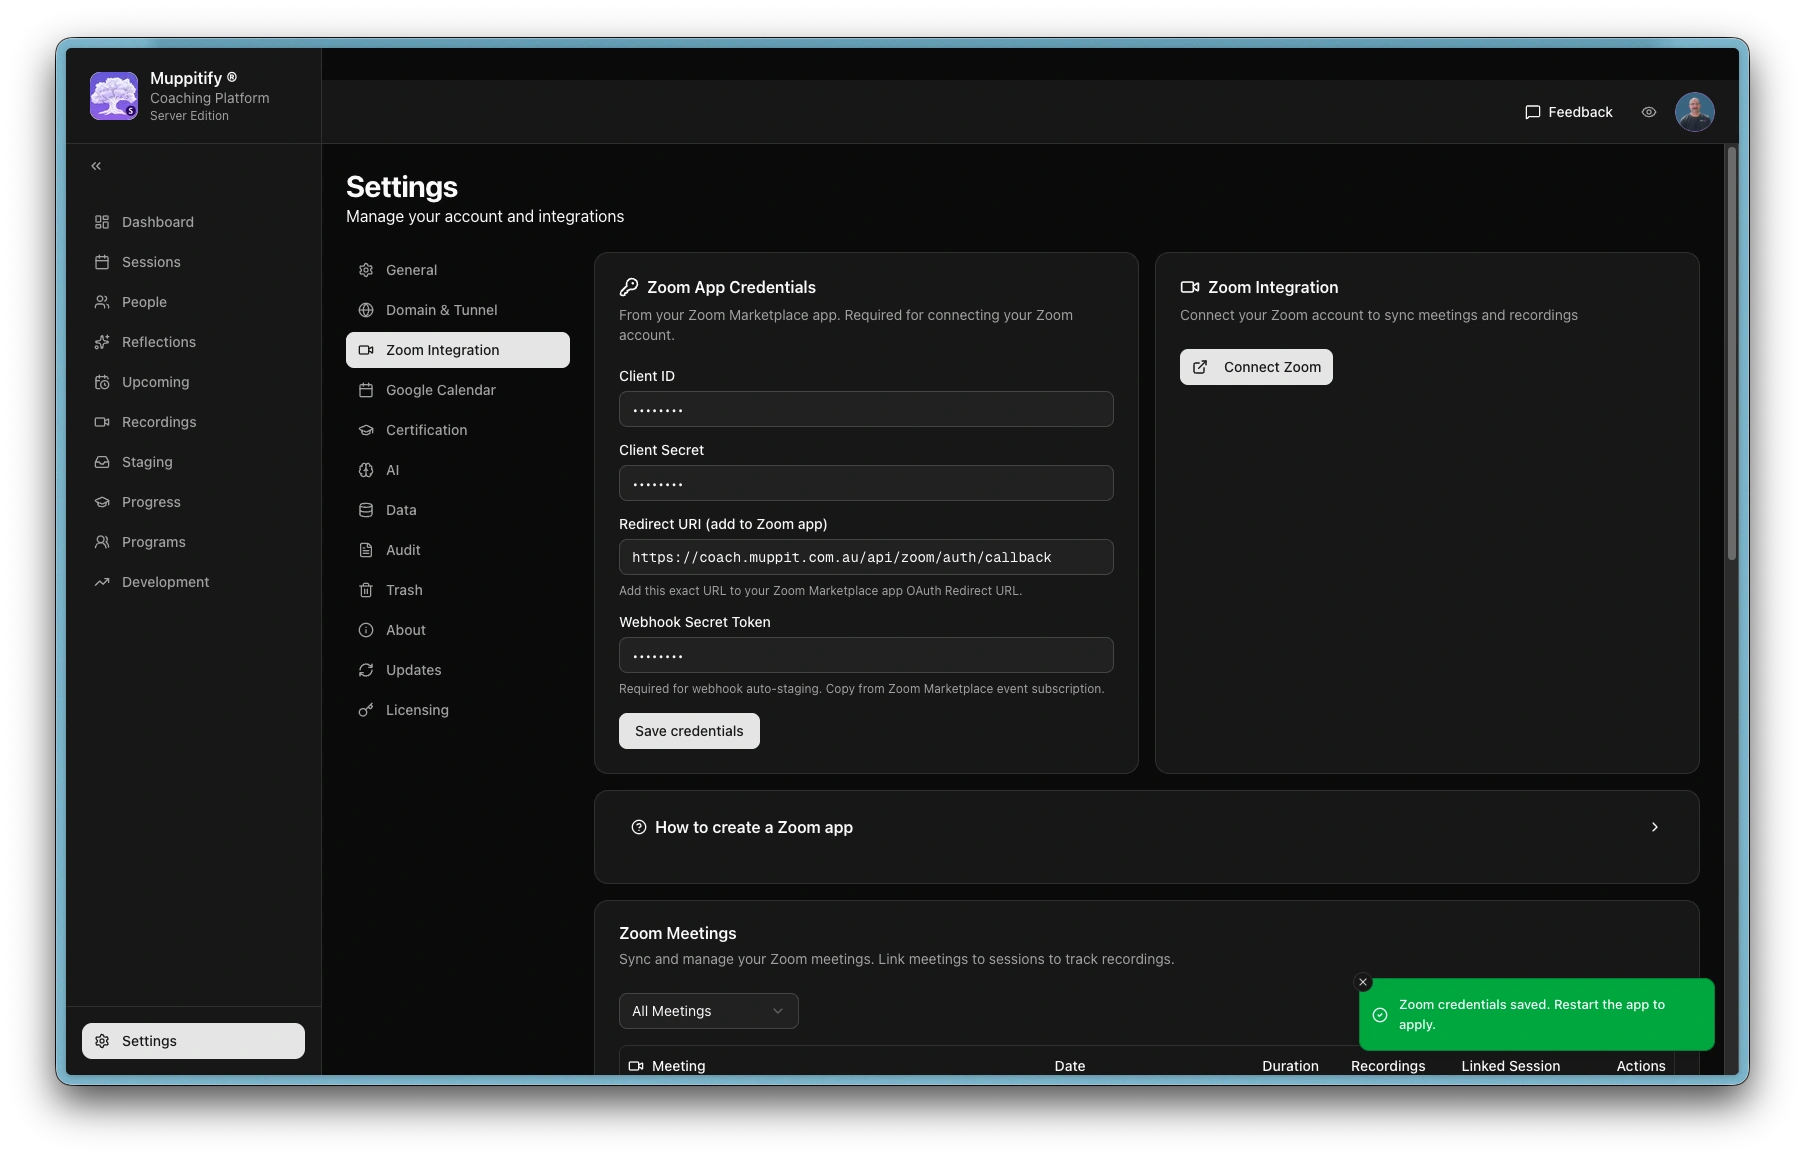
Step 2: Configure credentials
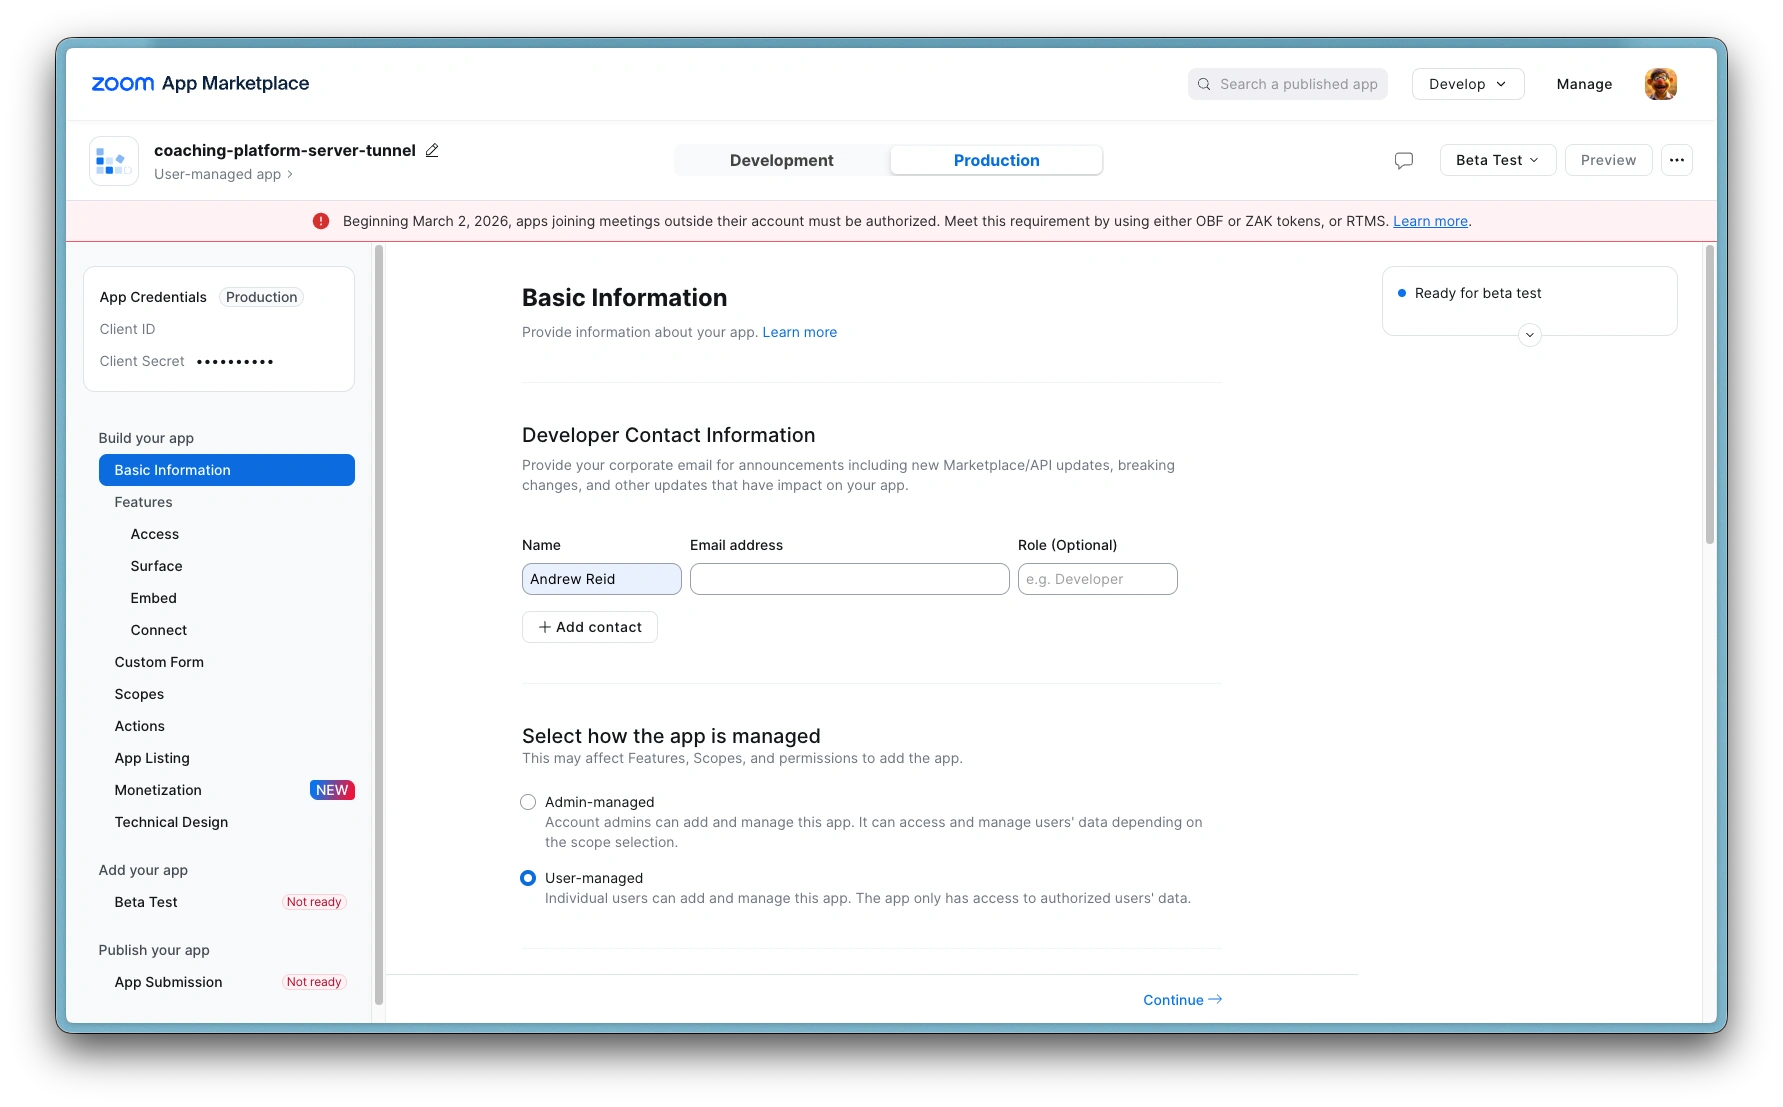
- In the Zoom Marketplace app, switch to the Production tab
- Copy the Client ID and Client Secret from the Production tab
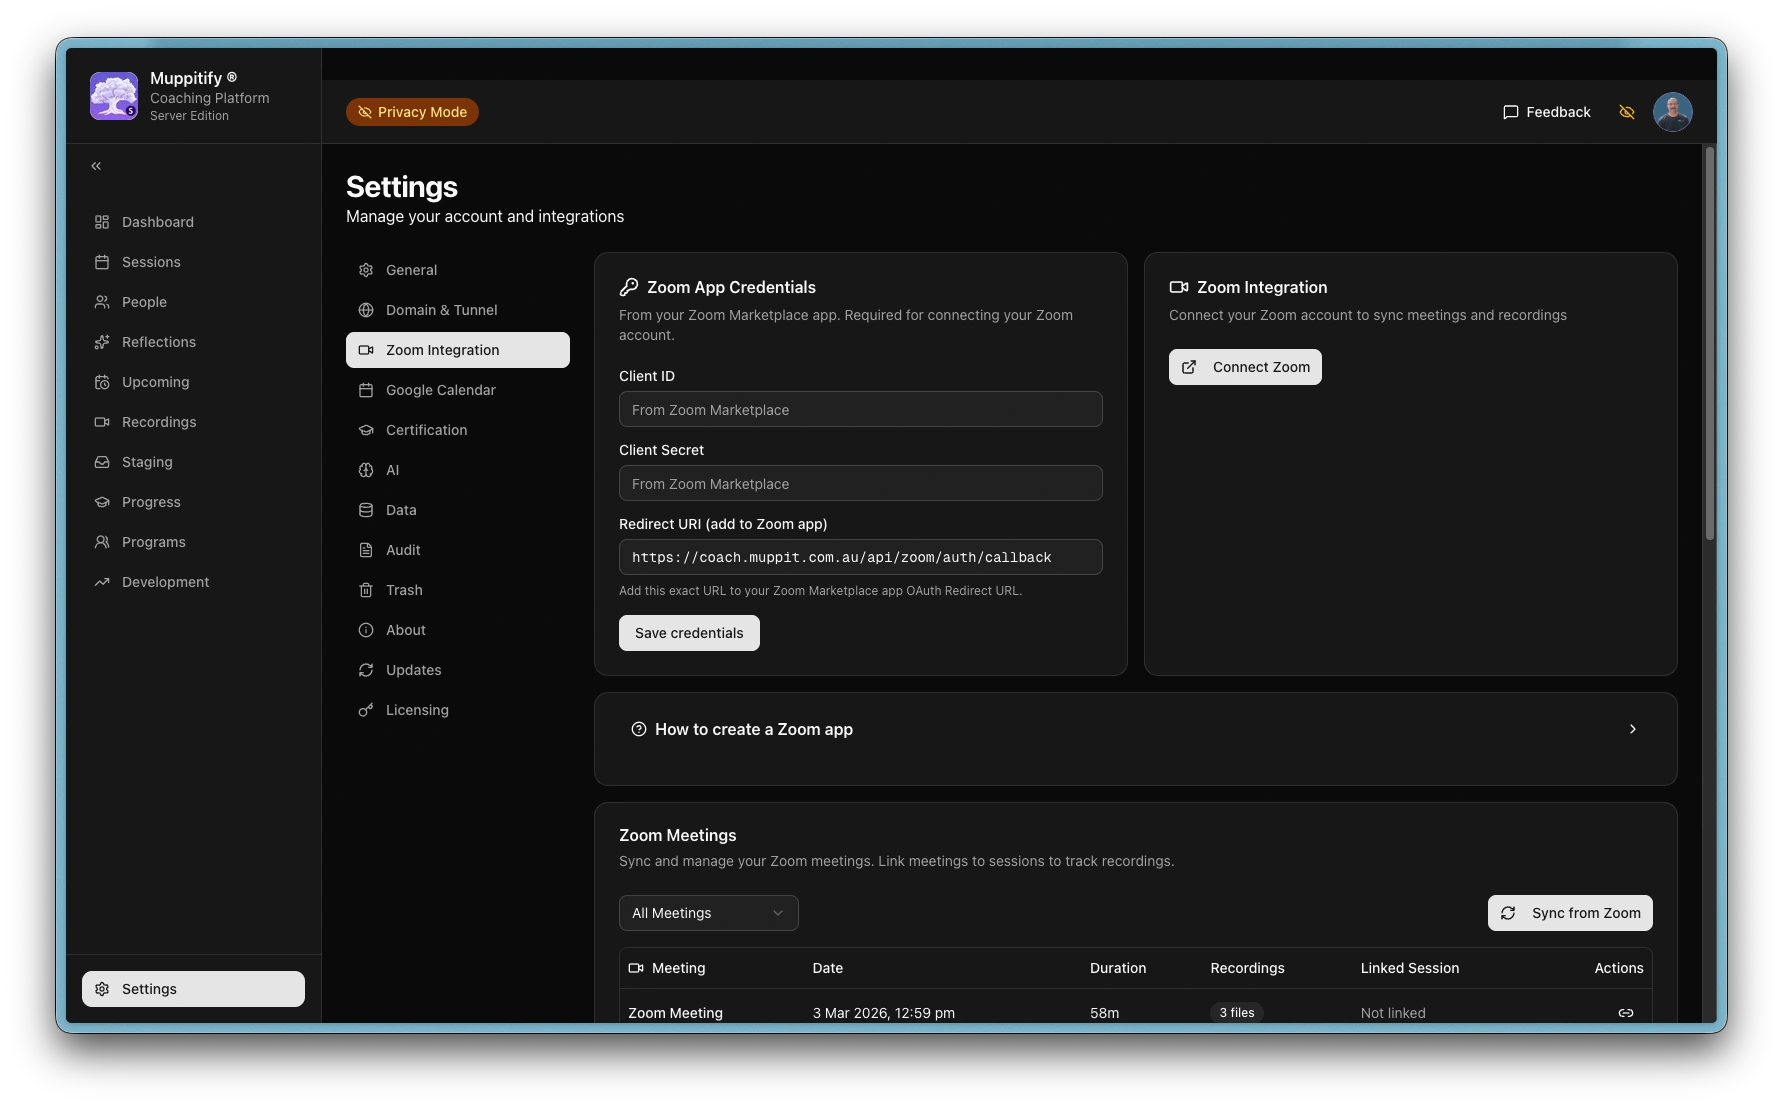
- Open the coaching platform and go to Settings > Zoom
- Copy the Redirect URI shown in the app:
- Desktop Edition:
http://localhost:19170/api/zoom/auth/callback - Server Edition:
https://coach.yourdomain.com/api/zoom/auth/callback(replace with your public domain)
- Desktop Edition:
- Back in the Zoom Marketplace, paste this Redirect URI into the OAuth Redirect URL field
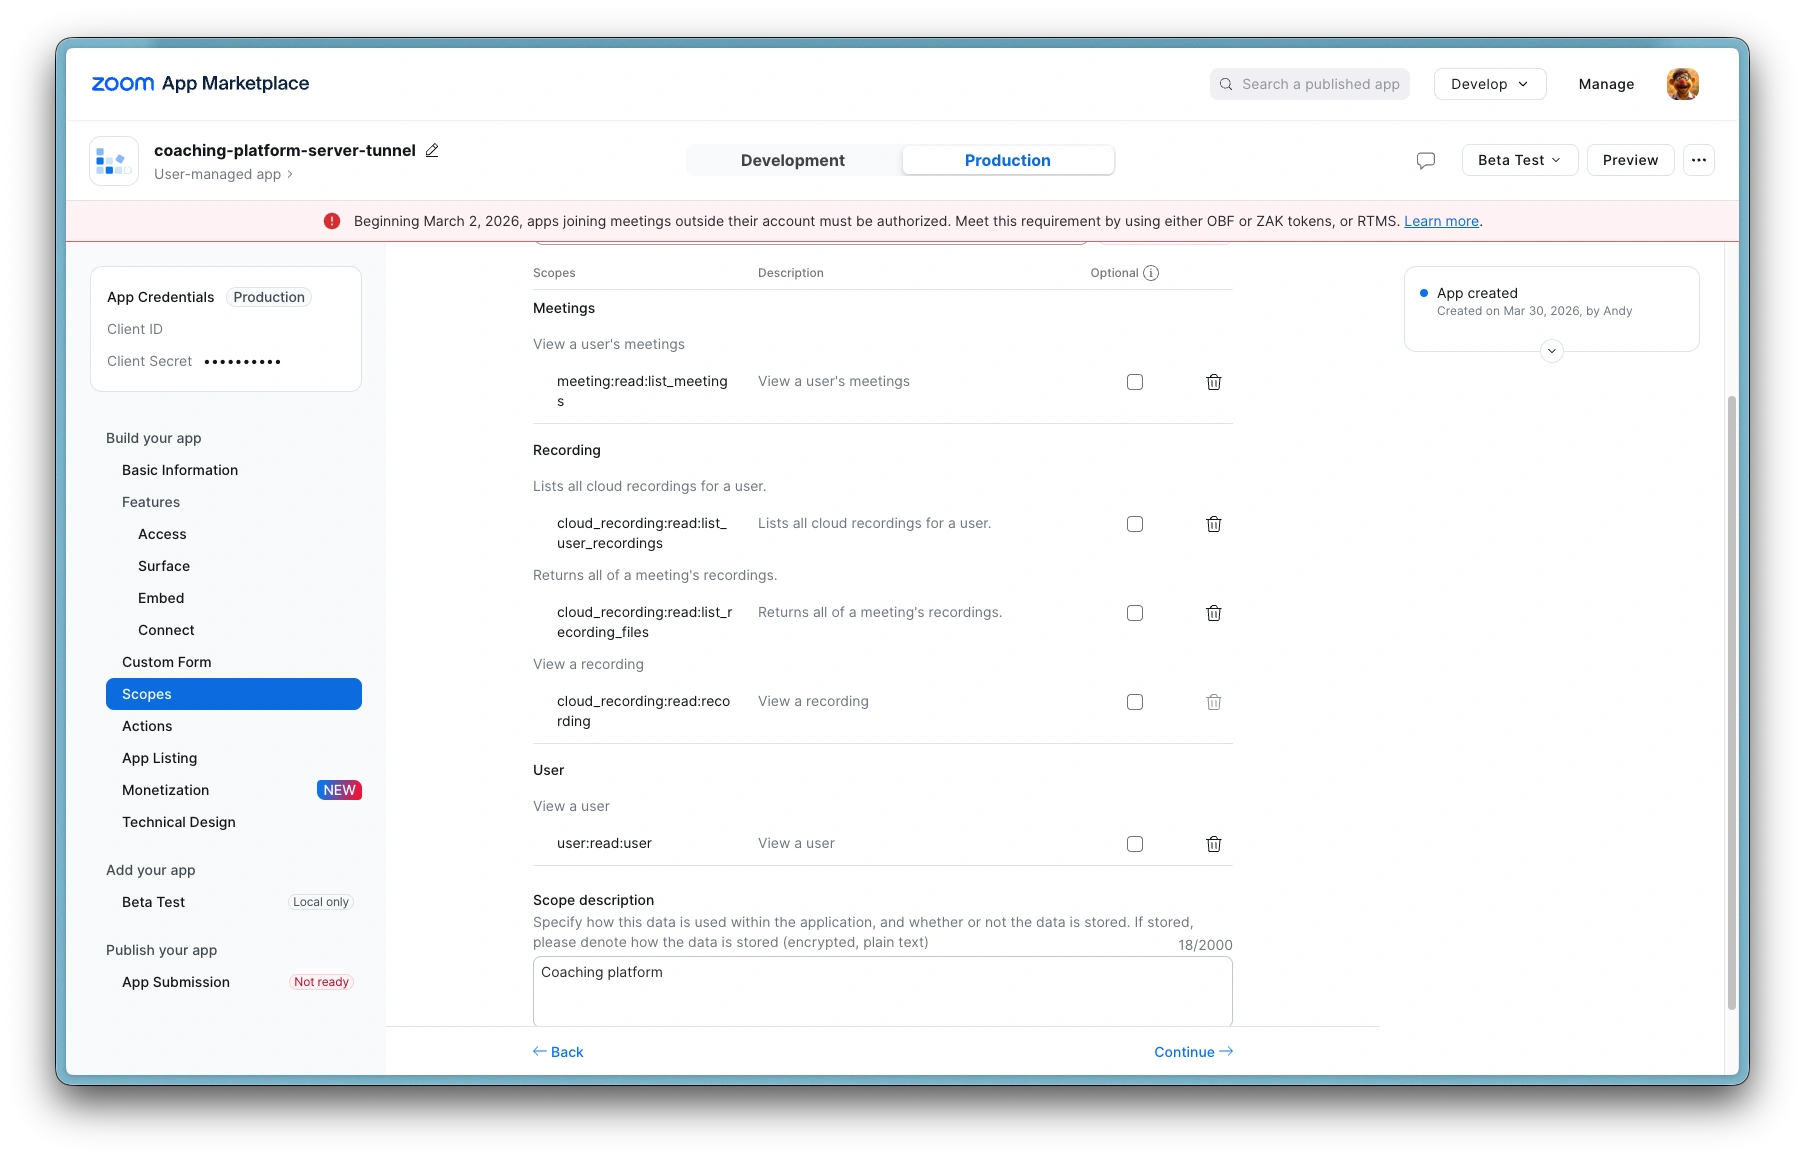
Step 3: Add required scopes
Under Scopes in the Zoom Marketplace, add the following:
| Scope | Purpose |
|---|---|
user:read:user | Read your Zoom profile |
meeting:read:list_meetings | List your meetings |
cloud_recording:read:list_user_recordings | Access your cloud recordings |
cloud_recording:read:list_recording_files | Access recording files (required for webhook auto-staging) |
If you cannot find these exact scope names, search for "user read", "meeting read", "cloud recording read", and "list recording files" in the scope search box. Zoom periodically updates scope naming conventions. Use the closest matching read-only scopes for user, meetings, and recordings.
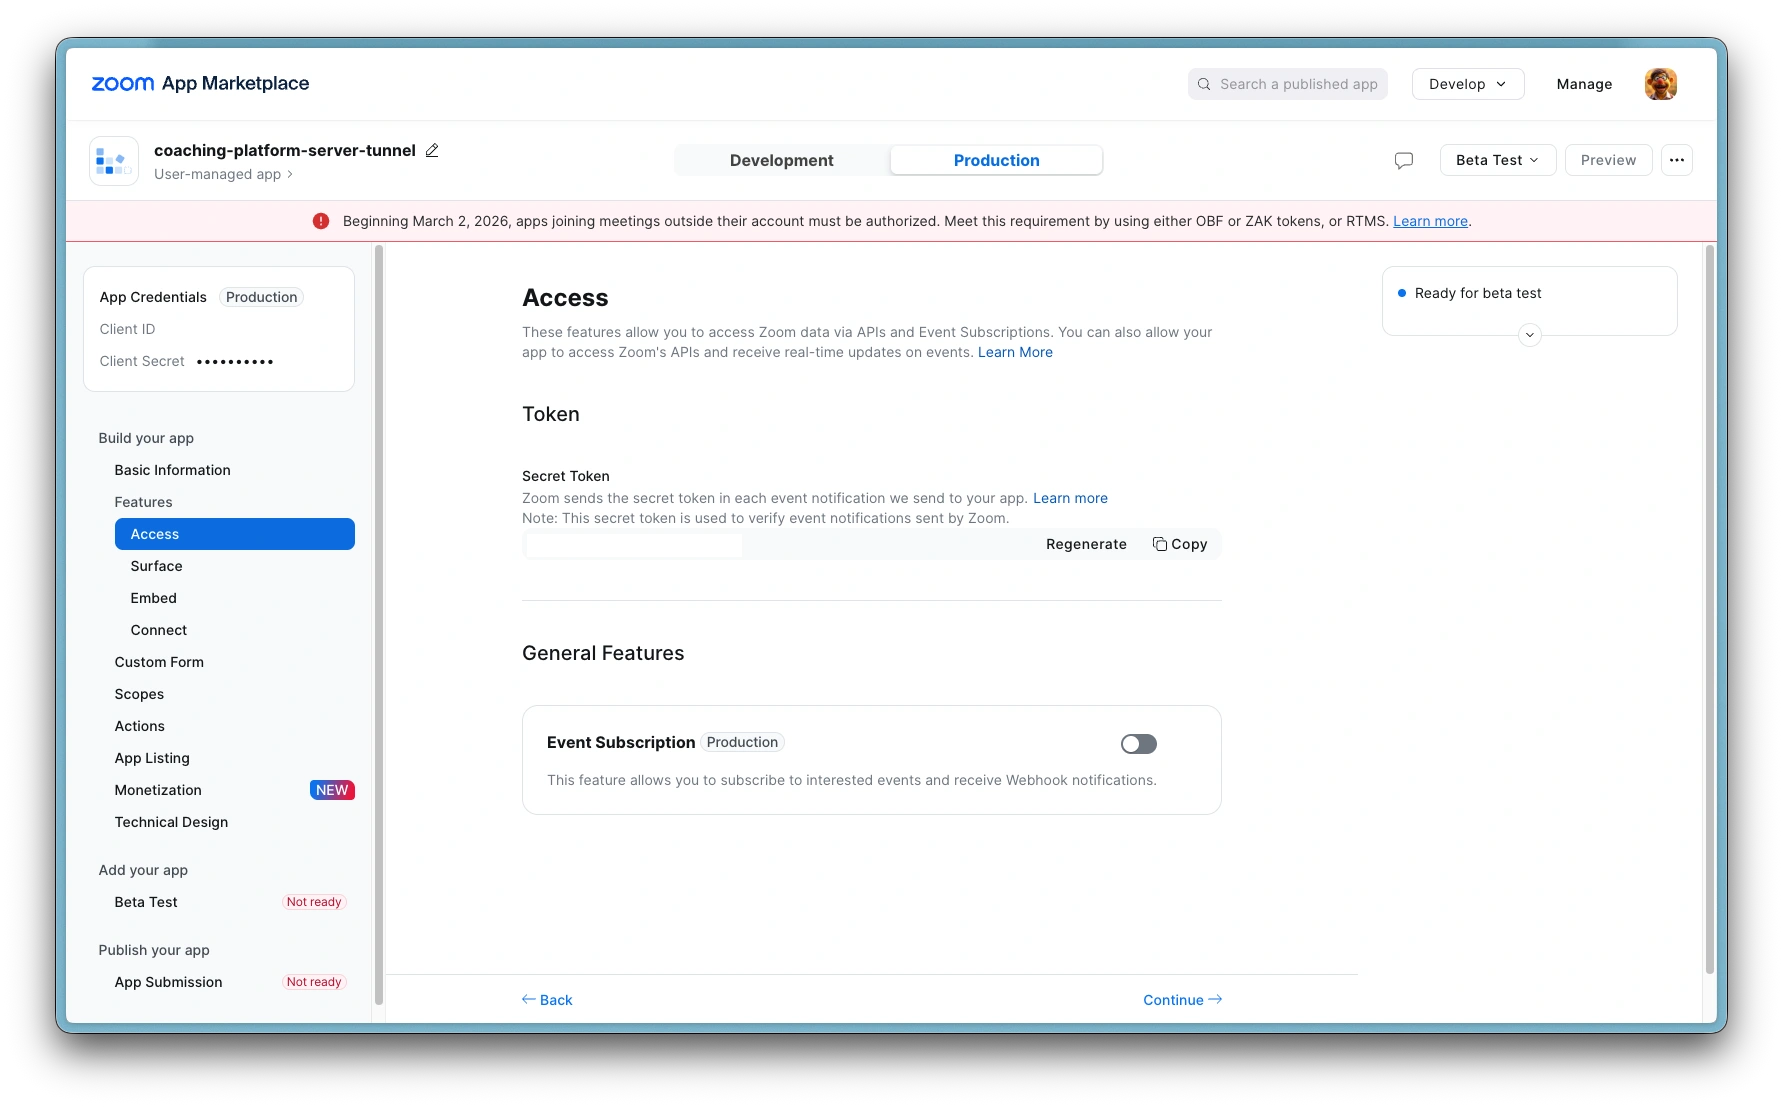
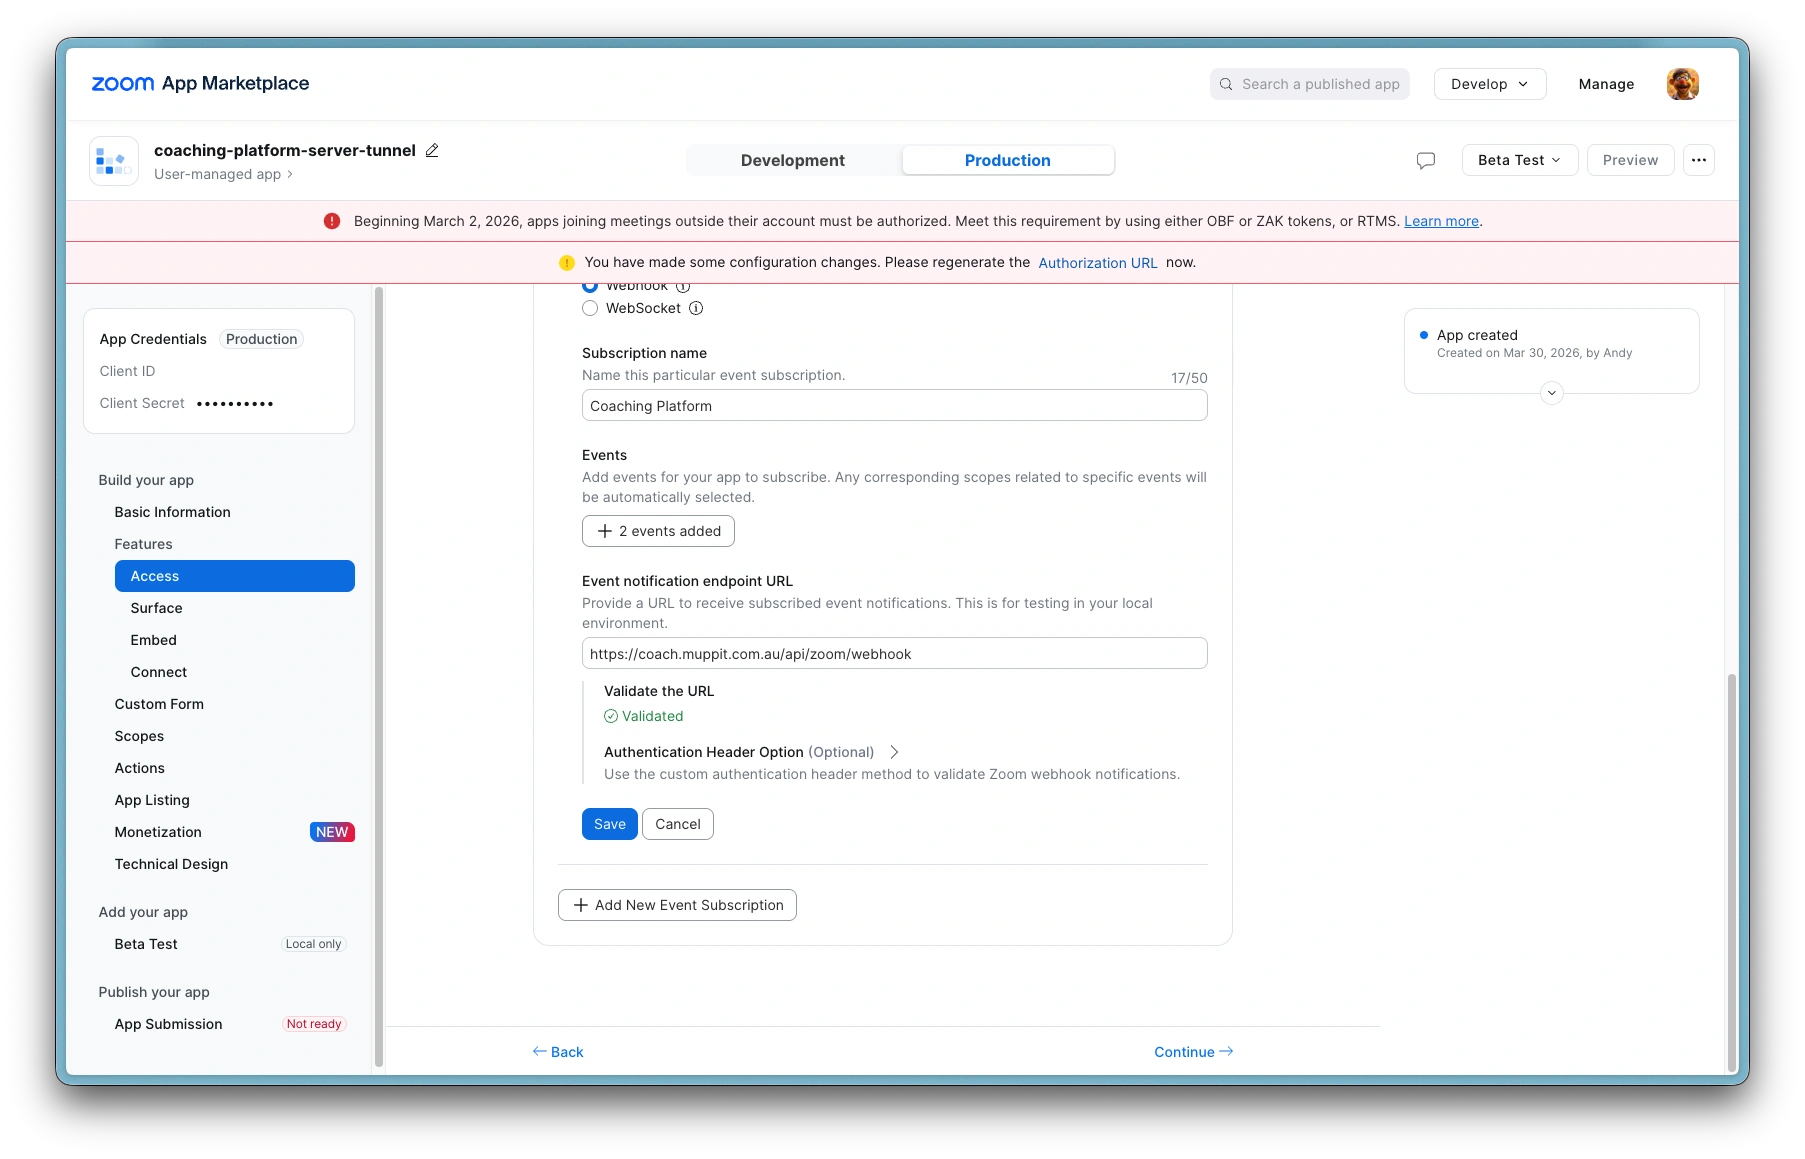
Step 4: Add webhook event subscription (Server Edition with domain and tunnel configured)
If you're using the Server Edition with a public domain, add a webhook so recordings are automatically staged when meetings end.
Zoom validates the webhook URL immediately when you click Validate. The server must have the Webhook Secret Token configured and be running with it loaded. Complete steps 4a-4c in order, then validate.
4a. Create the subscription in Zoom (do not validate yet)
- In the Zoom Marketplace app, go to Feature > Event Subscriptions
- Click Add Event Subscription
- Set the Event notification endpoint URL to
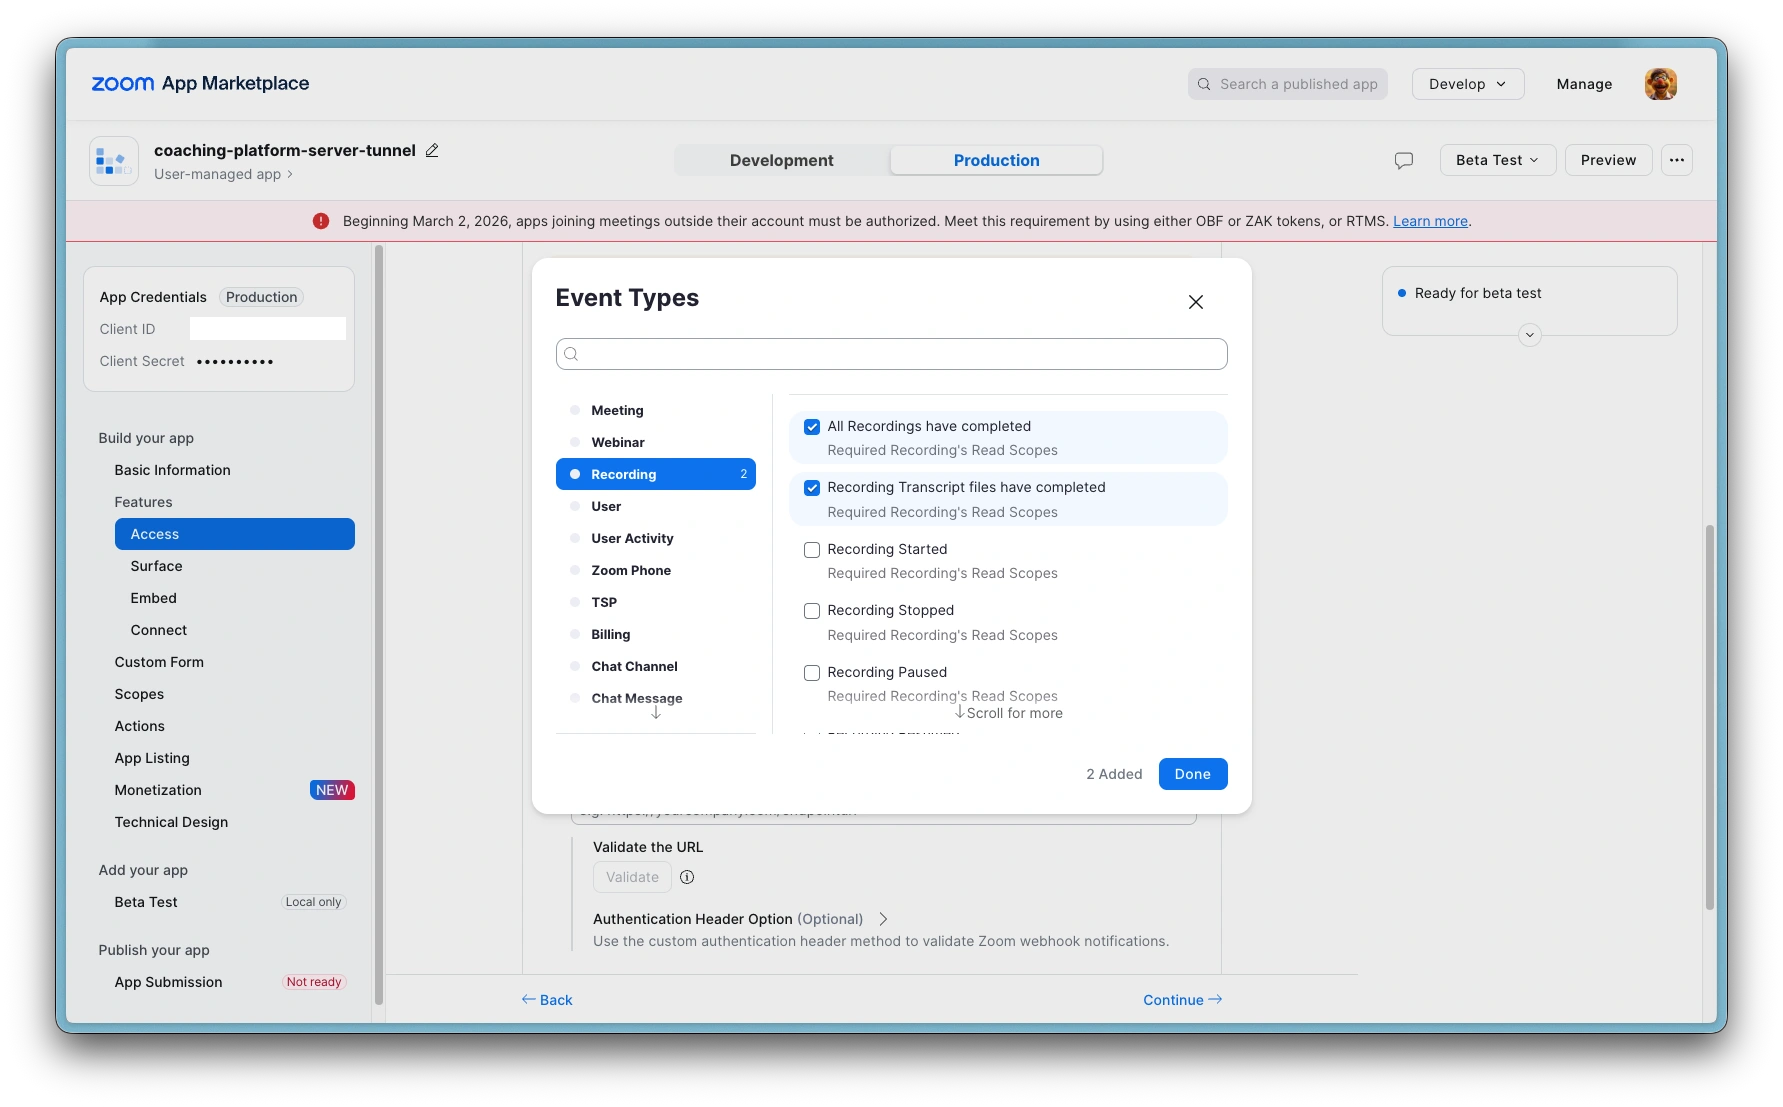
https://coach.yourdomain.com/api/zoom/webhook - Click Add Events, expand Recording, and select
recording.completed - Click Done and Save
- Copy the Webhook Secret Token shown on the subscription page
4b. Save the secret token in the coaching platform
- In the coaching platform, go to Settings > Zoom Integration
- Enter the Webhook Secret Token you copied from Zoom
- Click Save credentials
4c. Restart the container
The webhook secret is loaded from settings.json at container startup. You must restart for the new token to take effect:
docker compose restart
4d. Validate the webhook URL
- Back in the Zoom Marketplace, click Validate next to the webhook URL
- Zoom sends a challenge request to your server, which signs it with the webhook secret and responds
- You should see a green checkmark confirming validation succeeded
If validation fails, check:
- The URL is
https://yourdomain.com/api/zoom/webhook(not/api/zoom/auth/callback) - The container has been restarted after saving the webhook secret
- The tunnel is running and WAF rules allow
/api/zoom/webhook - Bot Fight Mode is disabled in Cloudflare
Webhook auto-staging requires a Cloudflare Tunnel with WAF rules configured and Bot Fight Mode disabled.
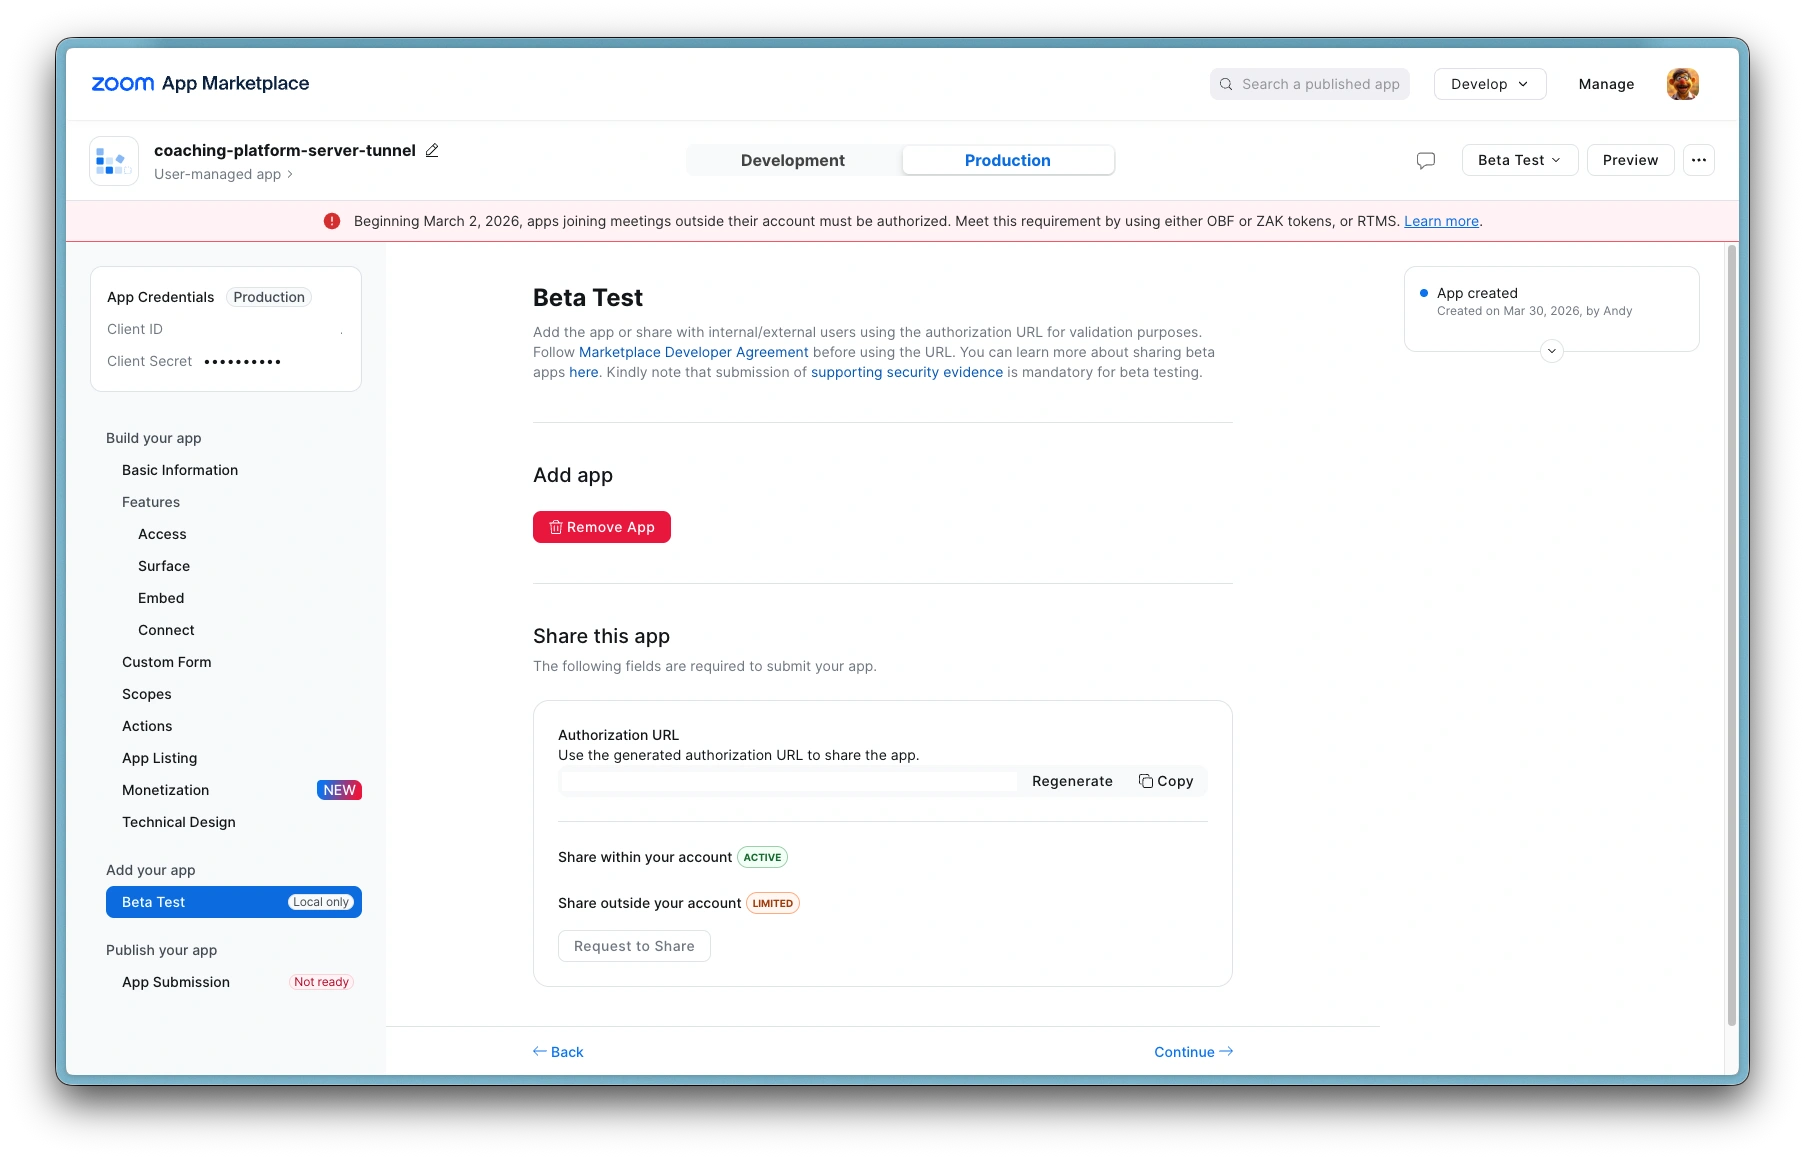
Step 4e: Activate via Beta Test (Server Edition only)
Before OAuth and webhooks will work, the Zoom app must be activated:
- In the Zoom Marketplace app, go to the Beta Test page
- Complete the two required sections: Features - Access and App Listing (basic details are sufficient)
- Click Add app now to activate the app for your account
Once activated, you can proceed to connect your Zoom account.
Step 5: Save and connect
- Click Save in the Zoom Marketplace
- Back in the coaching platform, click Save credentials
- Click Connect Zoom. Your default browser will open to authorise the connection
- After authorising, you'll see a success page in the browser. Return to the app.
- The Zoom connection card should now show "Connected as your@email.com"
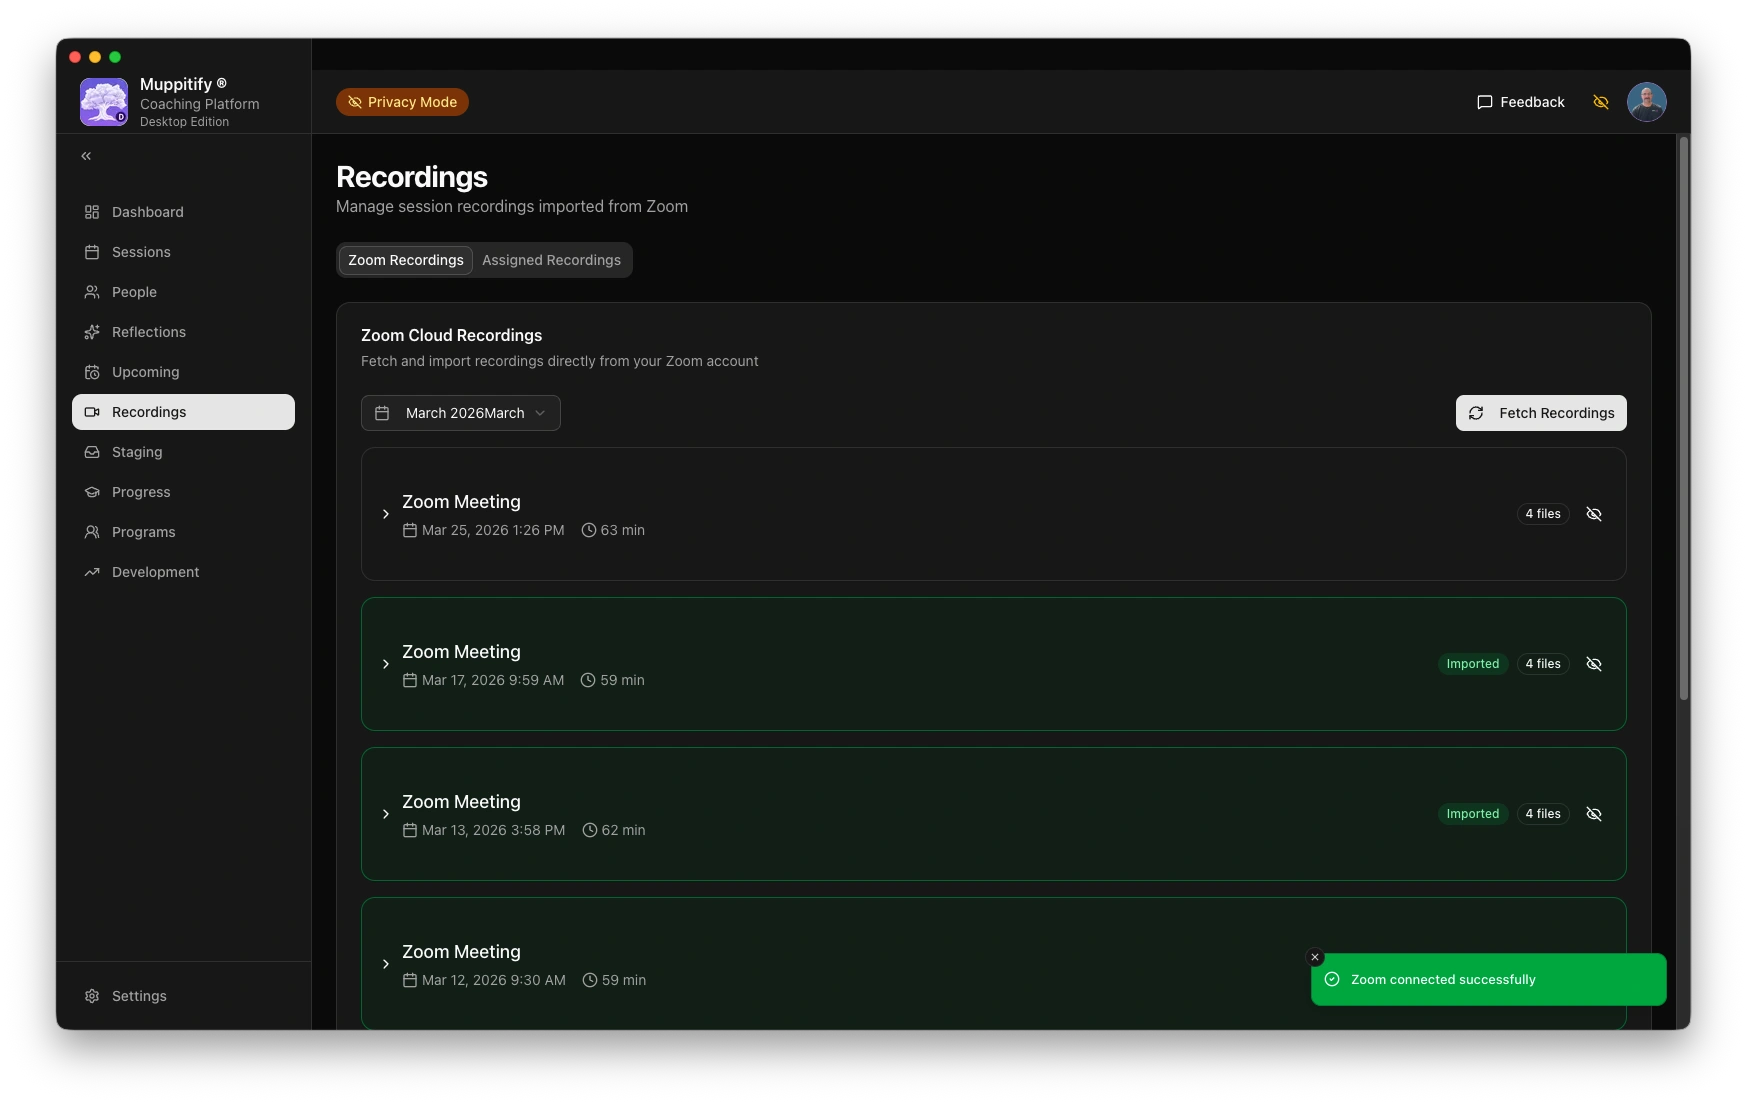
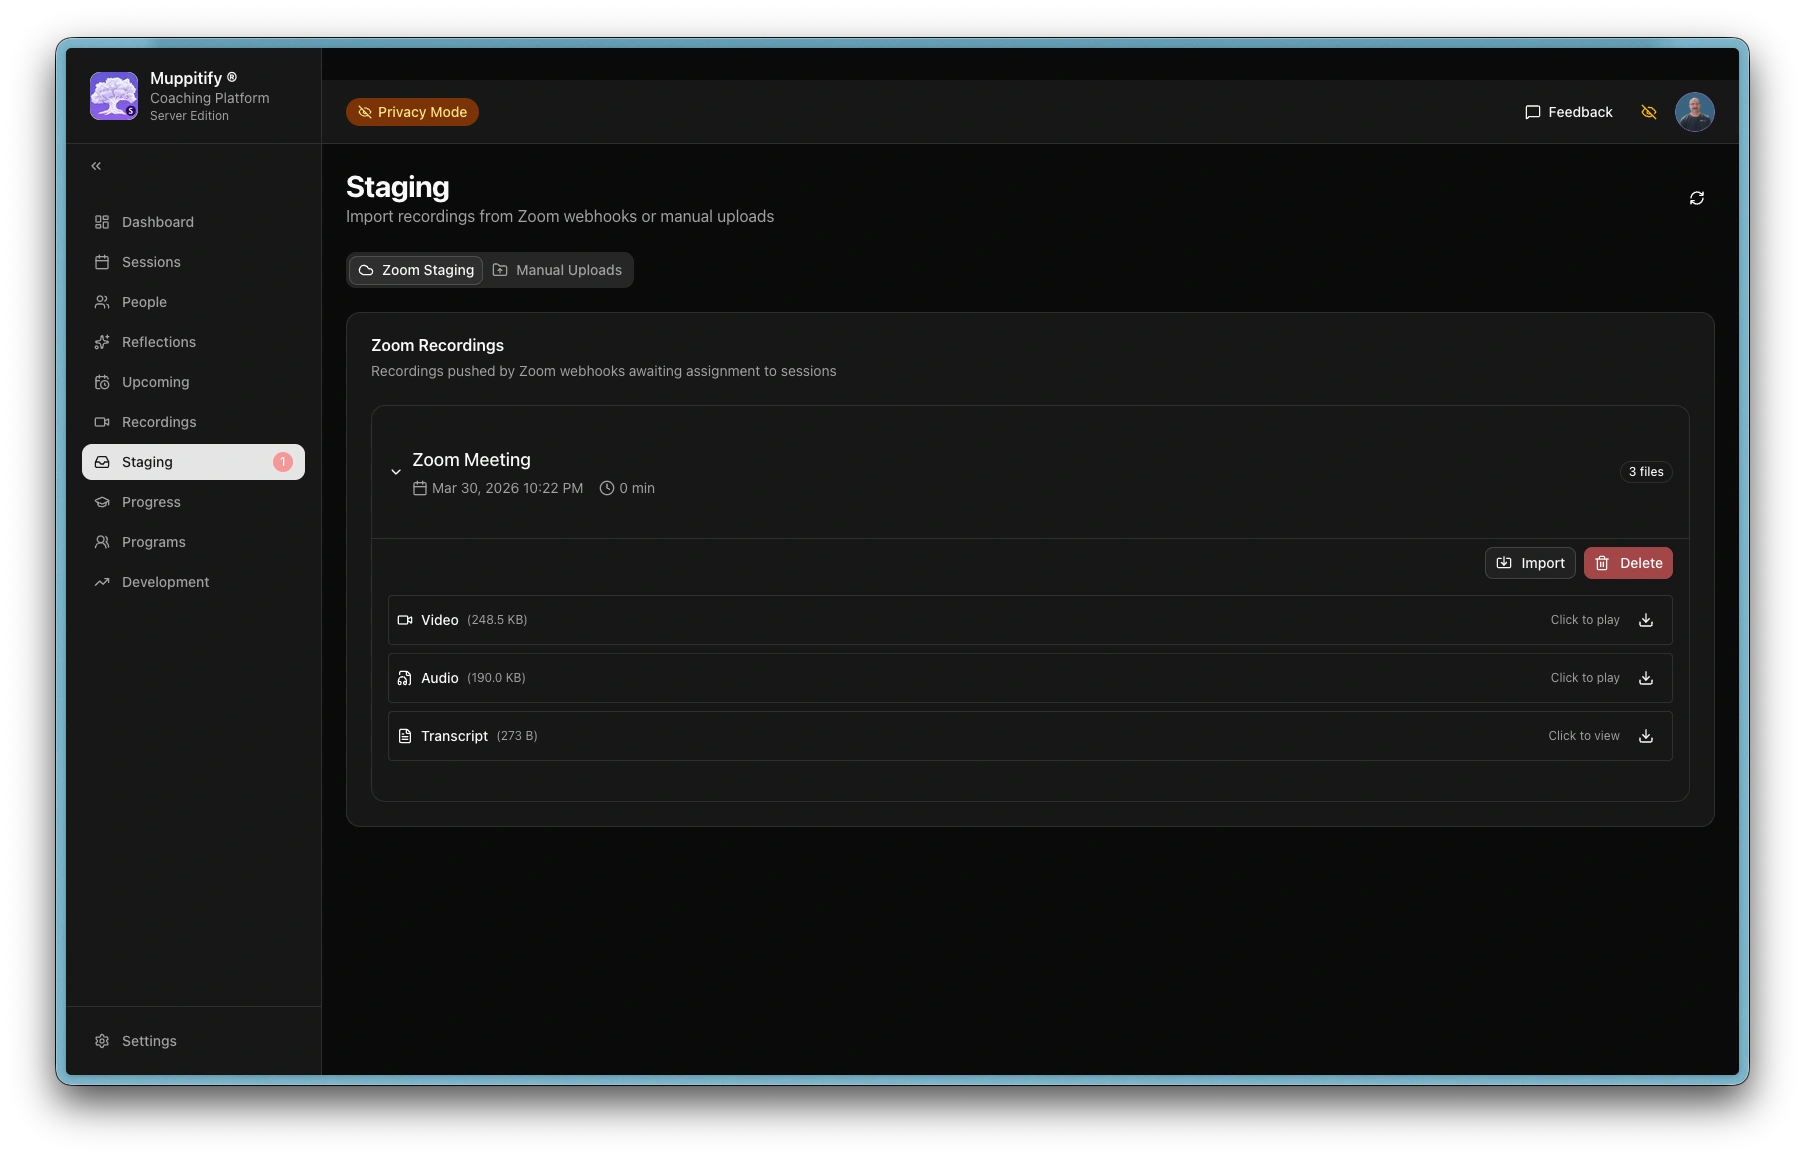
Using Zoom recordings
Once connected:
- Go to Recordings in the sidebar
- Select a month and click Fetch Recordings
- Your Zoom cloud recordings will appear with video, audio, and transcript files
- Click the import button on any recording to link it to a coaching session
On the Server Edition with webhooks configured, new recordings appear automatically in the Staging area after each meeting ends.
Troubleshooting
"Invalid redirect URL" error
Ensure the Redirect URI in the Zoom Marketplace exactly matches the one shown in the coaching platform settings > Zoom. The URL uses your public domain (e.g. https://coach.yourdomain.com/api/zoom/auth/callback).
- Server Edition: Ensure you are using credentials from the Production tab, not the Development tab
- Check the OAuth Redirect URL is set on the Production tab's Basic Information page
"Token exchange failed" error
If you see {"reason":"Invalid client_id or client_secret","error":"invalid_client"} after authorising with Zoom, the Client ID or Client Secret is incorrect. This typically happens when credentials are copied from the Development tab instead of the Production tab, or when the container has not been restarted after updating credentials.
- Go to the Zoom Marketplace app and switch to the Production tab
- Re-enter both the Client ID and Client Secret from the Production tab into the coaching platform
- Restart the container:
docker compose restart
Connection expires
Zoom tokens expire periodically. If you see connection errors, go to Settings > Zoom and click Reconnect.
Scopes not found
Zoom has migrated to granular scopes. If the exact scope names listed above don't appear, search for the closest read-only equivalents. The app needs permission to read your user profile, list meetings, and access cloud recordings.
Zoom webhook URL validation failed
- Ensure the URL is
https://yourdomain.com/api/zoom/webhook— not/api/zoom/auth/callback(that is the OAuth redirect, not the webhook) - The Webhook Secret Token must be saved in the coaching platform and the container restarted before validation will work
- Check the tunnel is running and the WAF allows
/api/zoom/webhook - Ensure Bot Fight Mode is disabled in Cloudflare
- Check container logs for
[zoom-webhook]entries:docker logs coach
Webhooks not firing (Server Edition)
- Verify the webhook URL in your Zoom app matches
https://yourdomain.com/api/zoom/webhook - Ensure the
cloud_recording:read:list_recording_filesscope is added -- without it Zoom will not dispatchrecording.completedevents to your webhook - Check the Zoom app is activated (not in draft mode)
- Ensure Bot Fight Mode is disabled in Cloudflare
- Check container logs:
docker logs coach